- Hatha yoga poses in class
- Child’s Pose
- Downward-facing Dog
- Cat-cow
- Standing Forward Bend
- Mountain Pose
- Tree Pose
- Triangle Pose
- Cobra Pose
- Thunderbolt Pose
- Gracious Pose
- Corpse pose
The hatha yoga style is regarded ‘yoga of poses’ as it gives you limitless possibilities to dive into different postures ranging from beginner to advanced level. Indeed, all yoga poses we practice today are taken from hatha yoga whether it’s in a dynamic vinyasa flow or a restorative yin yoga sequence.
What is Hatha Yoga?
The Sanskrit term “Hatha” literally means “forcibly”. Hatha yoga uses bodily posture in the vigorous form to control the physical self in relation to the mind. Along with physical postures, hatha yoga comprises different breathing exercises, cleansing techniques (shatkarma), mudras & bandhas for channelizing energy in the body & mind.
The concept of hatha yoga poses came in the first place when ancient yogis realized mental and psychic aspects of humans can’t be controlled unless the physical body is disciplined by various means. For this purpose, Hatha yoga founder Swami Swatmarama included 15 classical asanas in his compiled text hatha yoga pradipika.
What makes hatha yoga poses most practiced among the yogi’s community is their quality of calming the mind at the same building bodily strength. In hatha yoga, you emphasize static body posture and flow between poses in a slow manner (compare to vinyasa). This process of slowing body movement while holding a static posture brings muscles under contraction which in turn increases strength, flexibility, and improves awareness.
👉 Read the full guide on what Hatha Yoga is and how it works
Hatha Yoga Poses in a Class
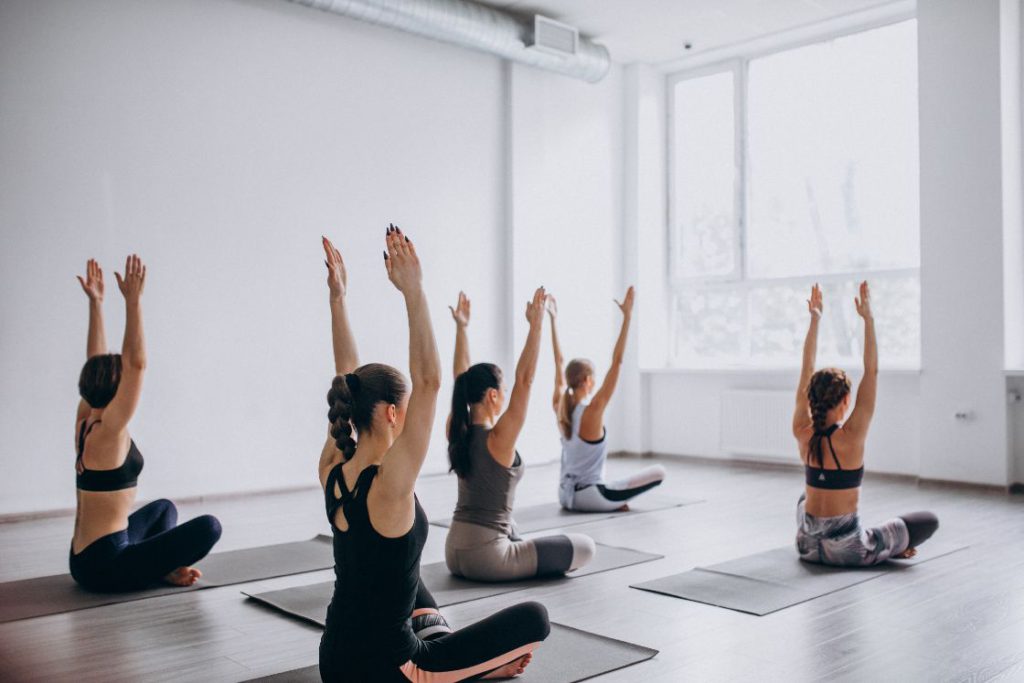
Today in many hatha yoga classes, poses are practiced in gentler form rather than the classical hatha yoga approach. It makes hatha yoga poses a good preparatory practice for a beginner who is about to start a yoga practice.
A Hatha class usually lasts for 45 to 60 minutes, begins with a relaxing yoga pose. Then slowly pace is build up with strength-building poses to warm up the body in preparation for the upcoming vigorous poses. Normally each Hatha pose is kept for 4 to 5 deep breaths in an interval of 60 seconds between consecutive poses. In between the poses, there are moments of relaxation too! Every time you come out of this moment of relaxation, it gives you more strength to approach that daunting pose. Finally, the class ends with lying down in Shavasana for 5 to 10 minutes for complete relaxation.
Sometimes a beginner may be a little skeptical of hatha yoga poses or joining a Hatha class because poses seem daunting in the first place. But there are some basic poses, where the level of difficulty is low and they are easy to perform.
Let’s practice these 11 hatha yoga poses for beginners;
1. Child’s Pose
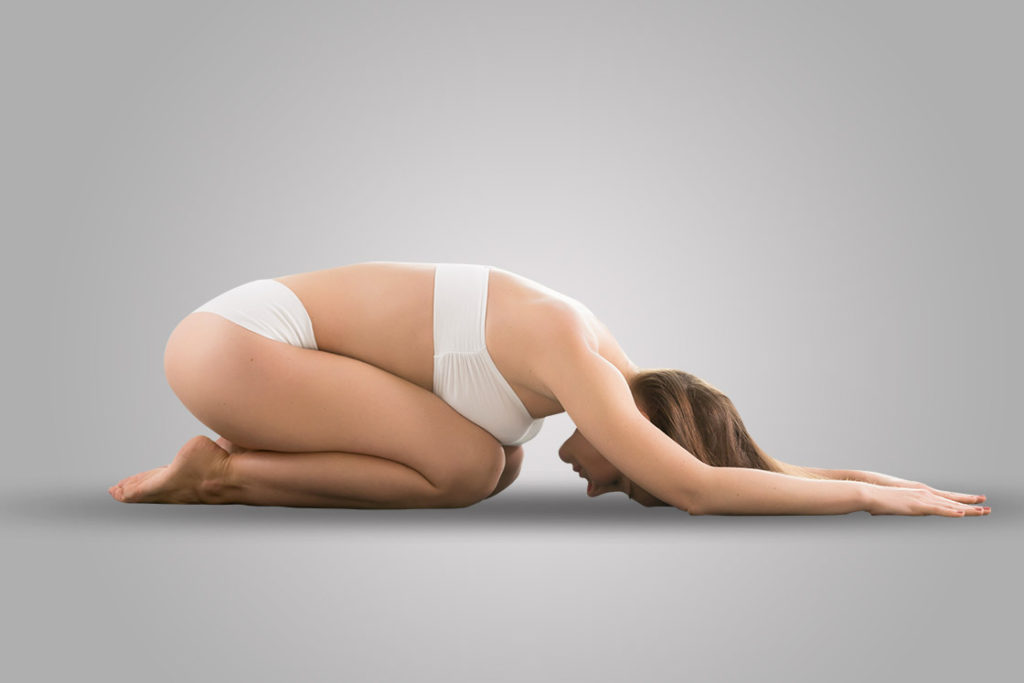
Also known as Balasana, child’s pose is a great starting to begin your hatha yoga practice. It’s a relaxing posture and doesn’t require any sort of flexibility, instead, performing it will give you a nice stretch to open your body in the first place. Also, come into this pose to relax the body for a while in between poses.
- Begin by sitting on your heels, knees together, and straighten your trunk.
- Open your knees equal to the width of the mat.
- Now slowly walk forward with your hand, start bending your trunk in space between open knees.
- Reach forward so that your forehead touches the ground. Rest your forearms on the ground, shoulder away from your ears, relax the whole body.
- Stay in this position for 30 seconds before beginning the next pose.
Beginner’s Tips
- You can place a cushion under your head if you feel it difficult to place your head on the ground in the beginning.
- A cushion can be placed under the toes also to avoid pain in the initial stages.
Benefits – Child’s pose reduces fatigue, it promotes blood circulation throughout the body. It calms down the nerves and relieves stress. Practicing this pose helps stretch the muscles and ligaments around the knee area.
2. Downward-Facing Dog Pose
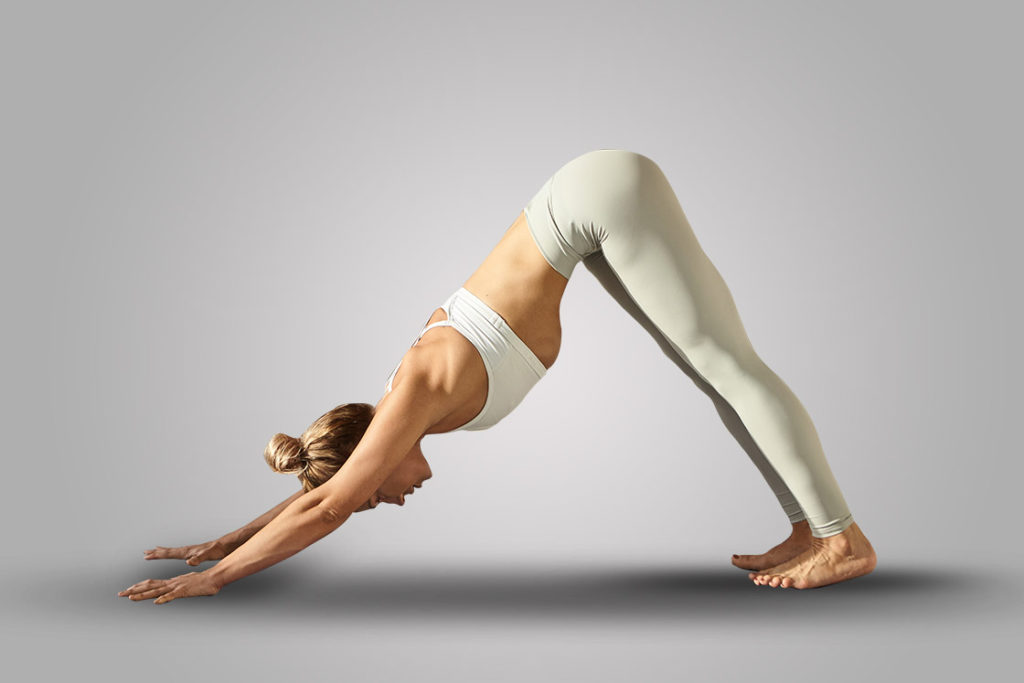
Downward-facing dog is one of the foundational hatha yoga postures. Here, the body is stretched bringing the upper body into an inversion as a dog stretches itself. People also refer to it as adho mukha svanasana.
- Form a table-like structure using your arms and legs and your back posture should be like the top of the table.
- Straighten your elbows and knees.
- Form an inverted V-shape. Place your hands shoulder-width apart and feet at hip-width apart.
- Press your hands firmly on the ground and keep your face downwards and your gaze should be at your navel.
Beginner’s Tips
- You can keep a cushion just below your heels to give that extra support if you feel a little discomfort in the beginning.
- Beginners can stay in this pose for a short duration if they feel uncomfortable to stay in that downward head position for a long period.
Benefits – Down dog pose helps improve blood flow to our brain. It strengthens the arms and improves body posture. It also stretches the ankles, the back of the body, the calves, and the whole spine.
3. Cat-Cow Pose
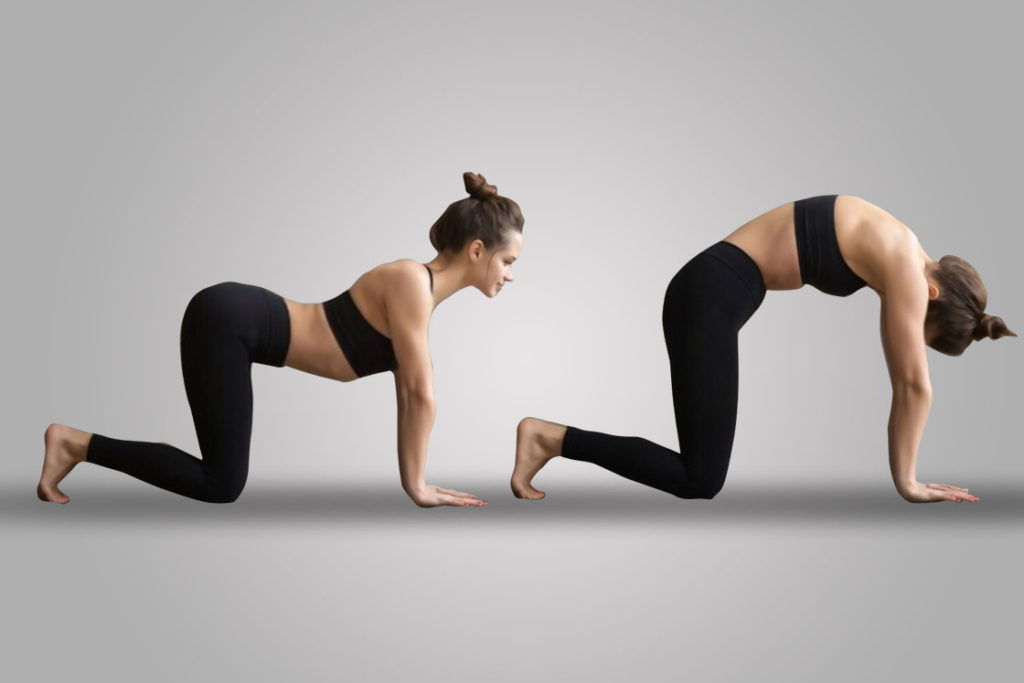
The cat-cow pose is a body warm-up practice involving a gentle stretching sequence. It stretches the muscles by fusing forward bend and back arch where body posture mimics cat and cow respectively. It is also known as Bitilasana Marjaryasana.
- Come to your all fours (hands and knees) to attain the table-top position.
- Pressing the palms on the floor sink your belly to the floor and raise your tailbone.
- Lift your head and move your shoulders away from the ears.
- Lower your head towards the floor by rounding the spine outwards.
- Repeat this flexion and extension of the spine for about 5-7 rounds.
Beginner’s Tips:
- The knees are kept on the floor throughout the practice, therefore putting a folded blanket under them will make it comfortable.
- Seek help from someone to place hands on the upper back while rounding the spine into cat stretch. This helps in bending the back fully otherwise concentrating on the upper back region is challenging for beginners.
Benefits – Cat-cow pose is great for increasing spinal flexibility and curing back pain. It also tones the core muscles and facilitates better digestion. This pose acts as a chest opener which is beneficial to both lungs and heart.
4. Standing Forward Bend
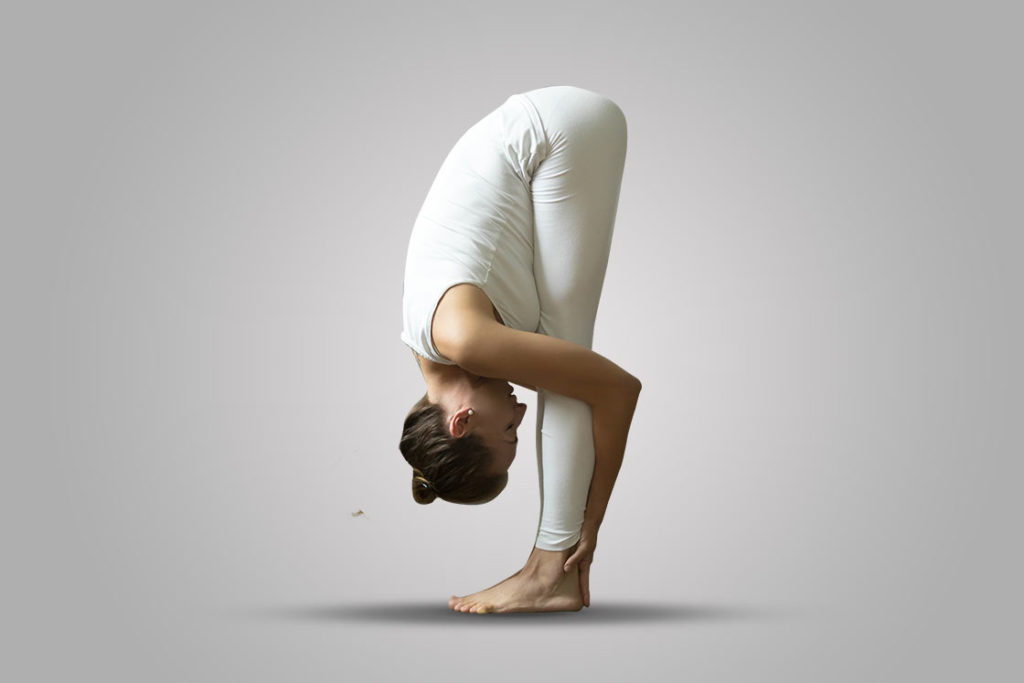
Standing forward fold pose aka uttanasana is beginner level practice of Hath yoga which involves inversion of the upper body. It is practiced as a restorative asana while exercising other standing poses.
- It begins with standing erect in tadasana for a few deep breaths.
- Then, bend the upper body forward at the hips keeping the spine erect.
- Keep bending until the head touches the knees and palms are placed on the floor beside the feet.
- Hold the position for about 30-60 seconds with slow deep breaths.
Beginner’s tips:
- Beginners can keep the feet separated apart to easily reach the floor with the palms and gradually decrease the distance between the feet.
- To bend forward without losing the integrity of the back, try pushing the hips backward. Also, practicing it with slightly bent knees is quite helpful to avoid any strain in the knees.
Benefits – Standing forward fold acts as a stress buster pose by enhancing the supply of blood and oxygen to the brain. It improves the overall flexibility of the body and tones the abdominal organs. This even helps in getting rid of infertility and alleviating menopausal symptoms.
5. Mountain Pose
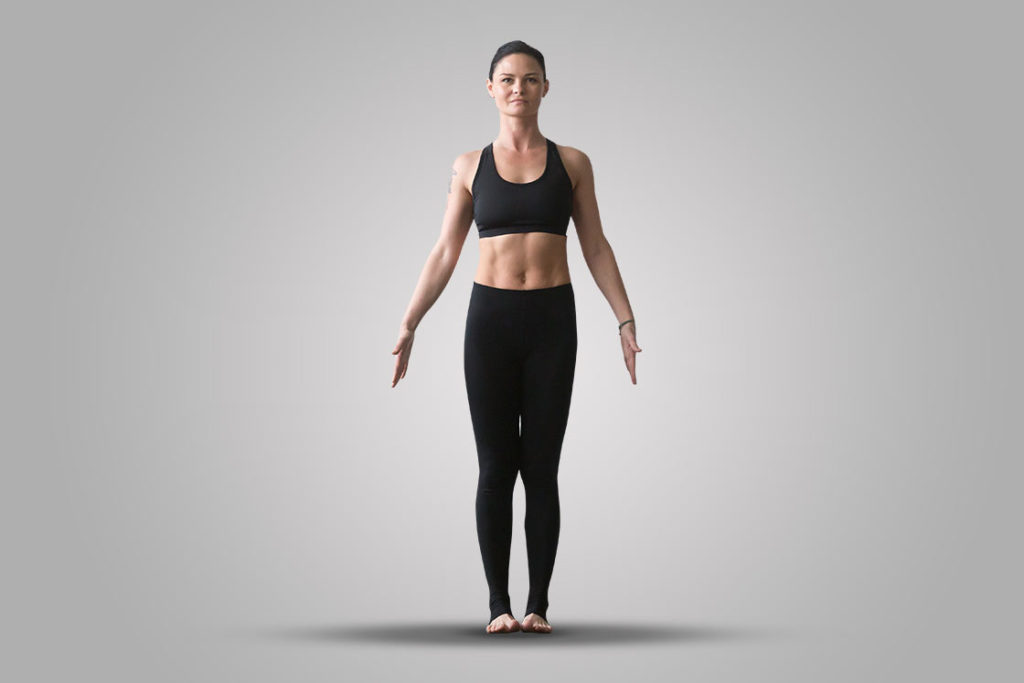
Mountain pose aka tadasana is a standing pose that can be performed by standing on the bases of your big toes. This is one of the basic standing poses of Hatha Yoga practice that serves as a foundational pose for all standing poses.
- Lift your toes and press them firmly on the ground. Place your heels little apart from each other.
- Place your feet slowly down on the floor. Move back and side to side.
- Keep your thigh muscles firm and lift your ankles
- Push your shoulder blades slightly towards back and release them down by widening your collar bones a little.
Beginner’s Tips:
- You can stand with the support of a wall to avoid the issue of maintaining that perfect body alignment.
- This Asana involves a lot of techniques that should be performed very minutely. But initially you can avoid that and focus on maintaining the perfect body alignment.
Mountain Pose helps in improving body posture, strengthens your knees and thighs, and firms your hips and abdomen.
6. Tree Pose
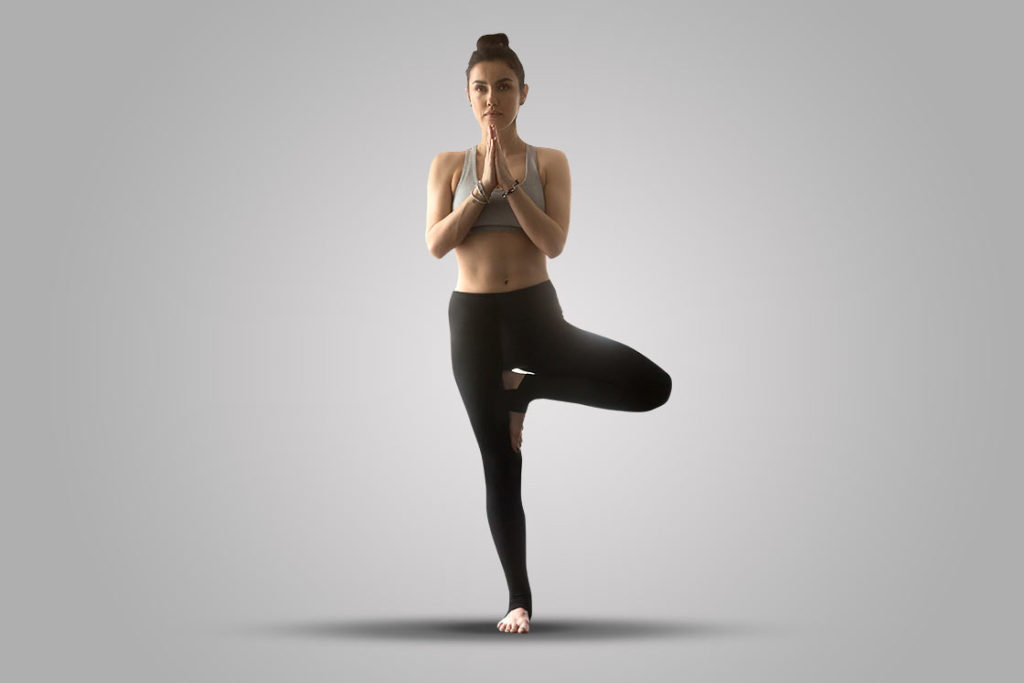
Tree pose is done to improve your ability to balance the body just like the tree balances itself being rooted in the ground. This is one of the easiest Asanas of Hatha Yoga practice. This pose is basically a standing pose where the body posture resembles a tree.
- Stand straight. Put your right foot on the inside of your left thigh. Place the heel firmly on the root of the thigh. Keep the left leg straight.
- Balance your body and raise your hands over your head while breathing. Join the hands so that they form a Namaste Mudra.
- Look straight at a single point in order to improve balance and concentration.
- Staying in this position for a few seconds (30-60 secs) slowly bring your hands down and relax by putting your legs in your original position.
- Repeat the same position with the other leg.
Beginner’s Tips
- Maintaining balance is the key to perform tree pose. As a beginner, you may feel difficulty in balancing yourself with one leg for 30-60 seconds. So you can take the help of a wall to learn how to maintain balance at first with just one leg.
- You can take the help of a prop like a stick for maintaining that balance.
- If you are unable to put your leg on the upper thigh in the beginning then put them on the lower thigh instead. You will be able to do it perfectly with regular practice.
Benefits – Vrikshasana improves the flexibility of the body and strength of the spine. It helps in maintaining calmness in the body. It also tones the muscles of hips and helps in preventing the pain caused due to sciatic nerve weakness.
7. Triangle Pose
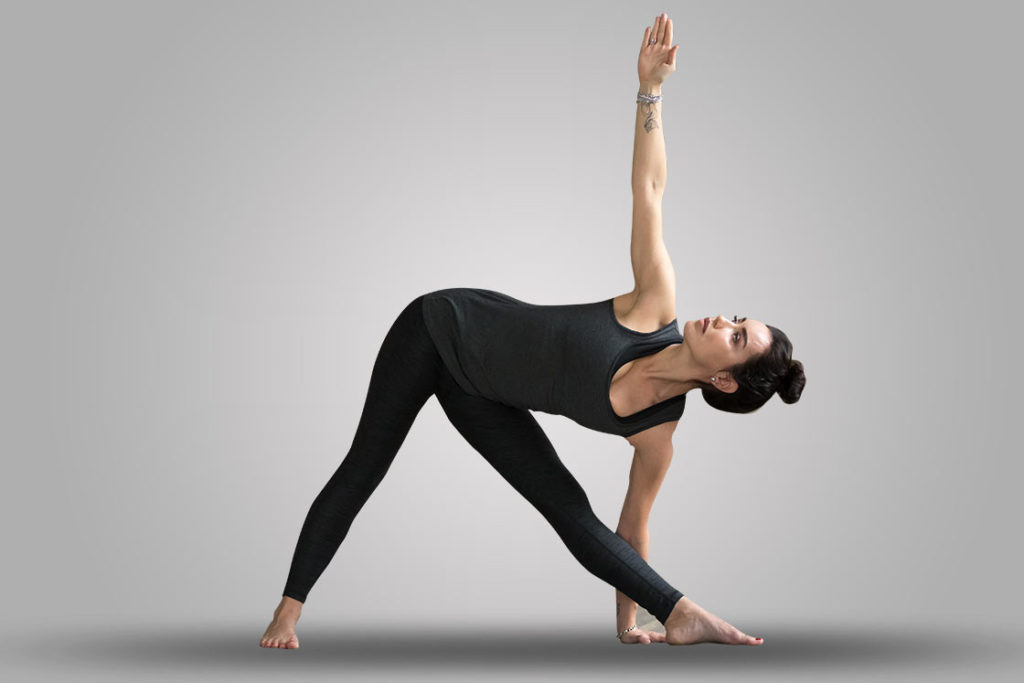
Triangle pose is an asymmetrical standing posture practiced by stretching the upper body into a side bend. Due to the resemblance of the body with a triangle in this asana, it is widely known as trikonasana.
- Stand with separating the legs 2 feet apart and spreading the arms at the shoulder level.
- Rotate the leading foot (say right) outwards at 90° and bend the upper body at the waist towards the right foot.
- Hold the right ankle with the right hand and left arm is extended upward.
- The neck muscles are also turned to gaze towards the thumb of left hand.
- Releasing in the reverse order continue the same steps to bend towards the left side.
Beginner’s tips:
- Beginners can use yoga block as a prop to ease the pose by resting the lower palm on it instead of grabbing the ankle.
- If balancing in this pose is an issue then it’s recommended to be practiced supporting the back against a wall.
Triangle pose enhances the legs, hips, core, shoulders, and back muscles. It acts as a therapeutic pose for curing sciatica, flat feet, and psychological issues like stress, depression, etc.
8. Cobra Pose
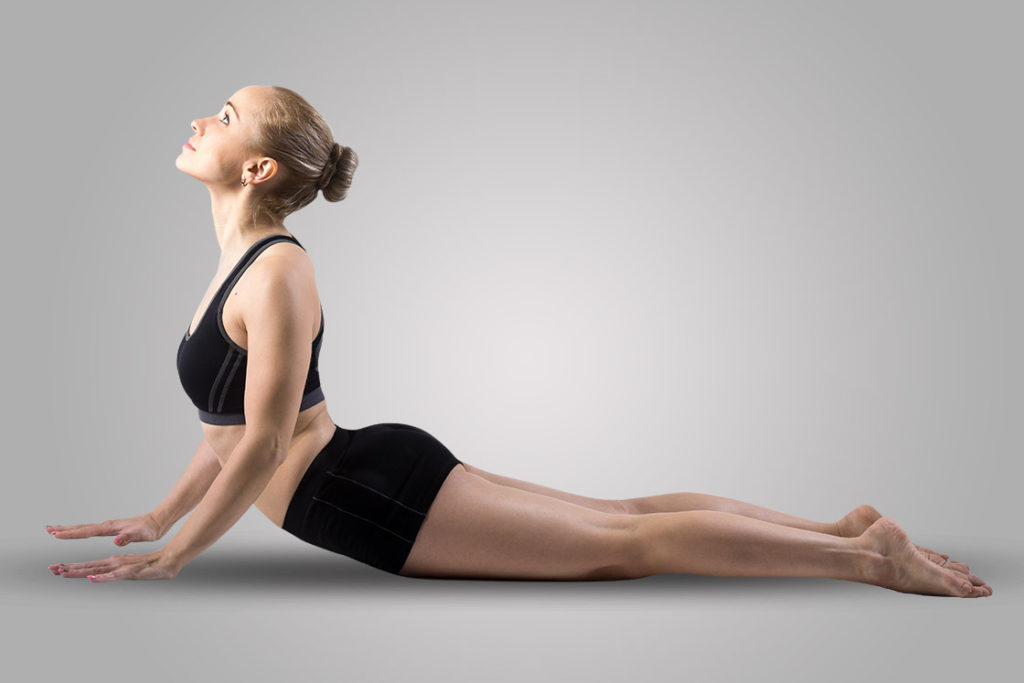
Cobra pose is a reclining posture that involves back-bending by throwing the head back like a serpent (cobra) raises its hood. It is also known as Bhujangasana that has been derived from the Sanskrit word Bhujanga (meaning Snake).
- Lie on your stomach and rest your forehead on the ground.
- Press your top portion of your feet on the ground.
- Gradually place your palms below your shoulders so that your palms can support while lifting your shoulders.
- Breath in and lift your head and chest off the ground with the support of your palms.
- Stay in this pose for 30 seconds.
Beginner’s Tips
- Place a cushion under your feet for extra comfort.
- You can stay in this pose for less than 30 seconds in the initial stages. Gradually you can increase the time duration.
Benefits – Bhujangasana helps in strengthening the spine and stimulates abdominal organs. It helps relieve stress. It is also helpful for asthma. Bhujangasana also helps reduce belly fat.
9. Thunderbolt Pose
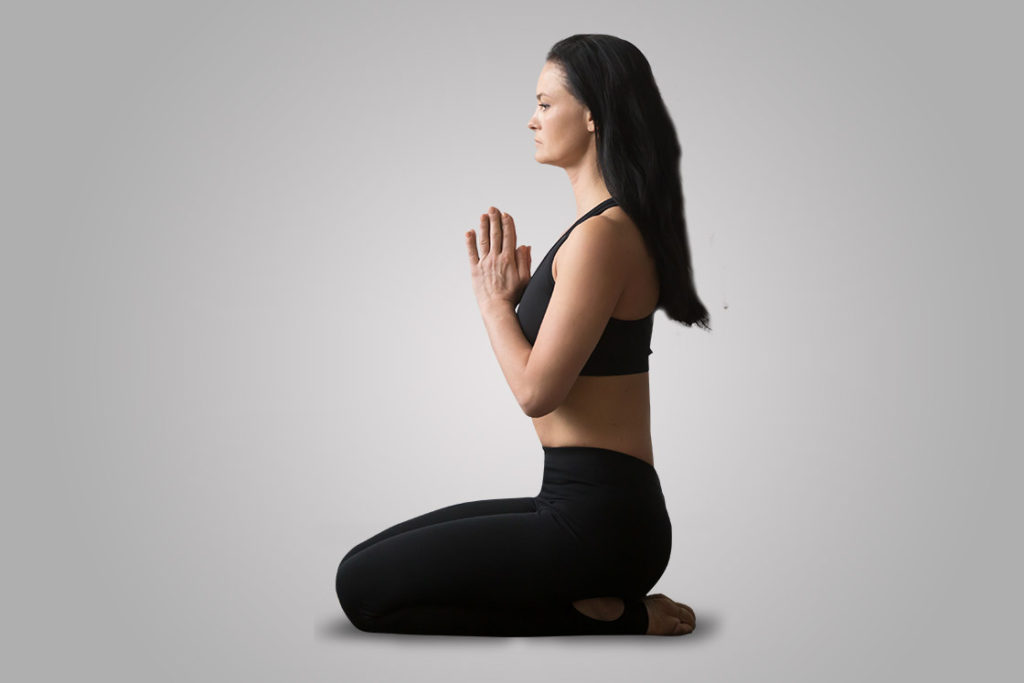
Thunderbolt pose is one of the classical hatha yoga poses for digestion after having a meal. In Sanskrit, it is known as Vajrasana. Since, ‘Vajra’ is a weapon of Lord Indra, known for its integrity and power, similar are the effects of this pose on the practitioner.
- Sit on your knees and then sit on the ankles to shift the weight from your knees.
- Place your hands on the respective knees. Your palms should face downwards.
- You can place your hands at your back in Namaste Mudra also.
Beginner’s Tips:
- You can place a cushion under your feet just to give some extra comfort in the beginning.
- Initially do not go for the backward Namaste mudra as it will be painful for the beginners. You can practice it gradually. Putting your hands on your respective knees also gives equal benefits.
Benefits – Thunderbolt pose improves the memory and cures backache. It improves our concentration level and strengthens the thighs and knees. Vajrasana also helps in improving our digestion.
10. Gracious Pose
Gracious pose is a basic sitting posture and can be held for longer periods comfortably, hence serves as an ideal meditative pose. It’s one of 15 original hatha yoga asanas mentioned in hatha yoga pradipika. Sanskrit term for ‘gracious’ is ‘Bhadra’, hence also referred to as Bhadrasana.
- To perform this pose, sit with legs stretching them outwards.
- Bend the legs from the knee and place them such that the feet should be put close to each other.
- The sole of the feet should touch each other.
- Gently put your thighs on your calves. Keep your spine straight and relaxed.
- Place your hands on your respective knees. Maintain this position for a few seconds.
Beginners Tips:
- Put cushions under your thighs for extra comfort in initial stages.
- Release yourself from this pose as soon as you feel strain in your muscles.
Benefits – Bhadrasana has several benefits like strengthening the knee and hip joints and it helps reduce the stress around the abdominal area. It improves our meditation and hence helps relieve stress. It also strengthens our spine and has a positive impact on both body and mind.
11. Corpse Pose
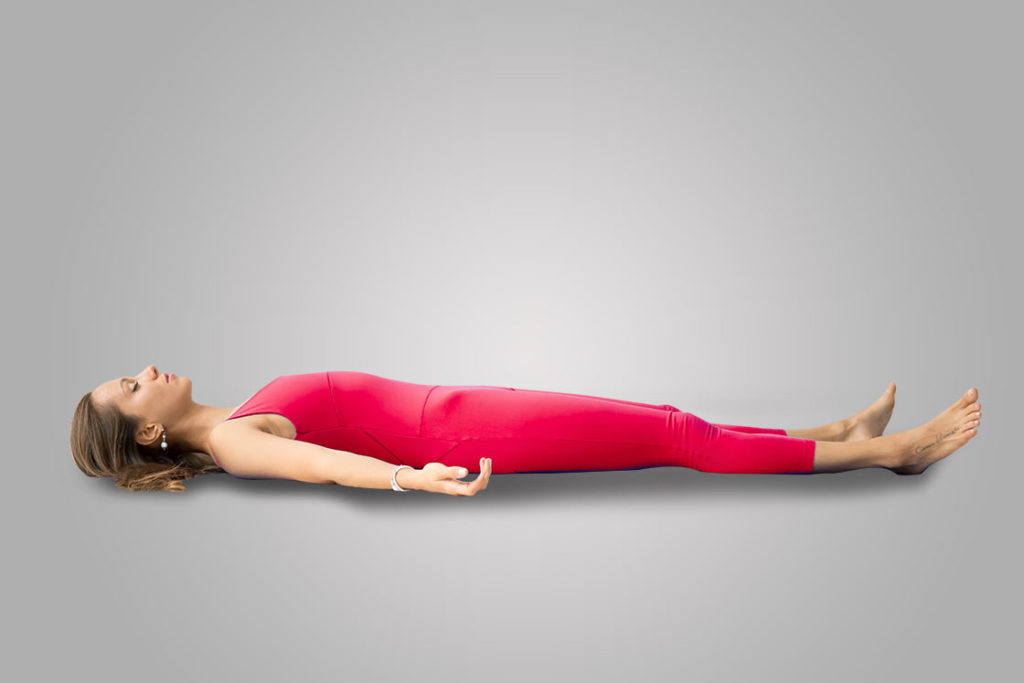
Corpse pose is the ending relaxing pose of hatha yoga performed in laying down position. This is a very relaxing posture and can also be done in between different yoga poses to relax the muscles.
- Lie flat with the support of your back and close your eyes.
- Keep your legs straight and a little apart with toes facing to the sides. Keep your feet and knees relaxed
- Place your arms alongside your body and place them a little away from the body while keeping palms open in an upward direction.
- Slowly relax your body by keeping your attention on your different body parts. First bring your awareness to your right foot, then to your right knee, and move your attention towards the other leg. Then Move your Awareness towards your head.
- Breath slowly and deeply and stay in this position for 10-20 minutes, roll onto your right side and be in this position for another one minute. Gently sit up with the support of your right hand.
- Take deep breaths keeping your eyes closed. Gradually come to an awareness of the environment.
Beginner’s Tips:
- Put a cushion under your neck if you are feeling stressed at the neck area in the initial stages. Gradually you can practise this pose without any support.
Benefits – In Sanskrit, ‘dead body’ is translated as ‘shava‘ and ‘pose’ as ‘asana‘, hence it is commonly known as Shavasana. It relaxes your body and mind and provides you a deep meditative state of rest by releasing stress. This also helps reduce blood pressure, anxiety, and problems of sleeplessness.
Conclusion
Hatha Yoga poses are very beneficial even if you perform them using certain props or support. Beginners can easily incorporate themselves in these body postures as simple techniques are used to perform these poses. With regular practice, it can make your muscles flexible and provide you ample motivation to increase the duration of performing poses. Once you master these poses you can easily perform the next level yoga poses comfortably and avail many health benefits of practicing yoga.
Hatha yoga is regarded as a great yoga for relaxation and improving the awareness of the mind. Hatha Yoga practice itself adopts the techniques of slowing down, putting the focus on static body postures, and shifting from one pose to the next with ease.
There is a myth that beginners will have difficulty in performing Hatha Yoga as they do not possess the flexibility of muscles. But the fact is the regular practice of some easy hatha yoga poses improves the flexibility of muscles; hence it is best for beginners who lack muscular flexibility.


: How to Do and Benefits")

