- Cat-Cow
- Bridge Pose
- Downward Dog
- Extended Triangle pose
- Cobra Pose
- Child’s Pose
- Locust Pose
- Knee to Chest Pose
- Half Lord of the Fishes Pose
- Supine spinal twist
- Legs Up the Wall Pose
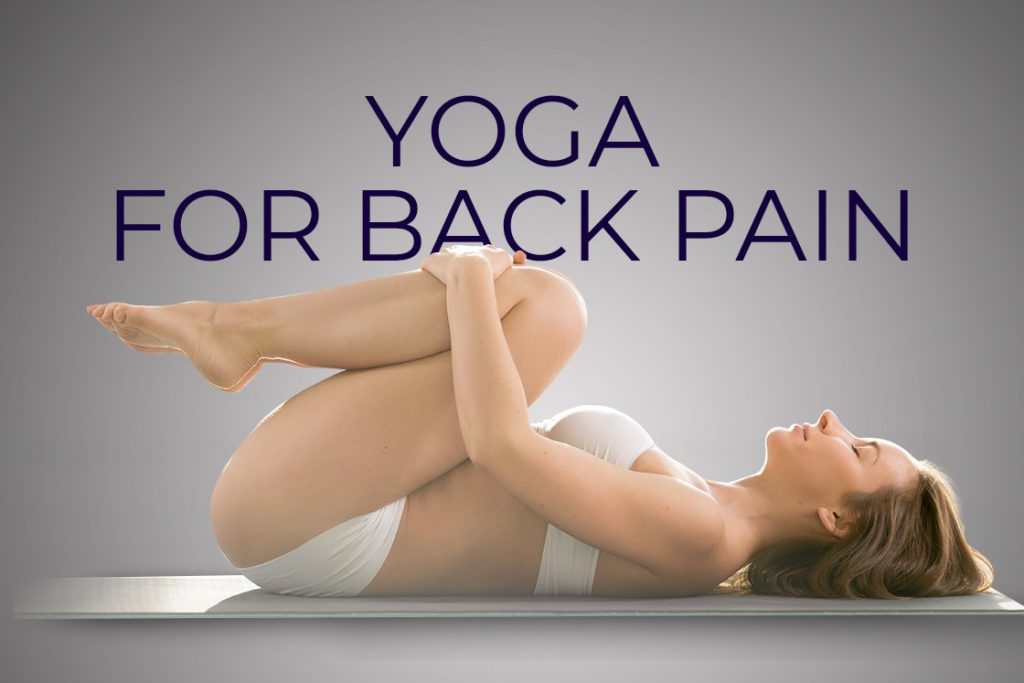
Is your sedentary lifestyle giving you piercing back pain? Well, you must peek into the practices of ancient sages indulged in penance without moving for several hours, days, and even months.
Can you guess their secret? Yeah, you have guessed it right, it’s yoga!
Yoga is something you can always count on for eliminating your back pain once and for all.
Pattern and Causes of Back Pain
Back pain can be of two types: Acute pain and chronic pain. Acute pain is the most common type of back pain that arises due to hitting in an accident, a fall, or lifting something heavy. Usually, it lasts for a maximum period of 6 weeks. However, chronic back pain lasts for a long time, generally more than 3 months.
There are three patterns of back pain, lower back pain, middle back pain, and upper back pain.
Upper back pain arises due to poor muscular structure, muscle strain, injury, working hard for a long time, osteoarthritis, etc.
Middle back pain occurs due to aging, arthritis, fractured vertebrae, muscle strain, obesity, etc.
A painful condition that affects the lower portion of the spine is known as lower back pain. It occurs if we have a poor structure, lack of regular exercise, fracture, improper lifting, etc.
Why yoga is the best remedy for back pain?
- Yoga makes you aware of your body postures and teaches you to sit properly to avoid the consequences of back pain.
- Most of the Asanas help strengthen the abdomen, back muscles and provides support to the spine, which can lower the risk of back pain.
- Regular practice of yoga works on stiff back muscles to increase flexibility, which gives relief from lower and middle back pain.
- Meditation, an integral part of yoga, helps relieve the stress that arises due to back pain.
Here is a compilation of 11 yoga poses to relieve back pain according to experts and some passionate yogis.
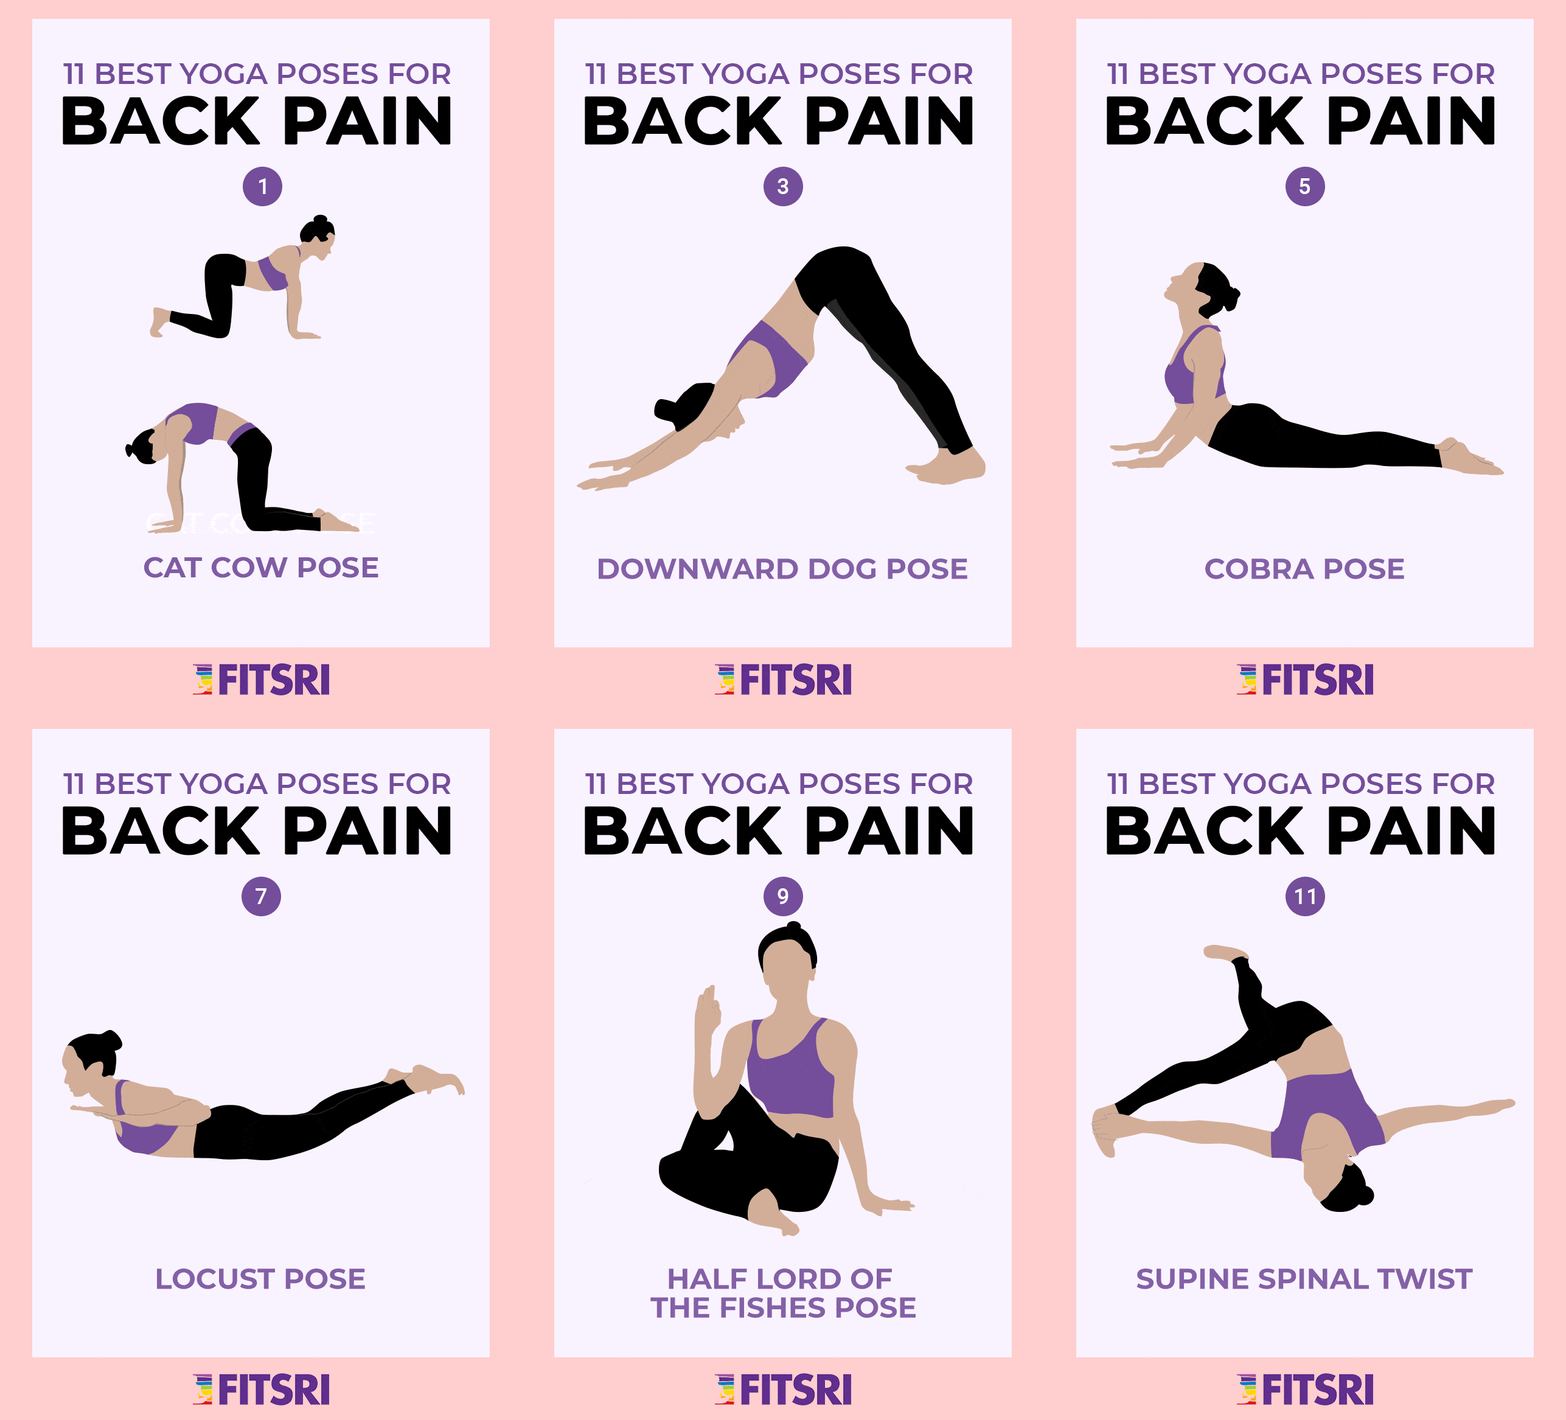
1. Cat-Cow
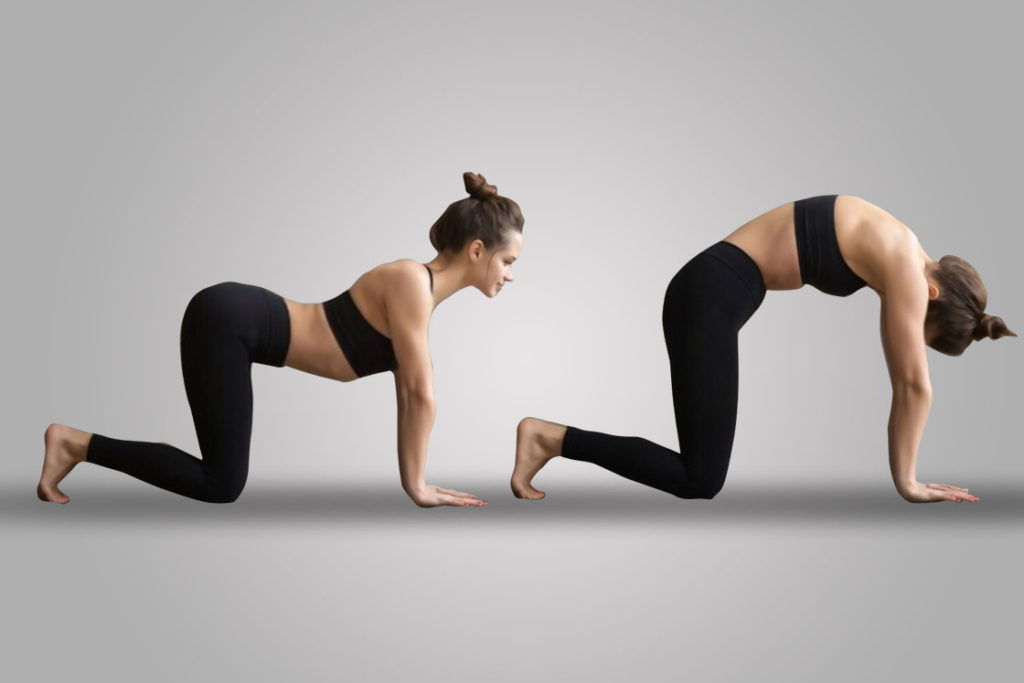
Cat cow pose is a fusion of two complementary movements, i.e. spinal extension and flexion. It stretches, hips, back, and core muscles by sinking the belly followed by lengthening the spine fully into a to-and-fro motion.
Laura Meihofer, a physical therapist mentions cat-cow and its modifications is really beneficial for relieving back pain. This pose tilts the pelvic floor muscles forward and then counters the movement by dropping the tailbone.
Further, it strengthens the pelvis that serves as foundational support for the back. This shows how pelvis dysfunction gets associated with back pain. Thus by eliminating the pelvis dysfunction, it helps to alleviate the back pain.
A 2017 research supports the fact that yoga session including cat-cow pose provides relieving effects from chronic low back pain. According to this study, cat-cow supplies the flow of blood into the discs between the vertebrae relieving tensions from the back.
To perform cat-cow for back pain;
- Come to your all fours with a flat back i.e. your hands and knees with your wrists directly under your shoulders, and your knees directly under your hips.
- Inhale raising the tailbone and pressing the chest forward to sink the belly into cow pose (bitilasana).
- The head is also lifted and the gaze is fixed ahead.
- While exhaling round your spine releasing the head by gazing towards the navel.
- Tucking the tailbone in and drawing the pubic bone forward lands you to cat stretch (marjariasana).
- Continue this movement for 1 minute.
2. Bridge Pose
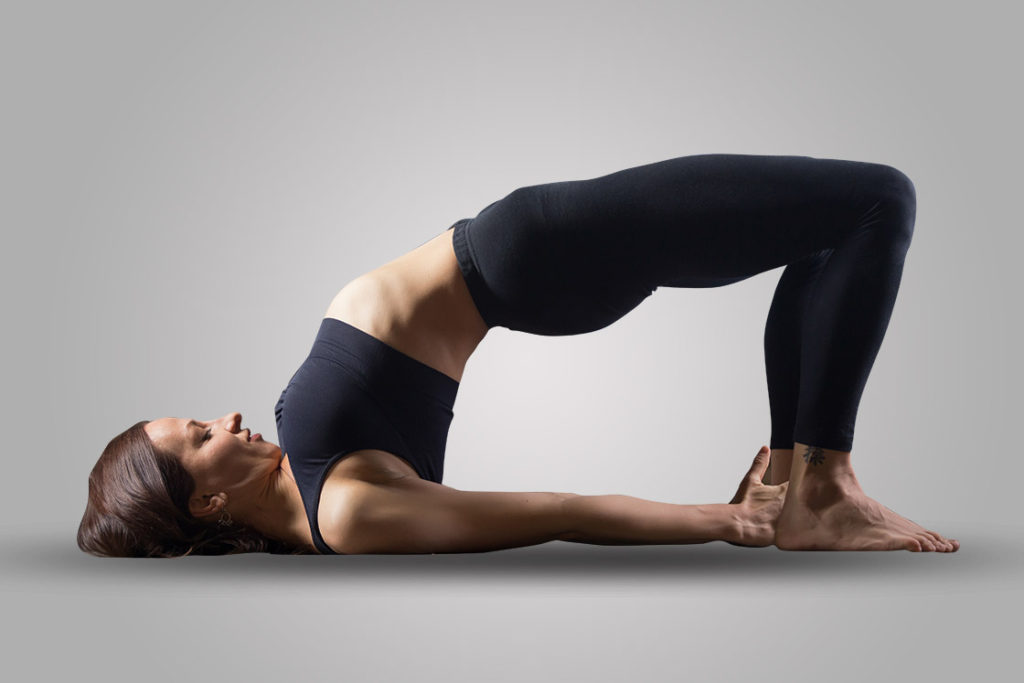
Bridge pose tones the back muscles by working on the cervical, dorsal, lumbar, and sacral regions of the spine. Besides this, it strengthens the neck muscles and stimulates blood flow to the brain.
Therefore, it is a relieving asana for the back muscles as well as for the mental stress arising out of pain. As Yogacharya Anoop recommends bridge pose for curing spinal and brain ailments.
According to him, while holding the bridge pose only the head and shoulders remain in contact with the floor. The rest of the body gets into an inversion that facilitates the flow of blood and oxygen to the spine and brain. This helps in strengthening the back and eases conditions like a slipped disc or upper back pain.
To perform bridge pose (Setu bandha sarvangasana) for back pain;
- Lay down on your back bending the knees.
- Extend your arms by the sides placing your hands and feet firm on the floor.
- Press your hands and feet on the floor to lift the lower back as high as possible. Stay there for 10 seconds then lower your back to the floor to relax.
3. Downward Dog
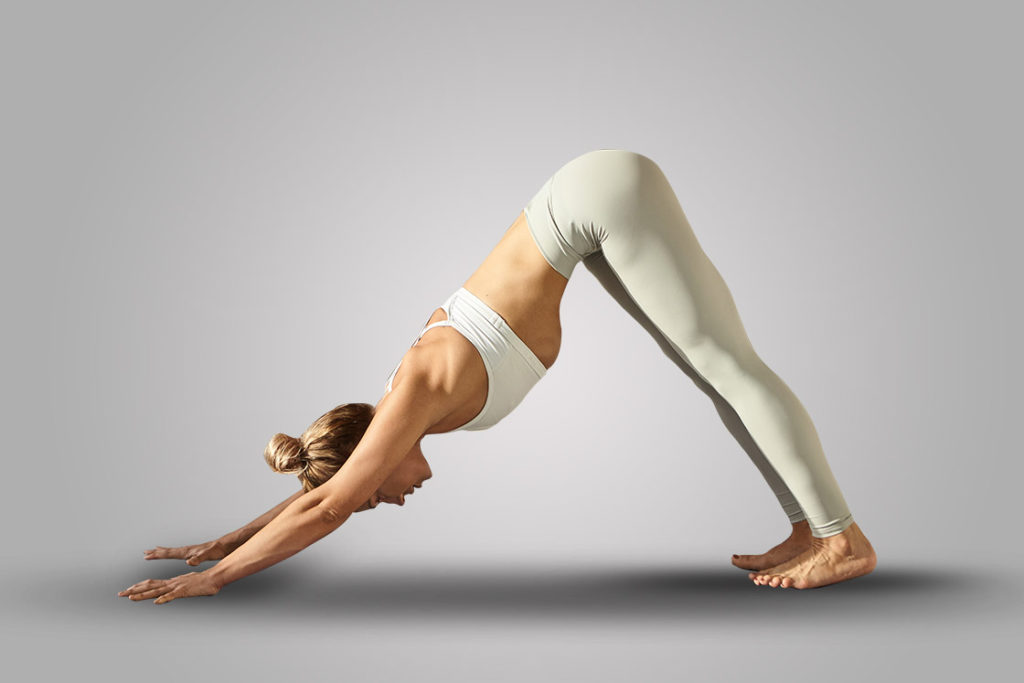
The downward dog pose stimulates the back extensors which support the spine. It also eliminates any tightness in the hamstring muscles which otherwise induces lower back pain.
Down dog is an important pose to relieve the back pain associated with hunched back posture, says Elizabeth Manejias, a physiatrist at the Hospital for Special Surgery in New York City.
Due to working most of the time on desks or scrolling on phone, the rounding of the neck and spine has become common which eventually induces back pain. Down dog opens up the anterior chest wall and shoulders rectifying the neck and spinal rounding. Thus keeps the backache associated with poor posture at bay.
- Get into downward dog by coming to the floor on all fours.
- Curl your toes, raise the hips and straighten the knees and elbows
- Deepen the pose by gradually pushing the hips back, lowering the heels, and drawing the head towards the floor.
Besides being a widely practiced pose, chiropractor Michael C Remy, enlist down-dog under the most injury-prone poses. She further explains it happens due to the lack of spinal stability.
Therefore, to safely execute the down-dog pose the practitioner must not lose spine neutrality.
4. Extended Triangle Pose
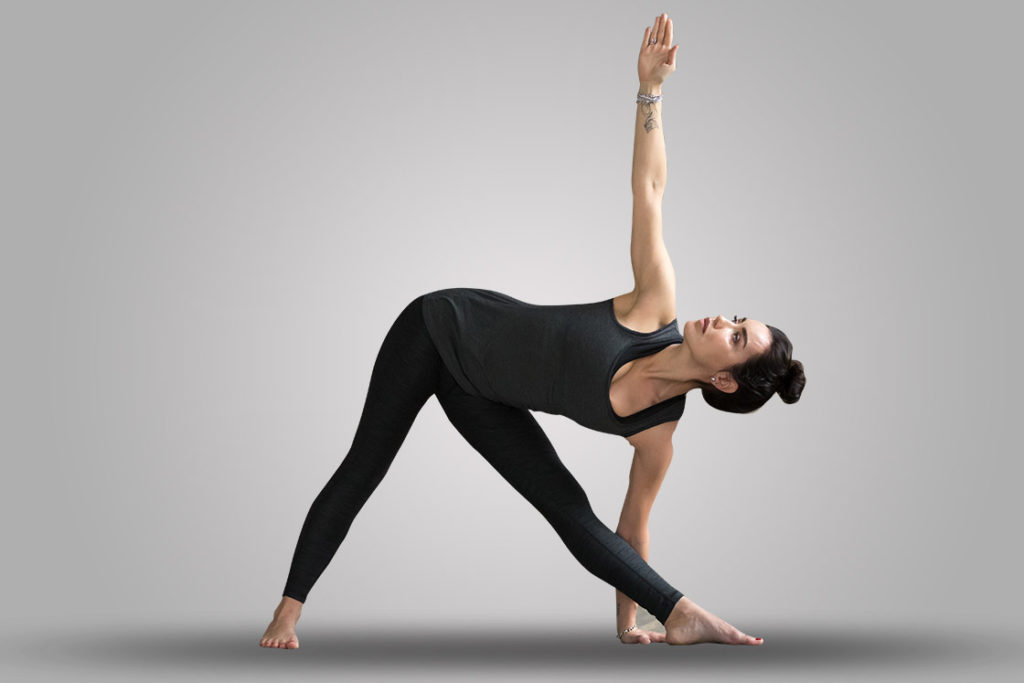
One of the major causes of back pain is found to be weak muscles, especially around the pelvis and core. For this, the extended triangle pose is an excellent pose.
In this pose, the body undergoes a gentle twist while bending sideways and stretches the spine, hips, and groin. It also expands the core, hence strengthening both the pelvis and core muscles, thereby eliminating the causes of backache.
A Senior-level Certified Iyengar Yoga teacher, Marla Apt quotes “extended triangle pose as a panacea to relieve backaches. The forward movement in the tailbone and shoulder blades opening the chest tones the spinal muscles.”
The following steps lead you to the extended triangle pose:
- Stand separating the feet 3-4 feet apart turning the right foot out to 90°.
- Extend both the arms to the shoulder level.
- Bend the body from the hip towards the right foot with the right arm reaching the ground.
- The left arm is kept extended towards the sky.
- Opening the chest turn to look towards the extended fingertips of the left hand.
- Hold for 10 seconds and then come up to repeat on the left side.
5. Cobra Pose
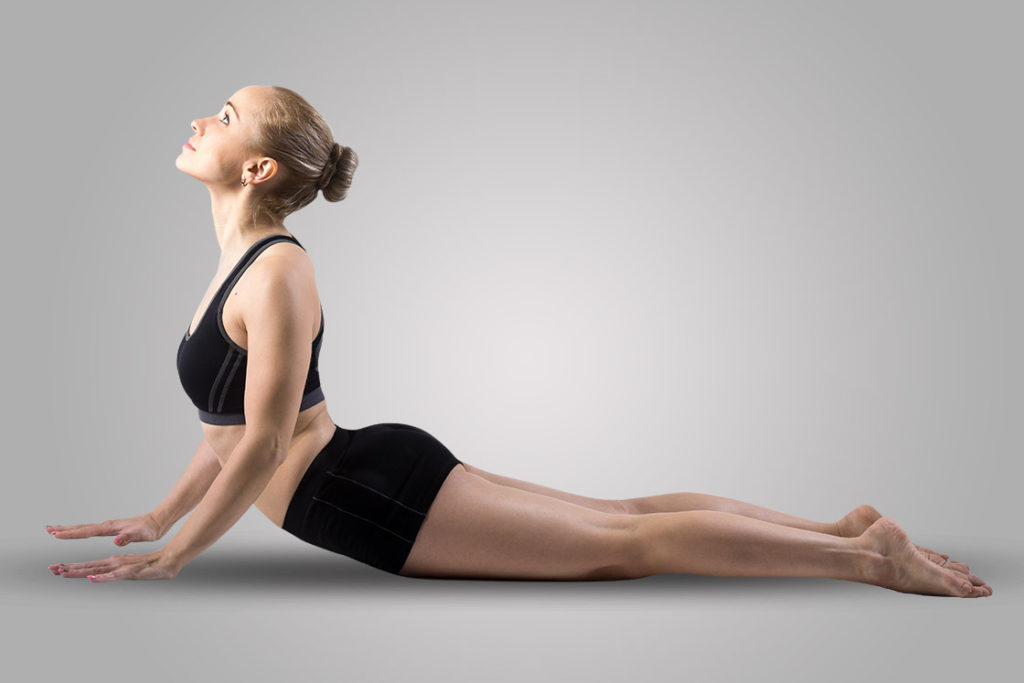
Cobra pose is a back-bending posture that extends the front torso opening the chest. The final pose achieved leaves massaging effects on the upper, middle, and lower muscles of the back.
It improves the flexibility and strength of the spinal column. A 2013 research on International Journal of Healthcare & Biomedical Research has described the spinal extension in the cobra pose by breaking it down into the extension of cervical, thoracic, and lumbar vertebrae.
Of the three extensions, the lumbar extension has prime significance. It stimulates the sacrum and circulates the spinal fluid. This stretching releases the trapped muscular tension alongside the spine, thus relieving pain.
To perform cobra pose for back pain;
- Lie down on your belly keeping the hands on either side of the chest.
- Press the hands to the floor to raise the head, chest, and torso keeping the pelvis to the floor.
- Let the elbows slightly bent opening the shoulders.
6. Child’s Pose
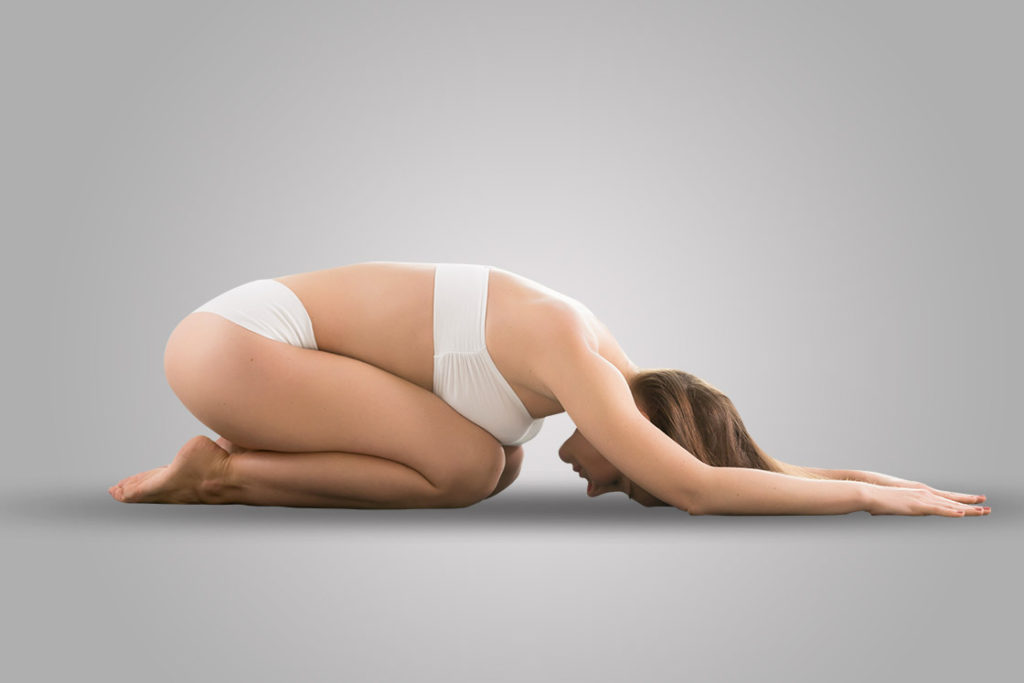
It is an active stretch that removes the accumulated pressure from the lower back by elongating the spine.
It stretches and relaxes the back muscles providing strength to the spine. The fact that the child’s pose is so relaxing is explained by its way of easing the tension accumulated in the lower back bearing the weight of the body all day long.
Therefore, elongating the back and opening hips in the child pose releases the pressure and gives a relaxing and relieving feeling in the backache.
To come into child pose for back pain;
- Get into a table-top position keeping the feet together.
- Drag the hands forward until the arms extend fully.
- Push the body backward so that the buttocks land on the heels.
- Bring the forehead to the floor and stay there for 1-5 minutes.
7. Locust Pose
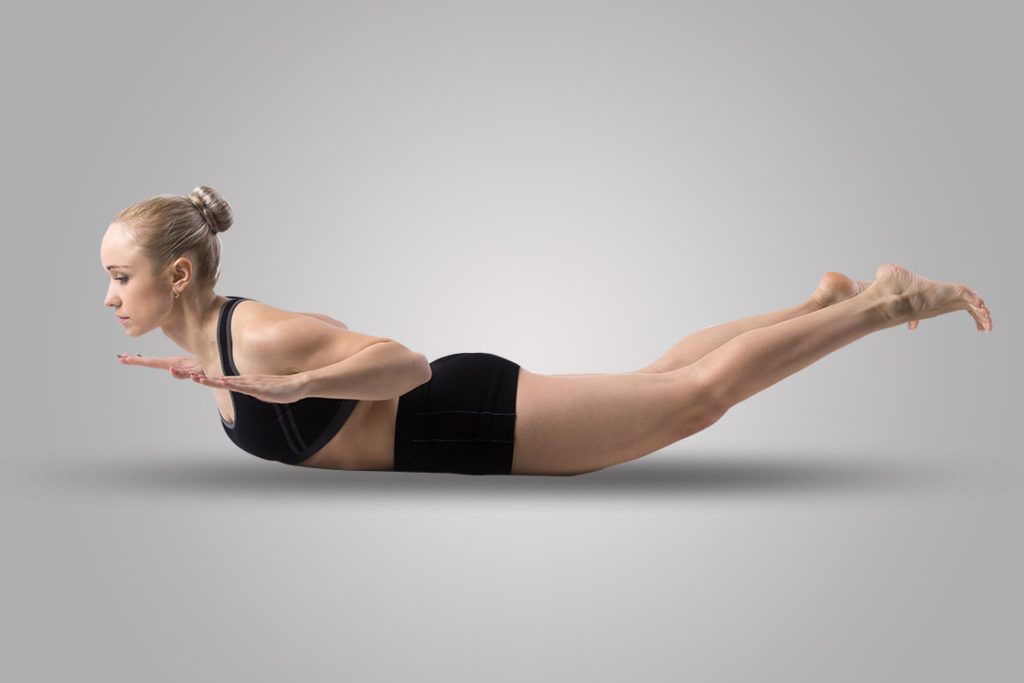
Locust pose is known for strengthening the back by targeting the erector spinae and multifidus muscles (group of muscles that run on the left and the right side of the spine). It works on correcting the body posture which is often considered the cause of lower back pain.
B.K.S. Iyengar in his book Light on Yoga explains that the locust pose stretches the spine backward and makes it elastic. It releases pain in the sacral and lumbar regions. He even adds that “Locust pose regular practice has cured the issues of the slipped disc without any surgical treatment.”
To do locust pose for back pain;
- It begins with lying down on the belly with straight arms and legs pointing backward.
- Then the legs, head, and chest lifted off the floor simultaneously.
- Only the abdomen is pressed against the floor bearing the weight of the body. Even hands are stretched backward not touching the floor.
8. Knee to Chest Pose
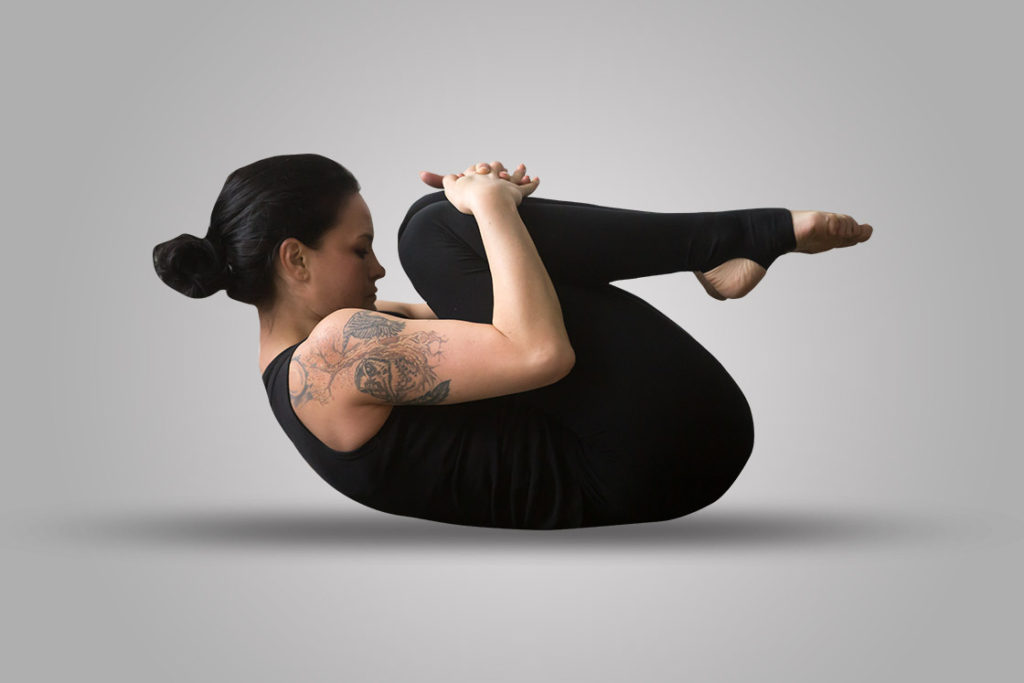
Knee to chest pose, also known as Apanasana, is a reclining knee hugging posture that stretches the hip and lower back muscles. It creates spaces for the nerve roots exiting the spine thereby relieving pressure on spinal nerves.
Physiotherapists enlist knee to chest pose among the easiest stretching techniques relieving lower back pain.
To perform knee to chest pose for back pain;
- Lay on your back with bent knees.
- Slowly lift your feet off the floor drawing your knees to the chest.
- Clasp your hands wrap your hands around the shins to hug the knees.
9. Half Lord of the Fishes Pose
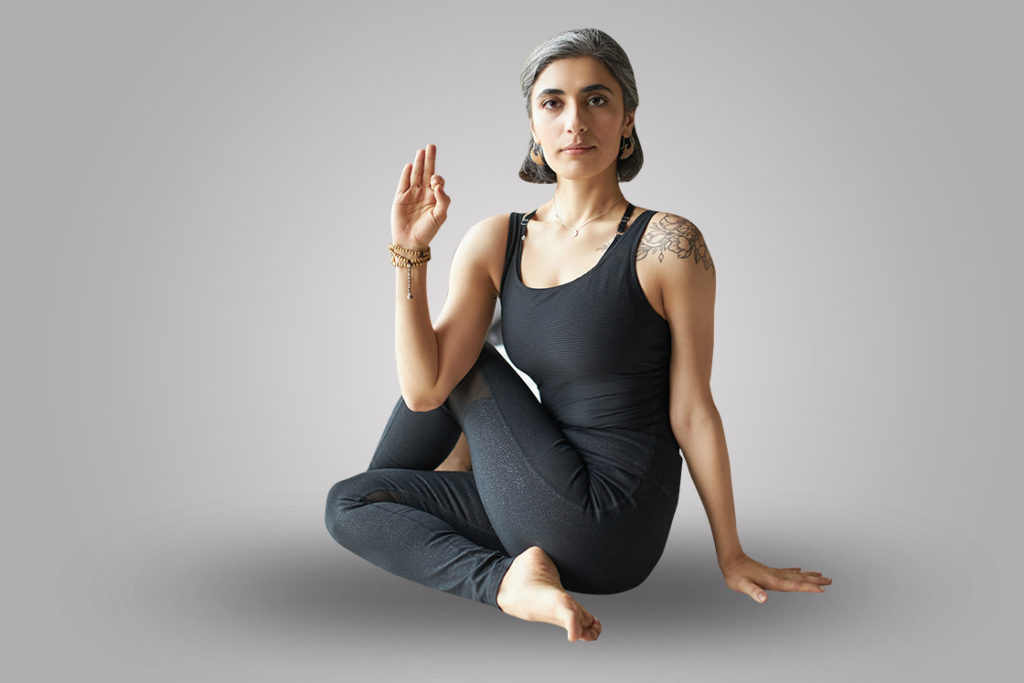
Either you have mild low back pain or have a slipped disc, Half Lord of the Fishes Pose does wonder in both cases. It tones the nerves of the spinal cord and removes stiffness between the vertebrae.
According to statistics of Femina, every seven out of 10 people suffer from a lower back issue in their lifetime.
In this same article, Jitendra Chouksey, the founder of FITTR, a fitness & nutrition community, expresses that yoga postures including half lord of the fishes pose to relieve the discomfort of back pain. It does so by providing a balanced rotation to the spine in the neutral extension. This twisting posture also works on the hips, shoulders, and neck that can affect the pain.
- To assume this pose, sit with erect spine and legs spread forward.
- Bend the left knee to place the left foot under the left leg as closely as possible to the left butt.
- Raise the right knee to place the right foot outside the left knee.
- This is followed by twisting the trunk to hold the right foot with the left hand.
- Complete the twist by turning the neck to look beyond the right shoulder.
10. Supine spinal Twist
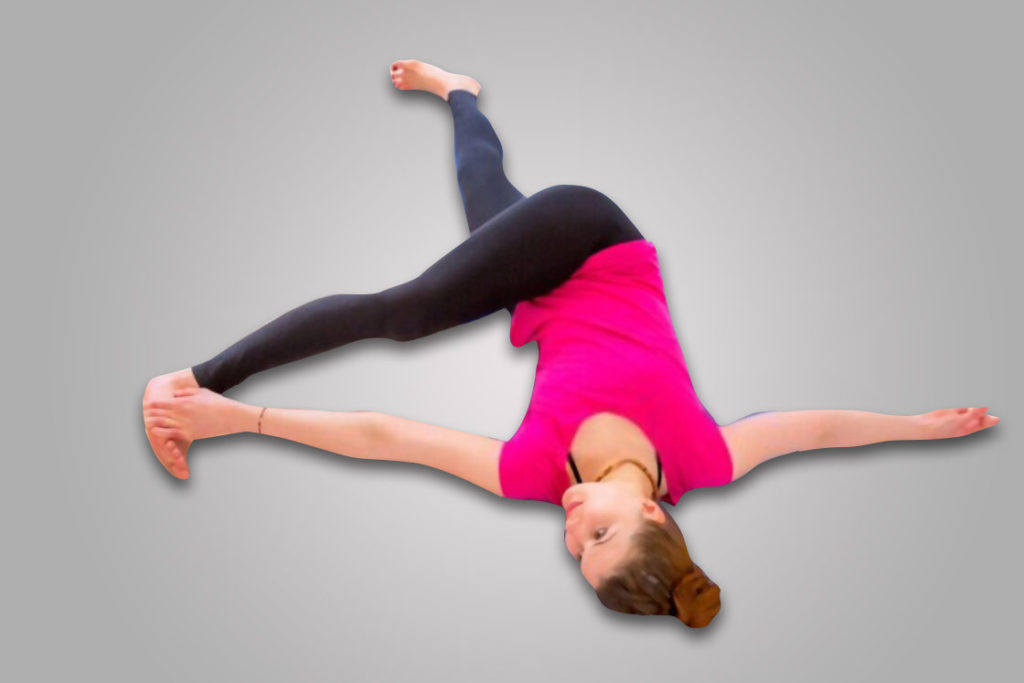
Also known as Supta Matsyendrasana, twists your spine which originates at the level of your waist. The ripple effect between the shoulders and hips in this pose causes the spinal rotation which realigns and strengthens the back muscles.
NYC based yoga instructor, Shanna Tyler recommends supine spinal twist as one of her favorite stretches for relieving lower back pain. She also added a trick to roll a towel under the knees on twisting to ease the tightness in this pose.
Dr. David Lee, the physical therapist instructs going into the reclining spine twist as follows:
- Lie down on your back with bent knees and opening arms to the sides.
- Keeping the shoulders to the floor lower your legs to one side.
- Use the corresponding hand of the twisting side to place the hands on the knees to help to keep the legs on a comfortable level.
11. Legs Up the Wall Pose
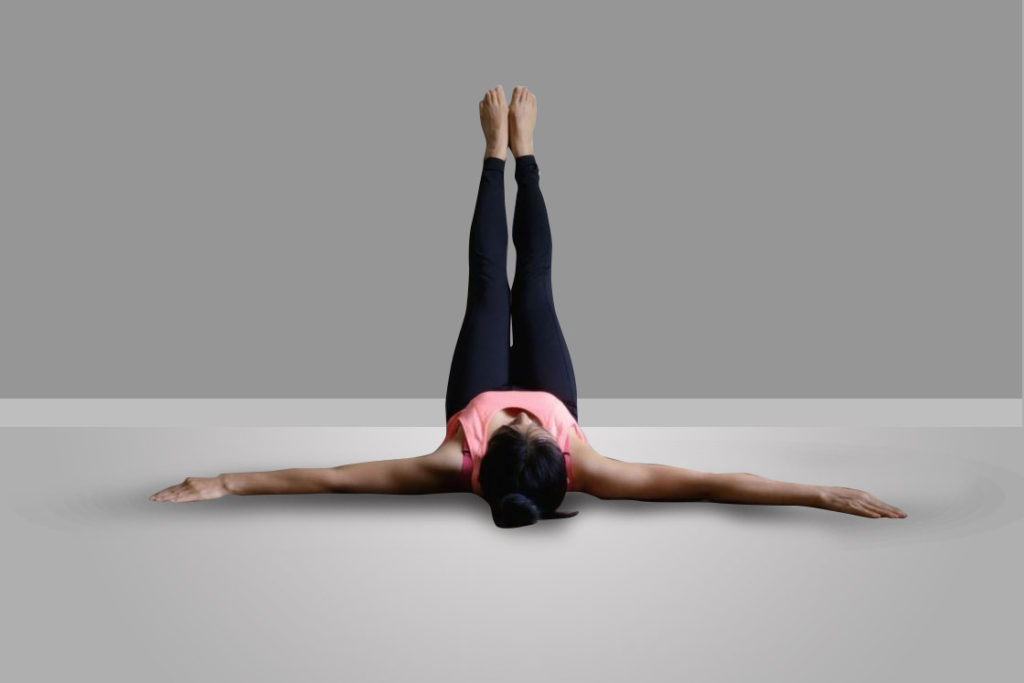
Legs up the wall pose stretches the back muscles by reducing the lumbar curve. It is done lying in the supine position which removes any pressure and strain from the spine.
In legs up the wall pose Experts suggest placing a block or folded blanket under the lower back for support if experiencing a backache.
Its action is generally on stretching the back of the neck, legs, front torso & pelvis. This all adds to restoring the back muscles and alleviating any pain if persisted by reversing the effects of hours of sitting especially on the pelvis and lower back.
To perform legs up the wall pose:
- Lie down on your back bending the knees with buttocks closer to the wall.
- Extend your legs up on the wall.
- Start walking your feet on the wall to bring the hips to lie under the raised legs.
- Adjust your sacrum over the prop to get support and relax the lower back.
Conclusion
Use the-above mentioned poses for healing the back pain on your own.
However, Dr. Lauren Elson of Harvard med school, emphasized patience and preparation when she talked about giving the body the needed time to get into the pose without rushing. As she concludes the problem is, “people quickly ‘drop’ into a yoga pose without gradually ‘lengthening’ into it.”
Similarly, Fi Clark, Head of yoga at FLY LDN states, “Never come to a point in a posture where you feel pain.” Therefore be honest with yourself and your limits on the mat.
Therefore, practicing with preparation and patience is the key to get relieving effects banishing the possible injuries.


This blog is such a hidden gem I stumbled upon it by chance and now I’m completely hooked!