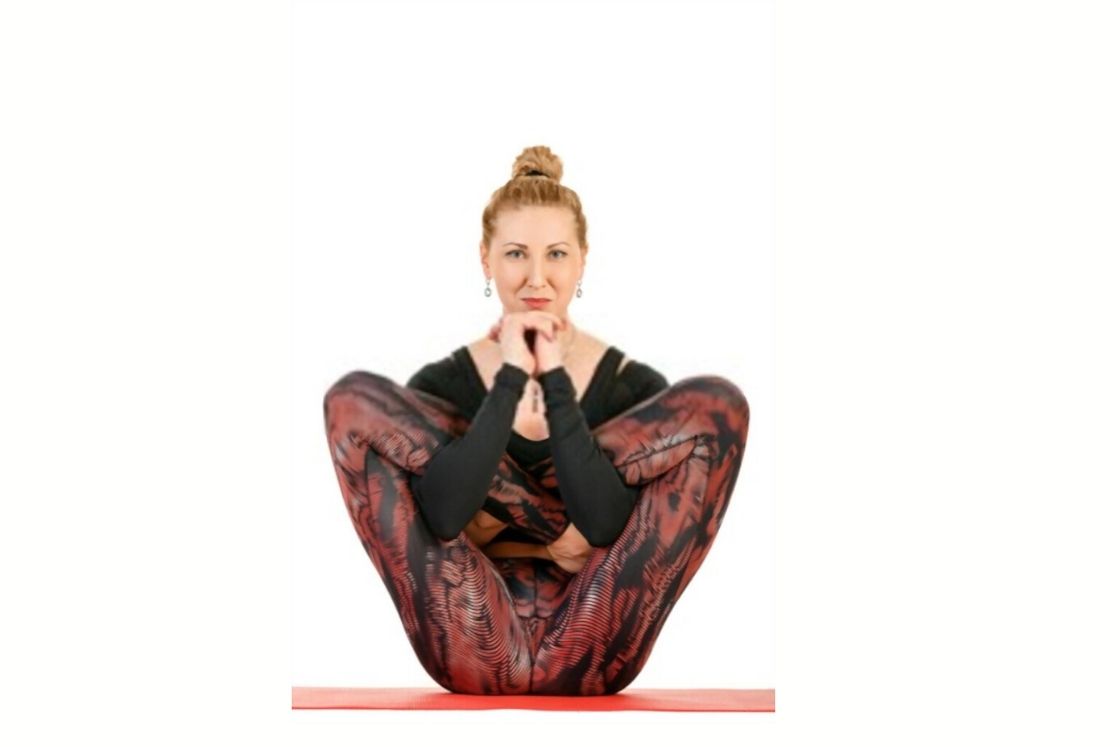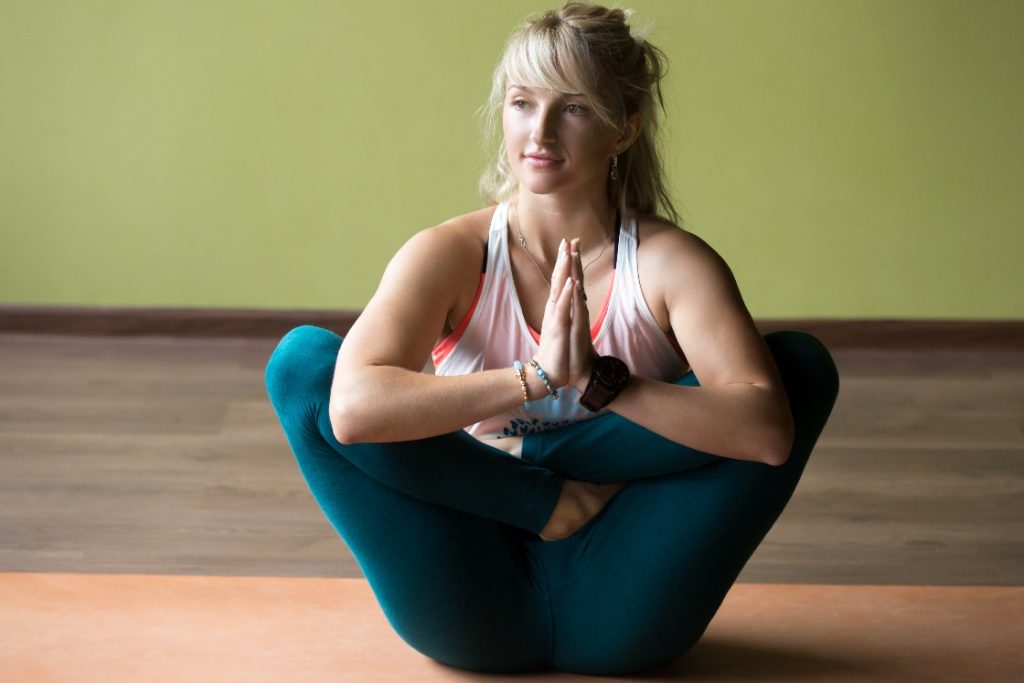
Garbhasana is one of the seated balancing postures where you balance the body in full lotus at your sit bones. It is one of the poses of the Ashtanga yoga primary series. Embryo pose, garbha pindasana, and fetus pose are some other names by which this pose is known.
It involves stretching and forward bending. The extent of flexibility that this asana requires makes it an advanced level pose.
Garbha pindasana majorly exercises the muscles of the spine, torso, hips, and thighs. It makes the knees, hips, and ankles flexible and strengthens the core.
Garbhasana Meaning
The popular name of this asana Garbha Pindasana can be explained through its Sanskrit root terms; The term ‘garbha’ refers to ‘womb’, ‘pinda’ means embryo, and ‘asana’ is ‘pose.’ It is named so because the final posture mimics the appearance of a fetus or embryo in the mother’s womb.
It is performed by sitting in padmasana and modifying it with lifting the knees towards the body. The arms remain tucked within the thighs and calves with bent elbows. The palms are placed on the face with fingers pointing up.
Garbha pindasana prepares the fetus with the correct position at birth. Besides this, it tones the abdominal organs, lower spine, and improves balance.
Garbhasana Practice Guide
If you have practiced Uttan kurmasana already, then practicing Garbhasana would be similar to you to a great extent. In both poses, the body comes almost similar full lotus pose, except, In Uttana kurmasana your body is rolled on the curved back, while in Garbhasana the body is balanced upright on sit bones.
To begin Garbhasana practice, go through the following points;
Precautions & Contraindications
- Do not perform garbha pindasana if you are suffering from sciatica or other spinal problems.
- If you have an injury in the ankles, knees, hips, or back, skip this asana.
- Perform garbha pindasana only if you can achieve padmasana with ease.
- If padmasana is difficult to attain, then practice with the modified version only.
Preparatory poses
- kukkutasana (Cockreal pose)
- Half Bound Lotus Standing Forward Bend (Ardha Baddha Padmottanasana)
- Warrior pose II (Virbhadrasana II)
- Boat Pose (Navasana)
How to Do Garbhasana (Steps)
- Sit on your mat in padmasana, placing your left foot your right thigh and right foot on the left thigh.
- Thread your hands creating a space between your thighs and calves up to elbows.
- Lift the legs near the shoulders along with bending your elbows and place your hands on your face with fingers below your ears.
- Here, you are sitting entirely on your buttocks.
- Press your heels on your abdomen on each side of your navel.
- Set your gaze to a point forward and take five deep breaths.
- Now, slightly bend forward and try to duck your head into your hands.
- As you exhale roll back on your spine to the right side
- Inhale, roll up to the buttocks swiveling on the left of your spine.
- Keep repeating the roll clockwise with the breath until you complete a circle.
- Inhale and sit-up bringing your palms to the floor.
- Release the arms from the inserted position.
- Release your legs from padmasana crossing the legs on the alternate side and repeat the above steps.
- Straighten your legs and relax.
Follow-up poses
- Cobra Pose (Bhujangasana)
- Crocodile Pose (Makarasana)
- Fish Pose (Matsyasana)
Modifications
- Yoga strap – If you are performing garbha pindasana with crossed ankle and you are unable to bind them to each other using a strap. It is not recommended to keep the hands on the knees. Therefore, the strap keeps the hands clasped together.
Variations

- Crossing the ankles – Try this variation if you are unable to attain padmasana. Sit with bent knees and cross your ankles and wrapping around your knee clasp your hands.
- As a beginner, it might be difficult for you to bring your hands to your face. For this, try performing garbhasana keeping the hands in Anjali mudra.
- With ardha padmasana – Garbha pindasana can be performed by sitting in ardha padmasana.
Garbhasana Benefits
1. Burns fat
Garbha pindasana works up the abdominal muscles. This causes contractions in the muscles. As the lower abdomen is exercised well during the asana. It helps to dissolve the fat of the lower abdomen.
There is a supporting study [efn_note] Yoga in Women With Abdominal Obesity— a Randomized Controlled Trial https://www.ncbi.nlm.nih.gov/pmc/articles/PMC5098025/ [/efn_note] that proves that garbhasana helps in getting rid of abdominal obesity.
2. Enhances strength
The asana involves the spine, abdomen, and lower back. It exerts pressure on these muscles and increases their elasticity and endurance. This makes the muscles stronger and keeps them toned.
3. Stimulates Manipura chakra
While holding the asana the heels are squeezed towards the navel. It helps to activate the Manipura chakra. This helps in maintaining emotional health and removes all the negative thoughts.
A study proves [efn_note] Yoga as an Innovative Solution for Financial Growth of Companies http://journals.smsvaranasi.com/index.php/purushartha/article/view/175 [/efn_note] that garbhasana is linked to the emotional stability of the being in the corporate.
4. Improves digestion
This asana tones the abdominal organs. This exercises the digestive organs and stimulates the secretion of digestive juices. This aids in proper digestion and getting rid of gastrointestinal ailments.
5. Maintains mental health
Garbha pindasana also tones the nerves and activates the parasympathetic nervous system. It provides relief from depression, anxiety, anger, and stress.
It relaxes the nervous system and relieves psychosomatic diseases like hypertension [efn_note] Effects of 6-week yoga training on blood pressure http://www.kheljournal.com/archives/2017/vol4issue3/PartE/4-3-56-174.pdf [/efn_note].
6. Stimulates internal organs and glands
This asana is beneficial for improving the functioning of internal organs like the liver, kidney, pancreas, spleen, and adrenal glands. This maintains the hormonal balance and aids the detoxification process.


