Yoga is an exercise for everyone. A wide number of variations and modifications allow anyone to practice the poses carefully. Additionally, yoga is a constantly growing area, which provides everyone with practices that are suitable to their health needs, body types, or preferences.
So, if you are not flexible enough to perform a particular pose, don’t worry. Yoga wheels are the best prop for you to get into the pose. It comes in circular and hollow shapes.
Exercises you can do with yoga wheels enhance your stretching ability and help you build muscle strength. There are many yoga poses you can practice with the help of a yoga wheel. The use of a yoga wheel can deepen the effects of your yoga practice.
Here are 10 yoga poses that you can try with a yoga wheel for better flexibility and strength;
1. Wheel-assisted Lunge Pose
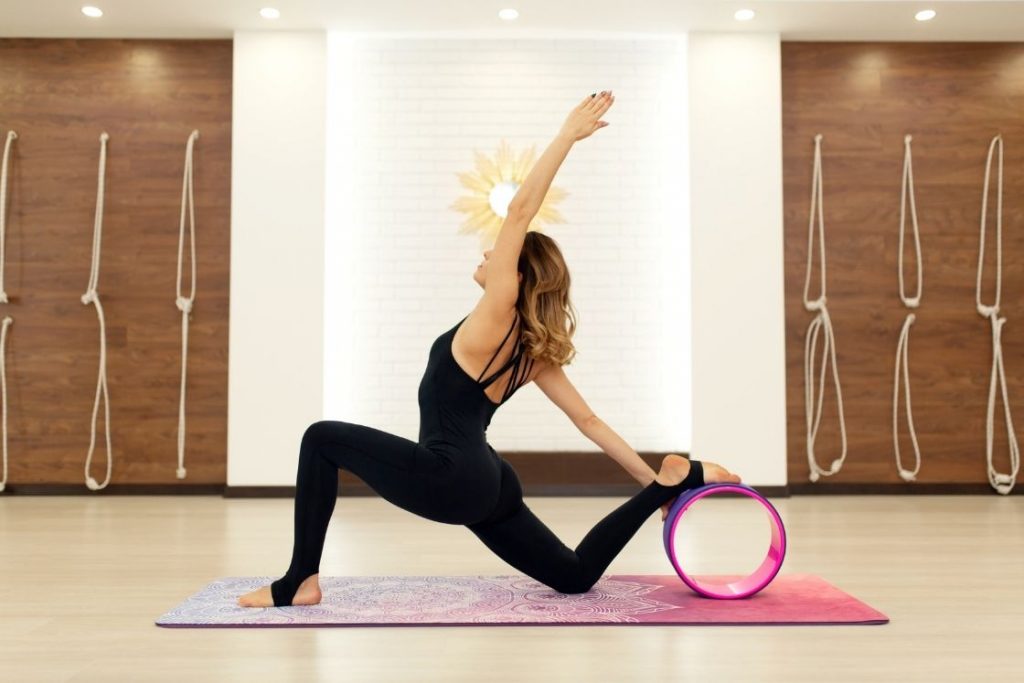
The lunge pose, also known as Ashwa Sanchalanasana, is an excellent posture to try with a yoga wheel. It helps you stretch the hamstrings and hip flexors.
The benefit of the wheel-assisted lunge pose is that it offers enhanced stability and deeper stretch when you roll one leg back. A wheel can be easily rolled back and forth to deepen or ease the depth of stretch in the lunge pose.
To perform the lunge pose using a yoga wheel,
- Stand with the wheel behind your legs.
- Bend and place your palms on the mat. Place the top of your right foot on the wheel, inhale and gently roll the wheel back.
- At the same time bend your left knee into a lunge. Place your left foot between both the palms. Stay in the posture looking in the front.
- Exhale and roll the wheel forward with your right leg. Release the hands and stand up.
- Perform the same sequence with the left leg. Repeat at least 10 times.
While performing the lunge pose with a wheel, keep your front leg stable. While rolling the wheel in the front, do it slowly.
2. Half Squat with Yoga Wheel
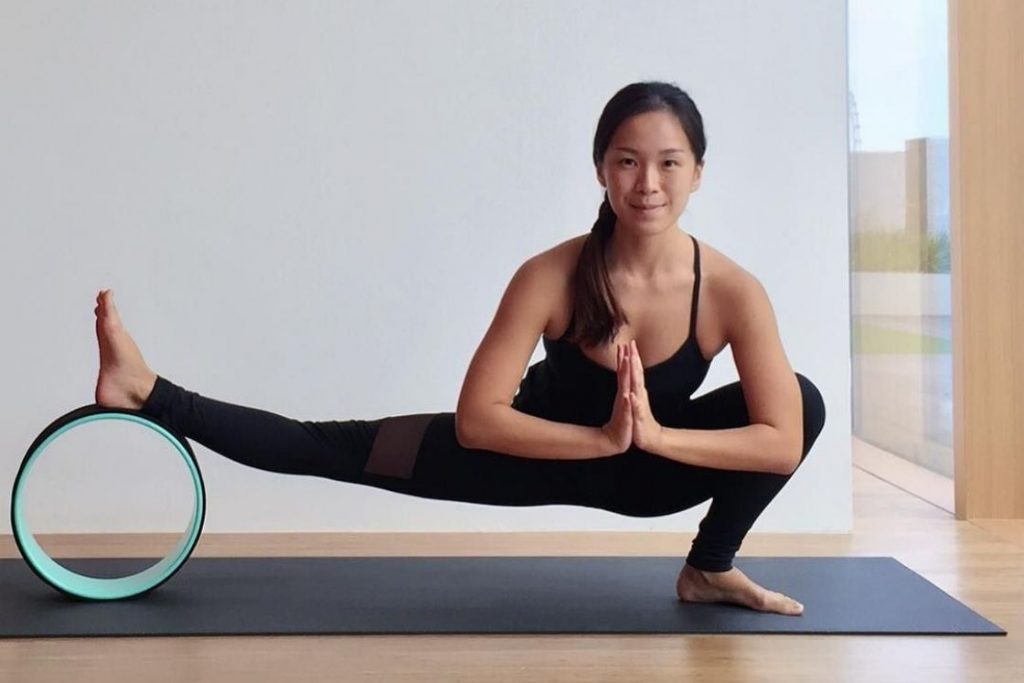
The half squat pose, also known as the side lunge pose or Skandasana, is a stretching yoga pose that strengthens your adductors and hamstrings muscles. This pose can be performed as a loosening exercise to flex the leg muscles.
In half squat, some practitioners may face trouble touching the left foot fully on the mat as they stretch their right foot and vice versa. A yoga wheel assists to achieve this ideal state of the pose, thereby offering deeper stretch.
To practice half-squat pose with a yoga wheel,
- Take a hips-width distance between your feet, facing the wide edge of your yoga mat. Your toes should be pointing to the front.
- Exhale and slowly bend from your left knee to sit on the left side of your mat. Try to keep your heels on the mat as you sit.
- Place your yoga wheel outside your right ankle. Extend your right leg along the wheel. Your right ankle should be on the wheel and your right knee should face the ceiling.
- Slowly raise from the left knee to come to the standing posture.
- Follow the same sequence from the other side and repeat it at least 10 times.
You can make Anjali Mudra with your palms while performing the half squat pose. It is an excellent stretching pose to make your legs stronger.
3. Wheel-assisted Seated Forward Bend
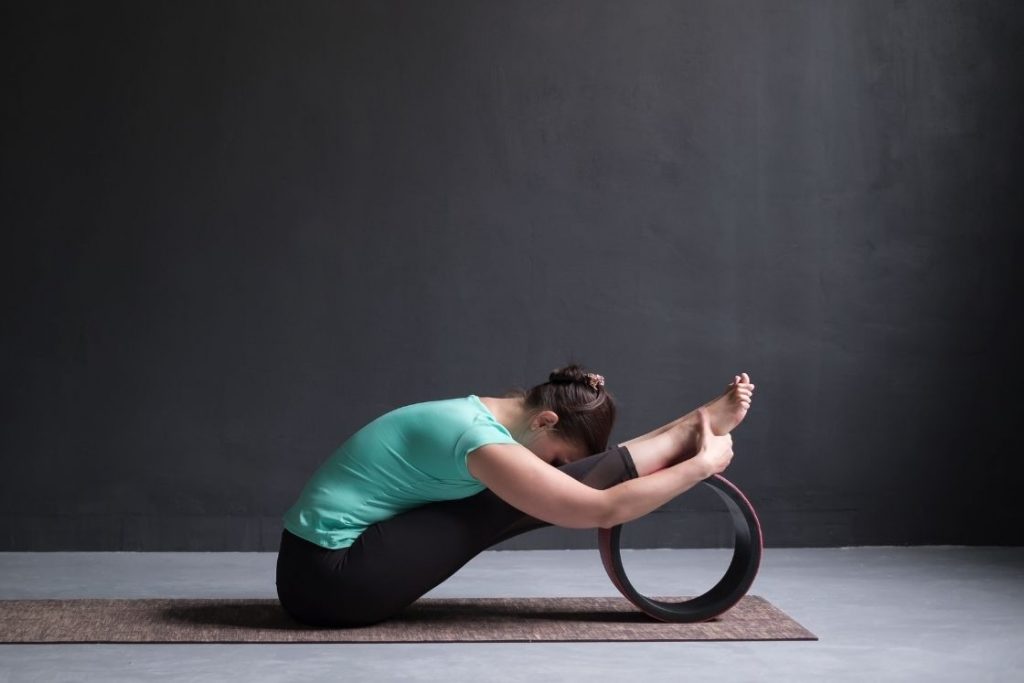
The seated forward bend is a challenging pose for practitioners who have tight hamstrings or excess belly fat. With a yoga wheel, these practitioners can experience the calming benefit of the forward bend.
The seated forward bend is more comfortable with a yoga wheel because it lets you bend and touch knees by raising the leg level. It also exerts deep stretch in the abdomen which may help in getting a flat tummy.
To practice this pose with a wheel,
- Sit on your mat with legs stretched in the front. Do not bend your knees. Your toes should be facing the ceiling.
- Place the yoga wheel under your calves. Keep the legs stretched without bending them from the knees.
- Exhale and lean over your thighs. Hold the wheel with your hands.
- Raise the legs until you feel a stretch in your abdomen and hamstrings.
- Stay in this posture for about 15-30 seconds and release.
Also known as Pashchimottanasana, seated forward bend is an excellent pose to relax your whole body and enhance your concentration.
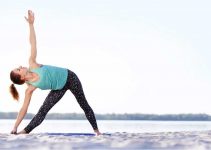
4. Extended Side Angle Pose with Wheel
The extended side angle can be difficult for practitioners who have excess fat or problems in bending. But if they use a yoga wheel while practicing this posture, they can attain it comfortably.
The essence of this pose is in the side stretching and balancing. The use of the yoga wheel enables the practitioners to ideally bend sidewise while resting one foot on the wheel. It also helps maintain balance while you are bending sideways.
To get in the extended side angle pose with the yoga wheel,
- Stand on your mat with your legs about one or one and a half meter apart. Your toes should be pointing forward.
- Turn your left toes outside and bend in your left knee. Lean from your lower back and place your left side of the torso on the left thigh.
- Place the left palm in the back of your left foot.
- Place the yoga wheel under your right calves and keep the right leg stretched.
- Raise your right arm above your head and look upward.
- Stay in the posture for 15-30 seconds and release.
- Practice the same sequence from the right side.
Using a wheel in this exercise helps you comfortably stretch your torso and legs. This posture helps increase the strength of your arms and side body.
5. Wheel-assisted Monkey Pose
If you love stretching but need more flexibility to perform the stretching poses, use a yoga wheel.
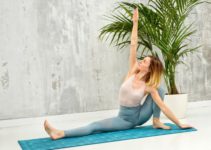
Monkey pose is the yoga version of ‘the splits’ in which legs are stretched out in 180 degrees keep both hips squared to the front. It makes this pose an advanced hip-opener.
To assist hip opening in monkey pose, a yoga wheel is placed under the calf of the front leg and then it slowly rolled forward while bending the torso backward or forward. Practitioners who are not flexible enough to stretch their legs fully can practice the monkey pose with a yoga wheel for practicing flexibility.
To do monkey pose with a yoga wheel,
- Stand on the left side of your mat, facing the wide edge.
- Place your right leg at the other side of the mat. At the same time turn your torso to the right side.
- Place the yoga wheel under your right calf and stretch your legs completely to sit down, facing the right.
- Your right leg will be slightly up, creating more stretch on your left leg. Give a complete stretch to your hamstrings, knees, thighs, and calves.
- Hold the wheel with your hands for support.
- Stay in the posture for 10-20 seconds. Then slowly release.
- Follow the same sequence from the left side.
You can also bend back from the lower back to stretch the upper body. This is a beneficial pose for your hamstrings, groin muscles, and hip flexors.
6. Wheel-assisted Reclined Butterfly Pose
Reclined butterfly is a great posture to relieve back tension. You can stretch your upper body and inner thighs at the same time in this pose.
A yoga wheel benefits in practising this pose as it creates comfortable support for your back as you lean back. Practitioners who have trouble with back bending can certainly use a yoga wheel.
To perform reclined butterfly pose with a yoga wheel,
- Sit comfortably on your mat and slowly touch the soles of your feet together to form a butterfly pose. Place your palms on the thighs and face them to the ceiling.
- Now place the yoga wheel in your back, aligned with the spine.
- Exhale and lean back on your yoga wheel. Along with the spine, rest your neck and head on the wheel too.
- The yoga wheel stretches and supports your spine to increase the relaxation.
- Stay in the pose for 8-10 natural breaths.
While practicing the reclined butterfly, try to keep your knees on the ground. This gives an incredible stretch in your inner thighs and makes the muscles strong.
7. Fish Pose with Yoga Wheel
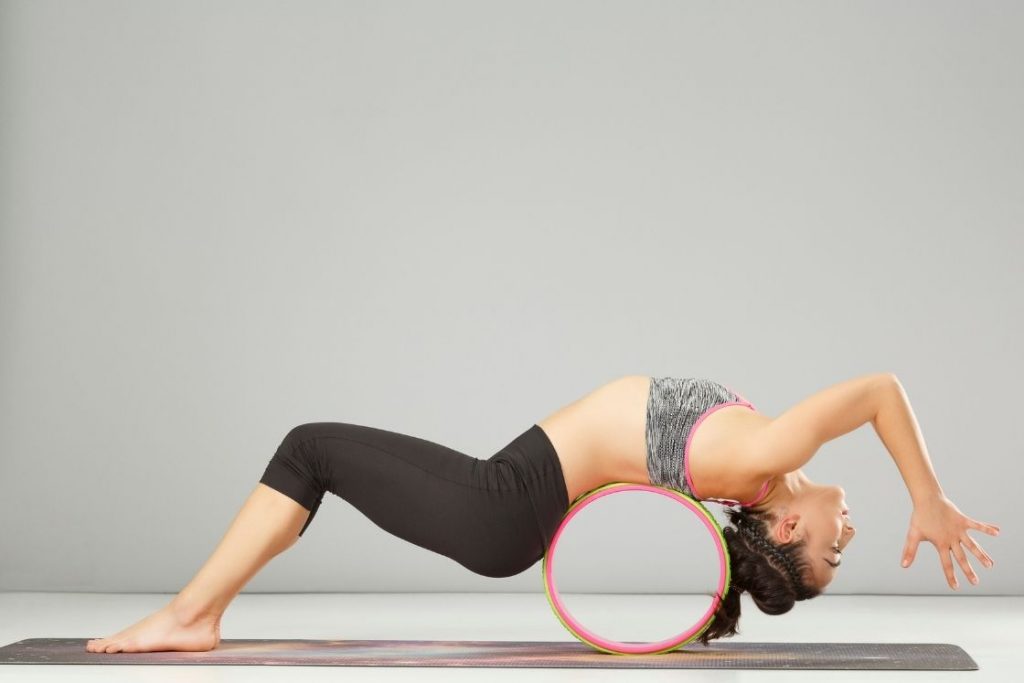
Practitioners who are unable to maintain the standard fish pose can use the wheel to deepen the effects of the pose.
Fish pose is an advanced pose that is difficult to maintain for many practitioners. Using a yoga wheel is good for those practitioners as it supports the back, allowing them to balance the pose for a prescribed time.
To perform the fish pose with a wheel,
- Sit on your mat with the legs stretched in the front. Your toes should be pointing upwards. Straighten your torso and place the palms beside your hips.
- Place the yoga wheel in your back. Ensure it is aligned with your spine.
- Inhale and while exhaling lean your back and extend your spine along the wheel. Release your hands and place them at a distance from your body.
- Lift your hips from the ground. Your spine and shoulders are stretched. Lean your neck and head on the wheel.
- Stay in the posture for 10-20 seconds and slowly rise and sit.
Open your arms wider to maintain the balance. Fish pose is a good chest-opening pose that also stretches the spinal and shoulder muscles.
8. Wheel Pose
The full wheel pose is an advanced backbend yoga posture that helps you enhance the flexibility of the spine. It can be a challenging pose for many who have difficulty stretching the body. However, the use of a yoga wheel can support your spine during this exercise. To get into the wheel pose,
- Sit straight with your legs together and stretched in the front.
- Slowly bend your legs from the knees and place the feet flat on the mat. Keep the yoga wheel behind you, aligned with your spine.
- Lean back along the wheel and let your back completely drape over it. Your crown should be touching the mat on the other side of the wheel.
- Press your heels against the mat and lift your hips up. Bring your arms beside the head and hold the wheel with them near your ears.
- Stay in the posture for 10-30 seconds. Slowly come back to the sitting posture.
The wheel pose is a chest-opening as well as back-bending posture. It opens the lungs for breathing and strengthens the shoulder girdle.
9. Wheel-assisted Headstand
The use of a yoga wheel is very useful while doing an advanced pose like headstand. The key aspect of this asana is balance. Practitioners who struggle to maintain weight in headstand can surely benefit from using a wheel.
To do the headstand with the yoga wheel,
- Start by sitting in the thunderbolt pose, by resting your hips on the soles of your feet.
- Place the wheel in front of you and hold it with your hands.
- Bend forward and touch your forehead on the mat, near the wheel.
- Straighten your legs in the back and start walking towards your hips.
- As you reach near the hips, lift the toes from the ground and raise them above your head.
- Stay in the posture for 10-20 seconds. Slowly release and relax in child’s pose, resting your forehead on the mat.
Headstand is the best practice to balance the blood flow in the body. It is also good for concentration and calming the mind.
10. Wheel-assisted Child’s Pose
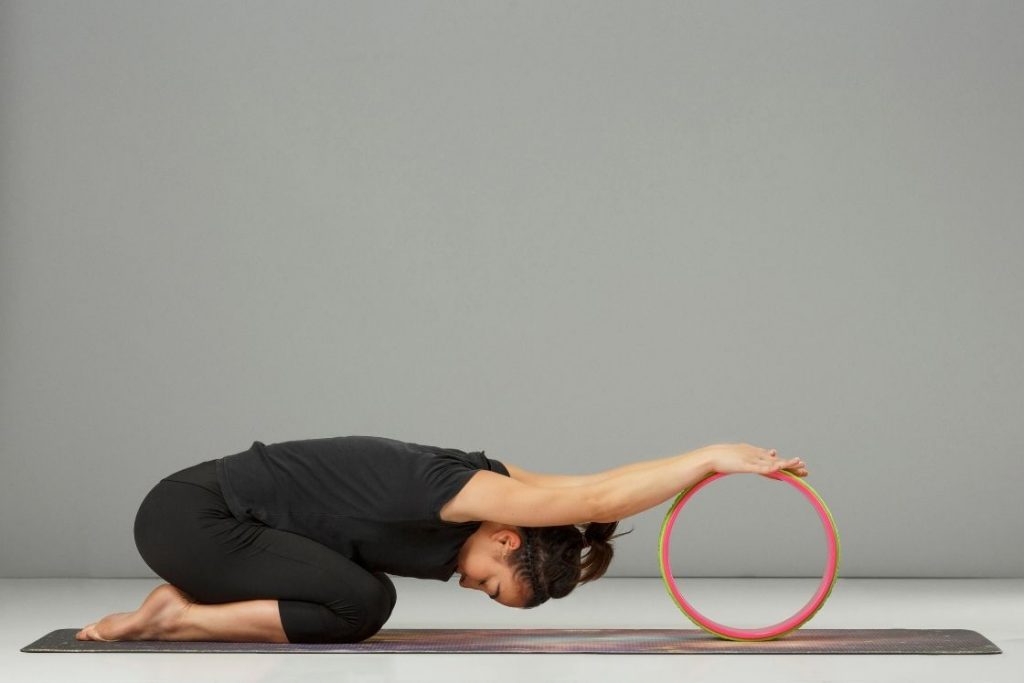
The child’s pose or Balasana is an excellent relaxing posture that helps the body to calm down after an intense yoga session. Practising the child’s pose using a yoga wheel can deepen its effects. To perform this posture,
- Sit in a thunderbolt pose, resting your hips on the soles of your feet.
- Place the yoga wheel in front of you. By stretching your arms forward and resting the palms on it, bend from the lower back.
- Roll the wheel forward and lengthen your spine until you place your abdomen on your thighs.
- Stay in the posture for 30 seconds to 1 minute.
Performing the child pose with a yoga wheel gives excellent stretch on your shoulders, chest, and armpits. It is a relaxing pose you can practice in the middle or at the end of rigorous asana practice.
Why Should You Use a Yoga Wheel?
One of the most important purposes of the yoga wheels is to make challenging poses achievable. They help the practitioners stretch certain major parts of the body like shoulders, chest, spine, and hips. Here are some major benefits using the yoga wheel offers you.
- Make Difficult Poses Possible to Practice
There are many challenging poses in yoga. In performing some, you may risk your existing body condition and excessively stretch that part of the body. Adopting the use of yoga wheels can let you perform such difficult poses with much ease and without straining the body excessively.
- Soothe Back Pain
Most challenging are the poses in which back bending is involved. The practice of the back-bending poses without hurting your spine is possible with the yoga wheel. You can also use it as a massage tool while practicing. Place the wheel aligned with your spine and roll it back and forth for a relaxing massage.
- Help in Personalizing Your Practice
Not everyone has the same body structure or muscle strength to practice difficult postures. Even the concept of difficult postures can be different for different practitioners. The use of wheel is ideal for all as it allows them to perform the postures comfortably without risking their health.
- Helps in Maintaining Balance in a Difficult Pose
If you are practicing yoga as a beginner, you may experience difficulty balancing. If balancing is the difficult part of your yoga practice, yoga wheels are the right props for you. They can be used while performing poses like plant, squat, crane tree, and more.
- Makes Inversions Comfortable
Back pain is the most troubling problem in today’s era. Poses that include inversions can be attained with the help of yoga wheels comfortably. They support your back without stressing much.
- Increase Your Stability
Yoga is all about maintaining stability in the posture. With a yoga wheel, you can certainly stay in the posture for a longer time. They provide stable support to your back and other muscles, helping you stay in the posture comfortably.
Final Thoughts
Practising yoga allows you to maintain your physical and mental health. Why yoga has been expanding awareness is because it is the system that anyone can follow. Yoga allows you to modify the exercises that can most suit you.
The props like the yoga wheel assist your yoga practices such that you are motivated to perform even the challenging postures. So, don’t worry about how to stretch your back while doing a wheel pose. Let the yoga wheel make it effortless for you!
