Iliotibial band or more commonly known as the “IT band” is a group of fibers or connective tissues that runs along the outer side of the leg. It starts from the hip moves through the side of the knees and ends at the shins.
The IT band is mostly responsible for extension, abduction, and rotating the hips. It also protects and stabilizes the knee and the outer thigh.
When you suffer an injury on the IT band or it becomes tight, it is called IT Band Syndrome or ITBS.
This article tells what yoga poses you can do to stretch the tight IT band.
What causes IT Band Syndrome?
IT Band Syndrome or ITBS is often seen in young athletes who repetitively use their knees for sports like running, cycling, hiking, trekking, basketball, soccer, and even weightlifters.
When the IT band is overused or overstimulated due to rubbing on the bone, it can cause tightness and inflammation to occur in the leg tissues. This tightness can also arise if you are sitting for a longer duration, walking up and down the stairs regularly, or walking in high heels.
Some other factors that can lead to ITBS are:
- Lack of flexibility
- Weak hip, glute, and abdominal muscles
- Weak knee extensor, knee flexors, and hip abductors
- Arthritis in the knee
- Flat feet
- Training or exercise mistakes such as not warming up, excessive strain to the body, poor posture during exercise or training, etc.
What are the symptoms of IT Band Syndrome?
If you have ITBS your knees and buttocks will be tender to touch. You will experience pain when you try to run, bend your knees or perform any activity that requires movement of the outside knee.
When you will move your leg, you will feel a sharp pain up and down your leg, constant ache near your knee, and clicking or popping sound on the outside of the knee during movement.
You will see the knee area inflamed with a burning sensation and redness. It can cause irritation due to friction through rubbing on the bone when you move your leg.
How do you relieve pain from the IT band?
If you have just started experiencing pain, you can ice the affected area and take precautions not to move your leg to reduce inflammation and strain. Avoid activities that require excessive knee movements.
Return to activities like running and cycling slowly. Take time to warm up and wear shoes that are comfortable and reduce pressure.
Over-the-counter nonsteroidal anti-inflammatory drugs can help lessen the pain.
Perform some stretches or gentle yoga poses that will work on the tightness of the IT band and also the area around the hips, thighs, and knee.
However, if the pain persists for more than months or gets severe, it is better to refer to a doctor. They will perform a range of tests, X-rays, and MRI scans to determine the severity and causes of the pain. Sometimes, they may recommend corticosteroid injections to reduce inflammation and pain or surgery if they think the tissue is damaged.
Yoga poses for stretching the IT band
Practicing yoga will help you in stretching the muscles that surround the IT band. Many yoga poses that focus on the leg muscles can be modified to increase the stretch towards the area where the IT band lies. Through modification of these yoga poses, you can pay special attention to the glutes, hips, outer thighs, and side knees.
With regular yoga practice, you can easily prevent injury or tightness in the IT band. It will promote strengthening and flexibility of the surrounding muscles as well as the joints.
Let us have a look at some really effective yoga poses, some of which have variations, to target the IT band area.
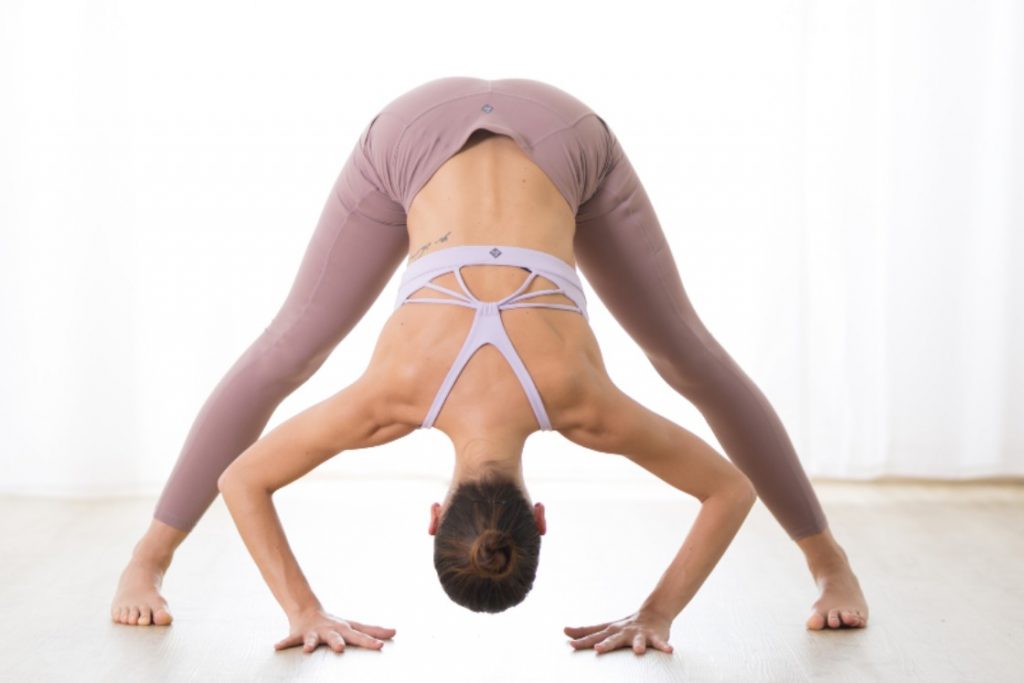
1. Wide-Legged Forward Bend (Prasarita Padottanasana)
Wide-leg forward bend is a very helpful pose to release the IT band tightness. It stimulates the muscles and joints of the hip area and strengthens your leg muscles to support your upper body. The variation of moving towards one leg and holding it will assure that the muscles on the side of the opposite leg are effectively stretching.
- Stand in Tadasana (Mountain Pose) and spread your legs at least 3 feet apart. Make sure your feet are firmly placed on the mat.
- From your hips, start to bend forward, while keeping a straight spine and a slight bend of the knees. As you bend, bring your arms down with you till they touch the top of your feet or completely to the ground.
- If you are unable to bring your hands to that extent, you can rest them on a yoga block or use a chair.
- Let your head hang in a relaxed manner. Stay in this pose for a few seconds or till you have found your balance.
- Apply some pressure on the outer edges of the feet to stretch the outer side of the leg.
- Turn your upper body towards the right, along with your hands, and place your hands on the outside of the leg. You will feel the stretch on the outside of the opposite leg.
Hold this position for 10-15 seconds and then turn to the left leg to repeat the same.
You can do this process 2-3 times.
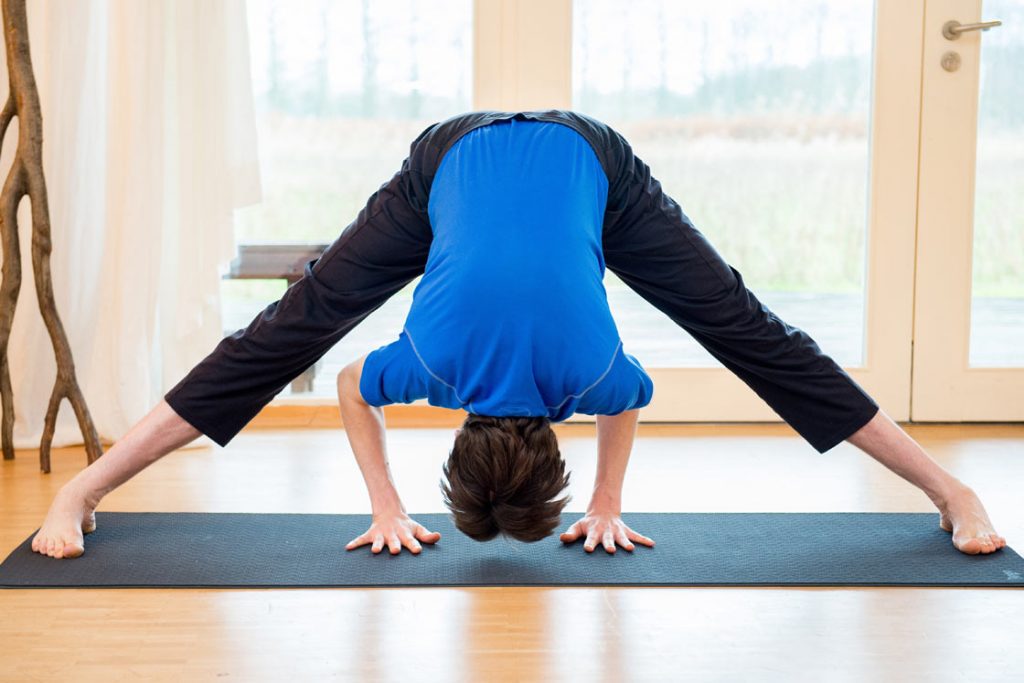
2. Forward Fold with Crossed Leg – Ankle Cross and Knee Cross
In this pose, you will be bending forward from standing position but your legs will be crossed. It is a deeper variation of the wide-legged forward fold which will give a much profound stretch to the side of the upper leg. The crossing of the legs will assure that both the legs get the stretch simultaneously.
The process of performing is similar to that of the Wide-legged forward bend but instead of spreading the legs, you need to cross the right ankle in front of the left. You can also place your right knee on top of the left knee to challenge yourself
With your ankles crossed, you need to hinge forward from your hips. Touch the ground with your hands or your fingertips. If you have issues with the back or hips, you can always use yoga blocks and keep a slight bend to the knees.
You can also adjust the distance between the crossed legs based on how deep you want the stretch. If you create a wider gap between the ankles, by placing the right knee on top of the left, make sure to use a prop to support yourself in the initial stages.
3. Revolved Triangle (Parivrtta Trikonasana)
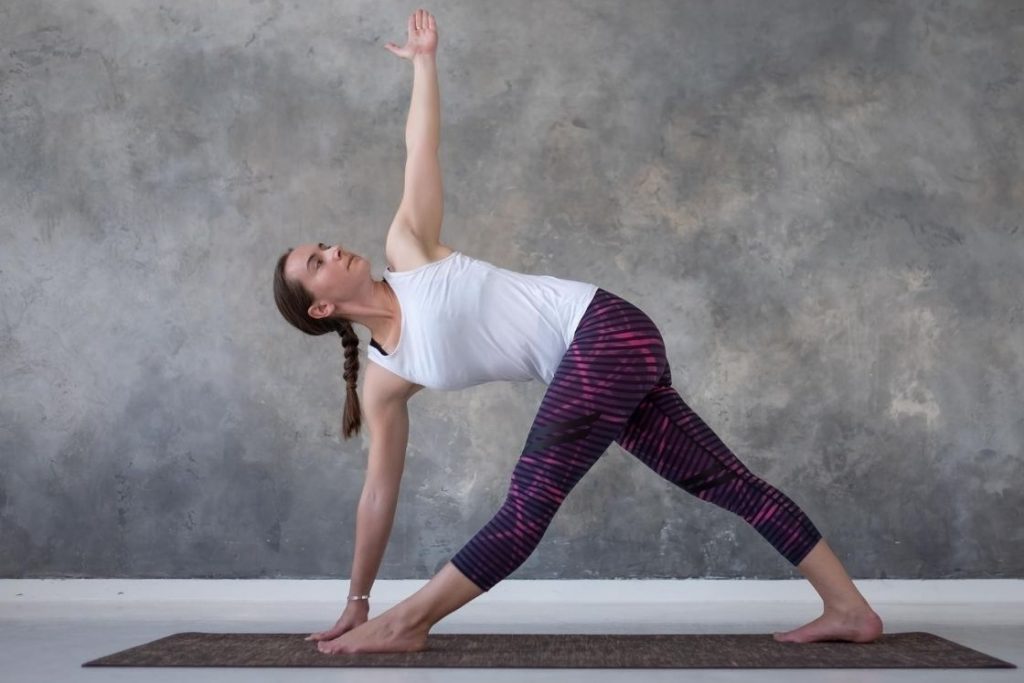
The revolved triangle is a variation to the triangle pose. This pose gives a gentle stretch to the sides of the legs to remove any stiffness that might be causing a tight IT band.
In this triangle pose, instead of bringing the same hand as the forward leg down, you use the opposite hand. This not only gives a spinal twist but also stretches the outer hips and leg muscles, hence good for IT band syndrome.
- Stand in Tadasana (Mountain Pose) and spread your feet 3 feet apart on the side.
- Your left foot should be turned diagonally and your right foot should be pointing towards the shorter end of the mat. The heels of your feet should be aligned.
- Spread your arms to the side with palms facing down. They should be parallel to the ground and your shoulders should be away from your ears.
- Start bending down towards your right foot from your hips joint, bringing your left arm down with you. Bend till your fingers touch your feet.
- You have an option to bring your arm completely the mat, to your ankle, or to your shin. You can also use a yoga block at its highest side to rest your left hand.
- Your arms should be in a straight line with your right-hand fingers pointed towards the ceiling. Make sure your torso is almost parallel to the ground.
- Turn your head to gaze at your right-hand fingers.
Hold this pose for 3-5 breaths and repeat the same with the other leg.
4. Side Plank (Vashistasana)
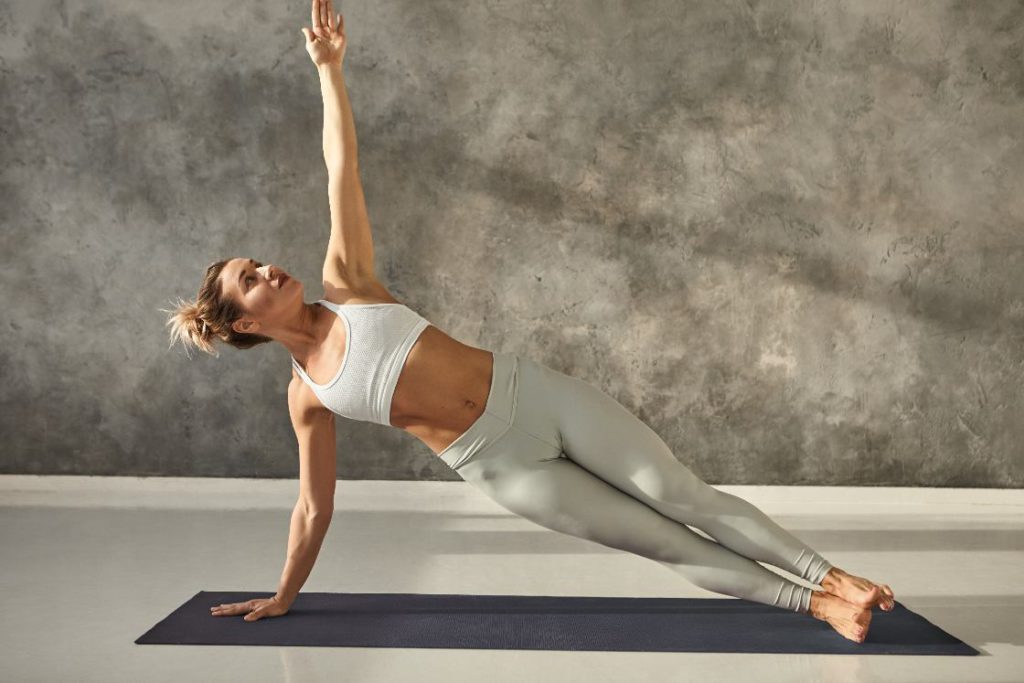
While side plank is an advanced pose, it is one of the best poses for stretching and strengthening the outer side muscles from hips to ankles. Since both your legs muscles work hard to stay in their position, the muscles of both the legs are strengthened along with the IT band.
As a word of caution, it is an advanced-level pose that should not be performed until you have attained some level of core strength for balancing.
- Lie stomach-down on your yoga mat with your arms bent at the elbows and hands are beside the shoulders with fingers spread. Place your feet verticle so that your toes and balls of the feet are touching the mat.
- Engage your core and press your hands to lift up your entire body to make a straight line. This is the plank pose.
- After staying in the plank pose for a few breaths, turn your body towards the right by putting some weight on the right arm.
- The outer edge of the right foot should now be touching the ground and firmly pressed. Your left leg will be placed entirely on the right leg.
- Stack your right shoulder directly above the right-hand wrists. Your left arm can be stretched overhead or rest on the left hip.
- Make sure the weight is being spread equally on the right palm.
Hold this pose for a minimum of 30 seconds and then repeat with the other arm.
5. Low Lunge (Anjaneyasana)
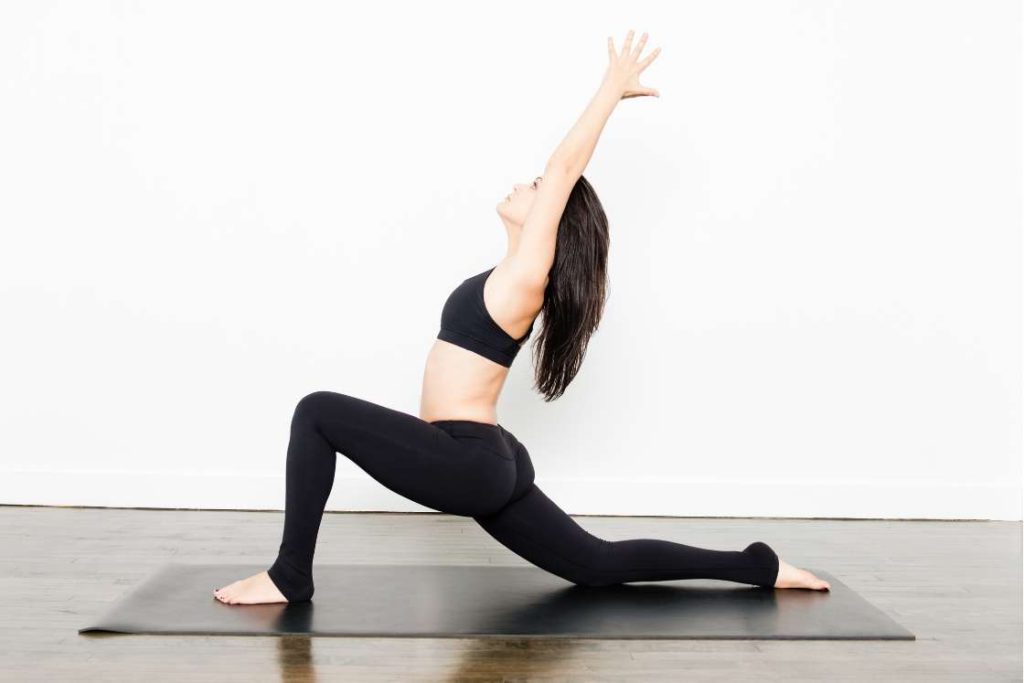
The low lunge is known as a great stretching and warm-up exercise for performing difficult poses or workouts. This pose will open your hips and strengthen the leg muscles by releasing pains and tightness. It provides substantial stretch, stability, and flexibility to the joints in the hips, knees, and ankles. You feel an overall stretch in the thigh muscles along with the side hips.
- Stand in a Tadasana (Mountain Pose) facing the shorter end of the mat and bring your right foot forward. The distance between your legs should be 3 feet. You can adjust the distance based on your flexibility and alignment of the center of gravity.
- Keeping both feet firmly on the mat, bend your right knee such that it makes a 90-degree angle. The thigh should be parallel and your lower leg should be perpendicular to the mat.
- Gently and slowly, lower your left leg, which is at the back such that your left knee touches the mat. Place a folded blanket under your knee to get more cushion.
- Bring your arms above your head and join your palms together. You can also keep them in front of your chest or on top of your right knee.
- To deepen the stretch, bend the right knee further till your feel resistance in your hip muscles. But the knee should not go forward than the toes.
Hold this pose for at least 5 breaths.
6. Reclining Spinal Twist (Supta Matsyendrasana) – “Clamshell” movement without twisting the upper body

The traditional reclining spinal twist asks you to turn your upper body the opposite way in the direction of the legs. However, this extremely modified version needs you to turn your body in the same direction as your legs.
The goal of this pose is to stretch and strengthen the side thigh and hip muscles by moving the leg up and down. It is called the Clamshell exercise as it resembles a clamshell opening and closing its shell.
- On your yoga mat, lie down on your side with the lower leg completely supporting the upper leg. Bend your legs so that the knees are almost at a 90-degree angle.
- Place one hand below your head to support your head and neck. The other hand can be placed on your hips for support or in front of your chest.
- With your abdominal muscles engaged and feet joined, lift up your upper leg as high as you can.
- Hold the lifted leg for 3-5 seconds and slowly bring it down to rest on the lower leg.
Repeat this process 10 times and turn the other side for the other leg.
Note – If you are already experiencing pain or tightness in your IT band, make sure that the affected leg is on the top, instead of supporting the weight of the opposite leg.
7. Reclining Hand-To-Big Toe Pose (Supta Padangusthasana)
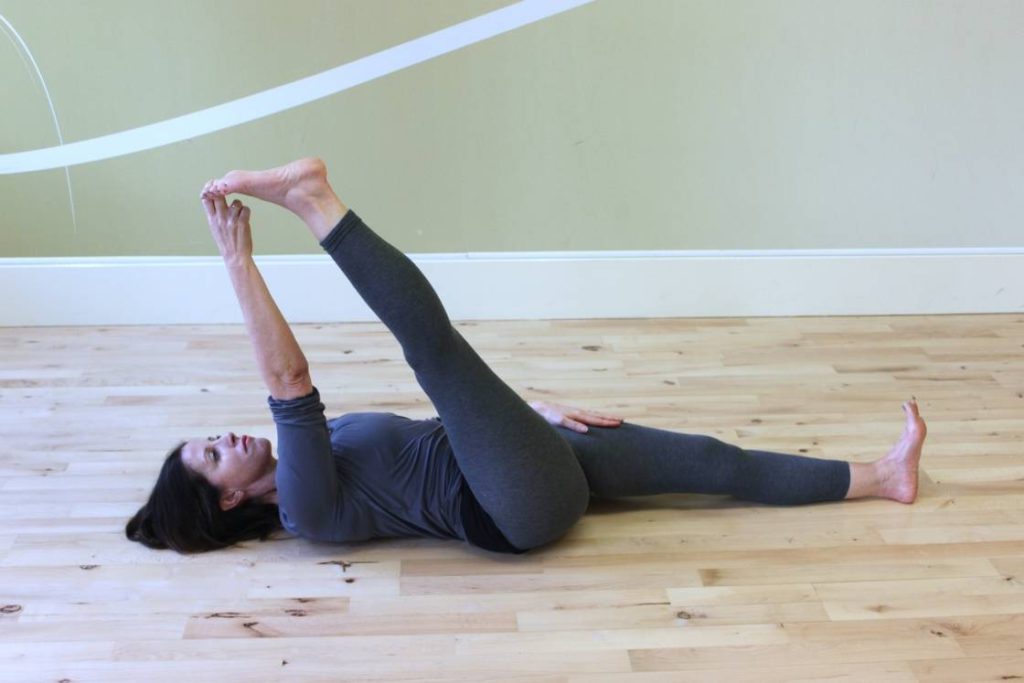
The reclining hand to big toe pose is well known for superbly stretching the hamstrings, hip, and thighs. But did you know that if you stretch your leg to the side, you can also feel the stretch on the side muscles? And if you include a strap, the resistance will promote strengthening the muscles as well.
- Lie in the Savasana (Corpse Pose) on your yoga mat.
- Bend your right knee and bring it as close to your chest as possible. Take a yoga strap and loop it around the balls of the foot.
- Holding both the ends of the strap with your hands, straighten your knee and tilt your leg upwards such that the soles of the feet face the ceiling.
- Keep your upper body and left leg straight and hold the straps with your left hand. Your right hand can be splayed out to your right with palms up.
- Press the right hip firmly on the mat and start tilting the right leg to the left. Make sure the right hip stays grounded.
- Stop moving your right leg sideways when you feel that your hip has started to lift from the mat. Be aware that both sides of your pelvis are carrying equal weight.
Stay in this position for 3-5 breaths.
To increase the stretch, lift your right hip and tilt the right leg further. Your left outer hip will also be rolled towards the direction of the leg.
Once your left leg is almost on its side, stop moving. Now keeping both the legs in their position, pull the right outer hip in the opposite direction.
Hold this pose for another 3-5 breaths. Slowly come back to the original position and repeat the same process with the left leg.
8. Half Moon Pose (Ardha Chandrasana) – Standing IT band stretch
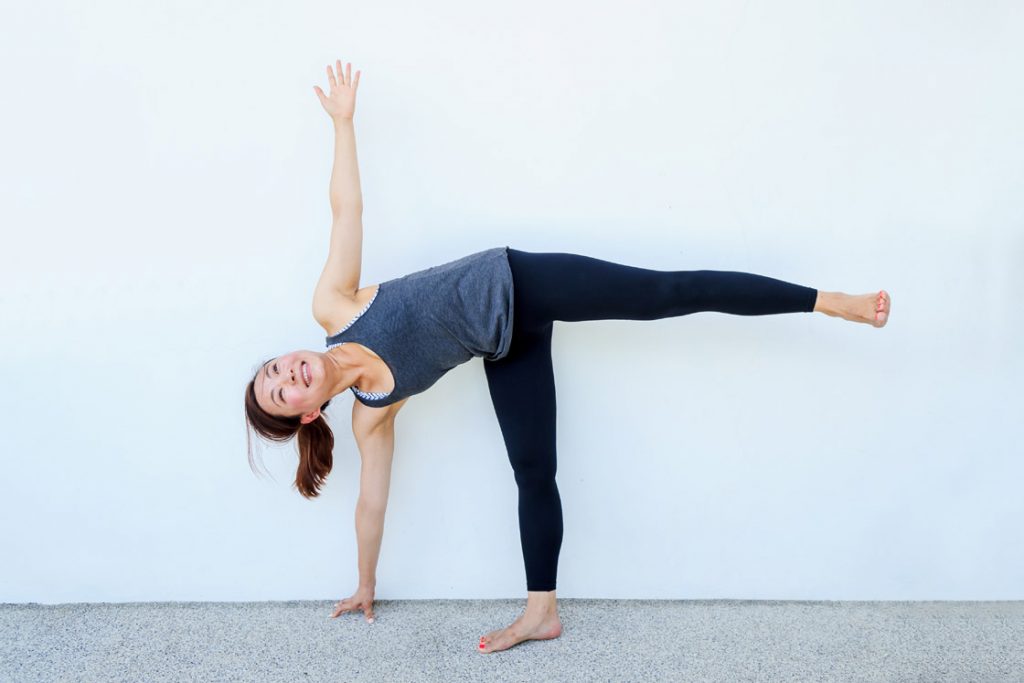
Anytime you stretch to the side while standing, know that the muscles on the side of the leg will also be stretching.
Half moon pose is the best standing IT band stretch that will promote the strengthening of the hip, thigh, and knee muscles that surround the IT band. It will also enhance the flexibility and mobility of the muscles and reduce tightness.
- Stand in the Tadasana (Mountain Pose) with your legs and back straight. Let your arms hang beside you in a relaxed manner.
- Cross your right feet over your left and place your feet firmly on the ground. Try to keep your feet shoulder-width apart.
- Stretch the left arm overhead and lean towards the right side. Feel the stretch to the entire side of the body, specifically in your thighs and knees.
- For more resistance, hold the left-hand wrist with your right hand and slightly pull the arm downwards. If you need more stability, practice this stretching pose next to a wall so that you can rest the left-hand palm on it.
- In all of this process, make sure your spine remains straight and your shoulders are away from the ears. Imagine someone pulling your upper body upwards while you are leaning your hand sideways to keep your back straight.
Also, do not lock your hip joints. As you lean towards the right, push out your left hip slowly and gently.
Hold this pose for 5-10 breaths and repeat with the other hand. On each side, repeat the stretch 3-4 times.
Conclusion
If you regularly practice the above poses and stretches you can avoid sustaining injury or tightness in the IT band. And if you are practicing them with symptoms, go gentle with performing the poses. You need to give time for the symptoms to reduce and eventually diminish.
Do not overwork the affected area and give it time and rest to heal. Gradually build up the stamina and flexibility to get back to your routine.
: Steps, Benefits, Precautions")

")

