Our arms are constantly engaged in various tasks and physical exercises, putting them at significant risk of injury. One such common injury is tennis elbow, which affects the connective tissues between your forearm muscles and elbows, causing pain on the outward side of the elbow.
This condition, known medically as lateral epicondylitis, can be debilitating. However, non-invasive, exercise-based interventions like yoga can effectively help heal and strengthen your forearm tendons, providing relief from tennis elbow.
Understanding Tennis Elbow
Tennis elbow, also known as lateral epicondylitis, results from the degeneration of tendons that extend and pull your wrists and turn your forearms, making flexion and extension motions difficult and painful. The pain typically arises from overuse and repetitive strain, leading to small tears in the tendons.
This condition manifests as pain and tenderness on the outside of the elbow, which can extend into the forearm and wrist, often exacerbated by activities involving gripping or lifting. The primary goal of treating tennis elbow is to reduce pain, improve flexibility, and restore strength to the affected muscles and tendons.
Can I Do Yoga with Tennis Elbow?
Yes, as long as you’re able to hold a pose comfortably without putting pressure on your arm joints, yoga is safe to practice with tennis elbow. You can prevent hyperextension of the arm by transferring pressure from your joints and tendons to other complementary body parts.
For example, while coming into downward-facing dog pose press hands evenly at all corners and grip the mat with fingers, then try to hold the pose on your legs (with almost zero pressure on your hands). It can heal the tennis elbow and, at the same time, strengthen joint muscles.
Who is at the risk of Tennis elbow?
Activities that over-utilize wrist extensions and arm rotations increase the risk of tennis elbow. Surprisingly, golfers suffer from tennis elbow more frequently than actual tennis players. Any sportsperson, athlete, artist, or performer with a physically active lifestyle can develop tennis elbow. Even professions involving heavy lifting or extensive typing can lead to this condition.
By understanding the nature of tennis elbow and taking appropriate precautions during yoga practice, you can safely engage in yoga and potentially aid in the recovery and prevention of this condition
Benefits of Yoga for Tennis Elbow
Yoga offers several advantages for individuals suffering from tennis elbow:
- Pain Relief: Gentle yoga stretches can help alleviate pain by improving blood circulation and reducing inflammation.
- Improved Flexibility: Yoga enhances the flexibility of the muscles and tendons around the elbow, reducing stiffness and discomfort.
- Strength Building: Certain yoga poses strengthen the forearm, wrist, and hand muscles, providing better support for the elbow joint.
- Stress Reduction: Practicing yoga promotes relaxation and stress relief, which can positively impact the healing process.
- Holistic Healing: Yoga addresses the body and mind, fostering a sense of overall well-being and promoting long-term recovery.
Best Yoga Exercises for Tennis Elbow Relief
While some yoga poses are ideal for healing tennis elbow, others may need modification. Using armbands or elbow pads during these poses is advisable.
1. Extended Arm Wrist Stretch Exercise
Extended arm wrist stretches can help alleviate tension and improve flexibility in the wrist and forearm muscles, providing relief for tennis elbow.
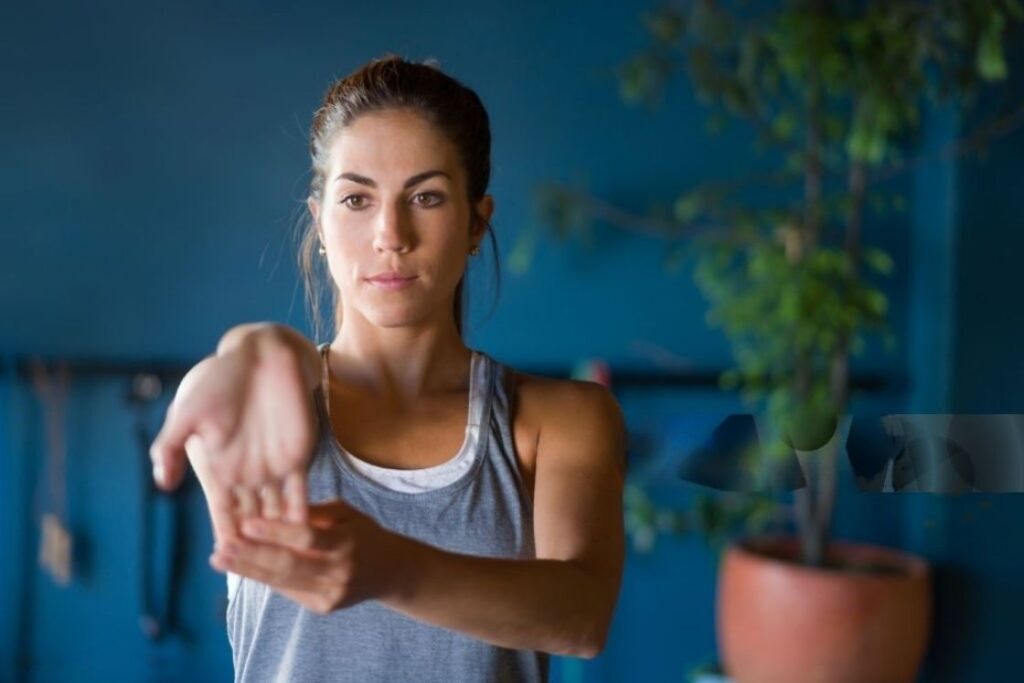
- Stand with your feet hip-width apart and arms at your sides.
- Extend your left arm straight out in front of you at shoulder height, with your palm facing down.
- Use your right hand to gently pull back on the fingers of your left hand, bending your wrist downward.
- Hold the stretch for 15-30 seconds, feeling a gentle stretch in your forearm and wrist.Release the stretch.Switch to your right arm and repeat the steps.
2. Shoulder Rotation (Mountain Pose Variation)
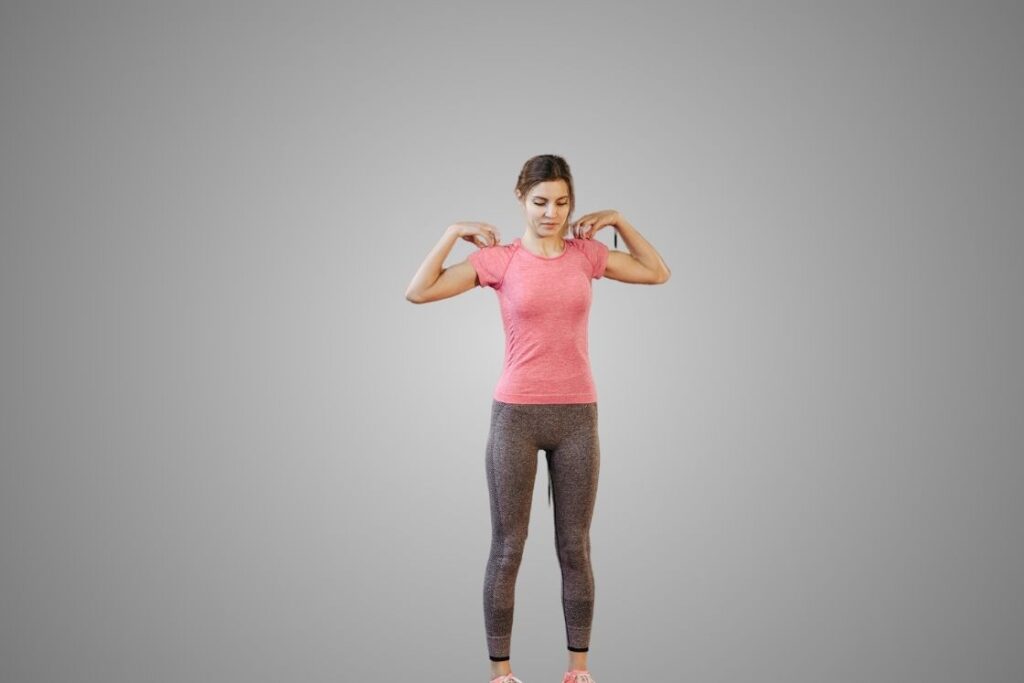
Shoulder Rotation (Mountain Pose Variation) helps relieve tennis elbow by improving shoulder movement and reducing muscle tension, which eases pressure on the elbow tendons. It also boosts blood flow, aiding in healing and reducing swelling.
- Stand with your feet hip-width apart and arms at your sides.
- Inhale and lift your shoulders up towards your ears.
- Exhale and roll your shoulders back and down in a circular motion.
- Continue this motion for 30 seconds to 1 minute.
- Change the direction and roll your shoulders forward for another 30 seconds to 1 minute.
- Release the rotation and take a few deep breaths.
3. Warrior II Pose
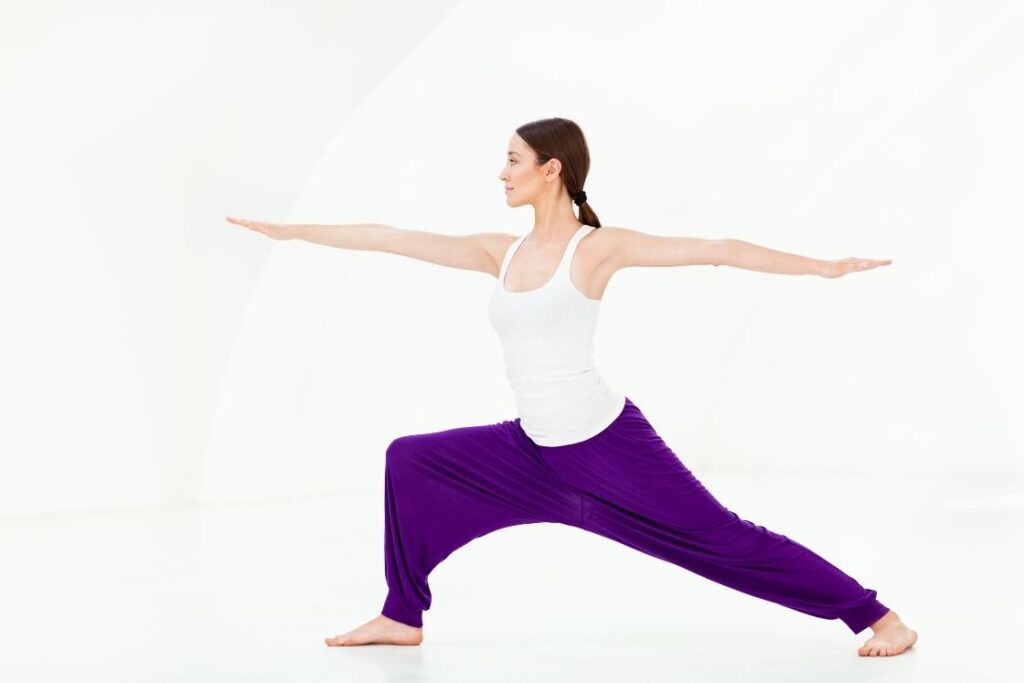
Warrior II Pose is effective for tennis elbow because it strengthens the legs and arms while stretching the upper body, which can help balance and support the elbow joint. It also improves overall body stability and alignment.
- Stand with your feet wide apart.
- Turn your right foot out 90 degrees and your left foot slightly in.
- Inhale and bend your right knee to a 90-degree angle, keeping your left leg straight.
- Extend your arms parallel to the floor, with palms facing down.
- Look over your right hand and hold the pose for 20-30 seconds.
- Exhale, straighten your right leg, and switch to the other side.
4. Cobra Pose – Bhujangasana
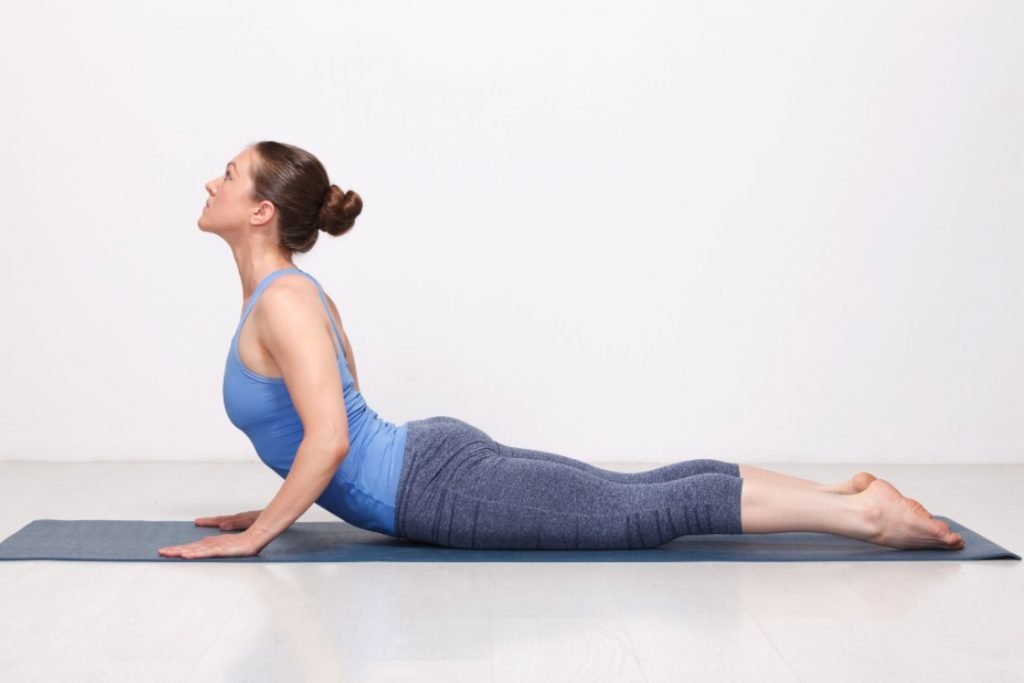
Cobra pose is excellent for your arm and wrist muscles, joints, and nerves. It gives both a dynamic and static stretch. Practicing it will help you develop synchronization between your wrists and elbows. And, the pose will also train your nerves to distribute even weight on both ends of the arm muscles.
- Lie on the front of your body.
- Place your hands by the sides of your chest.
- Keep your legs hip-width apart.
- Press against the ground, an arch up your upper body, by straightening your hands.
- Arch up till you can see straight in front and your chest faces the front as well.
- Keep your pelvis touched to the ground.
- Keep your shoulders free and pressed down, and chest puffed out.
- Keep the arch in your spine even.
- Breathe and hold the pose for 5-7 breaths.
Like the variation of the plank pose and dolphin plank, you can also practice an elbow resting variation of the cobra pose, which is the sphinx pose. You can arch up by placing your entire forearm, from your elbows, on the ground.
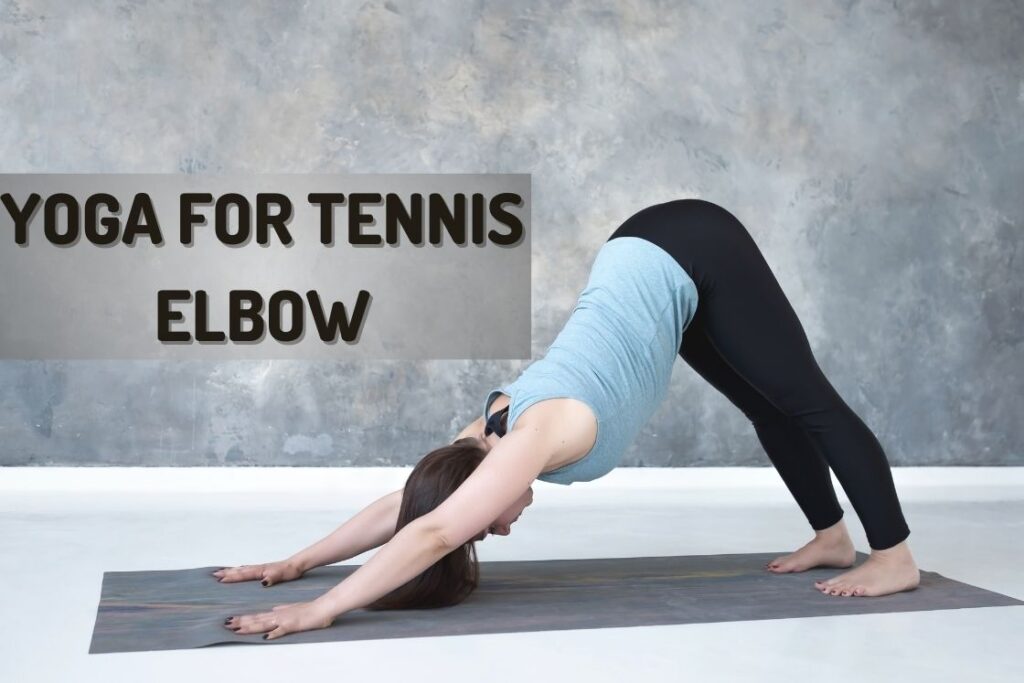
5. Down dog to up dog
Down dog to up dog is a good vinyasa of static and dynamic stretches, that exercises your nerves and muscles in multiple motions. This chain of two poses will include stretching, contraction, flexing, and rotation of all your hand muscles. You promptly feel more strength and flexibility generating in your hands and upper body.
- Get down on all fours, your hands and knees.
- Push backward and upward with your buttocks, stretching your hands and upper body, and straightening your legs.
- Plant your heels back on the ground, and push your chest down towards the ground, increasing your lumbar curve.
- Hold your pose here for 5 breaths.
- Now dip forward and downward to come into a four-limbed staff pose.
- From here rise up, arching your upper body upward and pressing your pelvis downward, like in cobra.
- Straighten your hands, press down your shoulders, open up your chest in front.
- Look in front and breathe.
- Unlike cobra, your lower body will also be off the floor.
- Hold this pose for 5 breaths and repeat the sequence thrice
Since the focus of our routine is on your arms and wrists, you can keep a slight bend in your knees during downward dog, and keep your heels lifted off the ground. On the upward dog, you can rest your knees on the ground.
6. Cow Face Pose – Gomukhasana
Cow Face Pose increases the range of motion in your arm muscles. The pose will also reduce your chances of future injury, besides healing the current one. The cow Face Pose will require significant body awareness, that will perfect your arm and wrist movements.
- Sit in a staff pose
- Bend and fold up your right leg.
- Take your left foot from under your right leg, bring it to your right side, and place your left heel against your right sitting bone.
- Now take your right leg to your left side, over your left leg, fold and stack up your right knee on top of your left knee, and place your right heel against your left sitting bone.
- Keep your upper body straight.
- Raise your right hand overhead, fold at your elbow and take your right hand in front of the middle of your shoulder blades.
- Take your left hand from the left side of your abdomen and reach for your right hand.
- Clasp your hands together in front of the middle of your shoulder blades.
- Hold the pose for 5-7 breaths.
- Repeat the pose by taking your left leg over your right, and changing your hands accordingly.
If your hands are not getting into a clasp, don’t force it. You might worsen your pain. Simply touching the tip of your fingers will suffice.
7. Wide-Legged Forward Bend with Twist

Forward bends are good for your legs and are effective light-intensive hand stretches. Adding a little twist in your torso and extending out with your arms, will increase the forearm stretch; and quite beneficial in case of Tennis Elbow.
- Stand wide-legged with a gap of 3-4 feet
- Bend forward from your groin and touch the floor with your hands.
- Open your hands, extending them outward. Place each hand on the foot of its respective side.
- Now twist your torso to your right to touch your right foot with your left hand.
- Return to center position, and again twist to your left to touch your left foot with your right hand.
- Repeat this sequence for 10 times.
Don’t rush to finish the rotations. Hurried twists in forward bend will injure your back muscles. Keep the torso twists slow and steady. Also don’t push to touch your opposite foot. Go only as far as you comfortably can.
8. Camel Pose
Camel Pose can be effective for tennis elbow by stretching and opening the chest and shoulders, which helps relieve tension in the upper body. This pose can also improve overall flexibility and alignment, potentially reducing strain on the elbow.
- Begin by kneeling on the floor with your knees hip-width apart and your feet pointing straight back.
- Place your hands on your lower back for support, fingers pointing down.
- Inhale and gently press your hips forward while lifting your chest towards the ceiling.
- Exhale and reach your hands back towards your heels, keeping your thighs perpendicular to the floor.
- Press your hips forward and lift your chest more as you deepen the stretch.
- Breathe and hold the pose for 15-30 seconds.
- Inhale and slowly return to the starting position, sitting back on your heels.
Preventing Tennis Elbow
Yoga is an excellent way to heal your Tennis Elbow, but the question is, why did you need to heal an injury when it could have been prevented in the first place. And that too using yoga itself. Yoga poses, especially the ones increasing your body awareness will come in particularly handy. Such yoga practices will increase your mindfulness and help you stay focused on your physical activities.
Additional tips include:
- Equal Weight Distribution: Carry equal weights in both hands or switch hands if carrying heavy loads.
- Proper Sleeping Posture: Maintain a proper sleeping posture.
- Desk Job Adjustments: Keep forearms parallel to the floor, wrists straight.
- Use Protective Gear: Use armbands, elbow, and wrist grips.
- Tend to Small Bruises: Use cooling pads, freehand stretches, and rotations.
- Timed Tasks: Alternate periods of work and rest in labor-intensive jobs.
- Avoid Overextension: Distribute load weight across your body.
Exercises to Avoid with Tennis Elbow
Avoid exercises that stress your tendons at harmful angles:
- Handstands: They place excessive strain on the elbows and wrists, exacerbating pain.
- Push-Ups: They put significant pressure on the elbow tendons and can worsen symptoms.
- Chin-Ups: The gripping and pulling motion can aggravate the tendons in the elbow.
- Bench Presses: The forceful pushing motion can stress the elbow joints and tendons.
- Weight Lifting (dumbbell curls, barbell extensions): These exercises involve repetitive movements that can strain and irritate the elbow tendons.
Conclusion
Tennis elbow is caused by repeated incorrect movement of your arms and wrists. Thus this condition is an accumulation of many minutes of wear and tear. This makes the healing of the tennis elbow a time-consuming process. However, yoga exercises are good at tackling such comprehensive physiological injuries. One might say, in ancient times when physical tasks were in abundance, yoga was designed to heal and avoid extensive physical injuries.
Tennis Elbow Exercise FAQs
Avoid Plank Pose, Chaturanga, Headstands, and Crow Pose as they place excessive strain on the elbows.
It’s best to avoid planks if you have tennis elbow, as they can strain the elbow tendons. Instead, opt for modified versions or alternative poses that do not put pressure on the elbows.
Gyan Mudra, performed by touching the index finger to the thumb, can help promote relaxation and circulation.
Practice 3-4 times per week, focusing on gentle and non-straining exercises.
Yoga can alleviate symptoms and promote healing but should be combined with other treatments for complete recovery.
Yes, consult a healthcare professional or certified yoga instructor to ensure safety and appropriateness for your condition.
: Meaning, Steps, & Benefits")
: How to Do, Beginners Tips, Benefits")


