- Yoga & Plantar fasciitis
- Heel Pain Relieve Poses
- Mountain pose
- Hero pose
- Garland pose
- Chair pose
- Warrior 1 pose
- Reclined Hero pose
- Downward dog pose
- Wide-legged Forward Bend
- Reclining Bound Angle
- Legs up the wall pose
- Who’s At Risk
- Exercises to Avoid
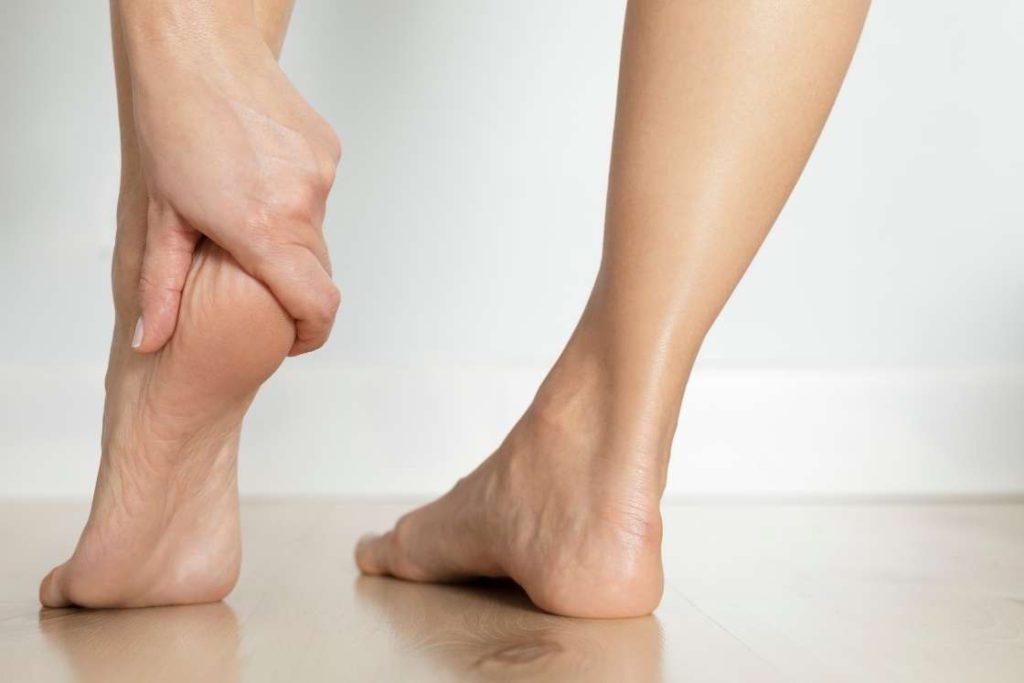
The only good thing about Plantar Fasciitis is that it is self-treatable, the rest is just pain, inflammation, and stiffness. Plantar fasciitis is an inflammation of the ‘plantar fascia’ web-like ligament that connects your heel to the front of your foot. It causes a stabbing pain in the bottom of your foot near the heel.
We are not often concerned about our Plantar Fasciitis; we rarely even notice it exists. However, its importance is thoroughly felt, once incurred, an injury and could restrict basic activities like walking.
If you want to relieve your heel pain from Plantar fasciitis, then you can definitely consider the gentle approach of yoga. The healing mechanism of yoga will help you restore the health of the ligaments, muscles, and bones in your foot. Moreover, yoga stretches for feet are effective in triggering the regeneration of injured cells, providing a fast recovery.
What exactly yoga does for plantar fasciitis?
A weak or injured plantar fascia ligament will take some time to heal. In the meanwhile, your muscles and bones will suffer. Over time your foot will be riddled with weak ligament, bones, and muscles, delaying your recovery period.
Practicing yoga for plantar fasciitis will provide a complete solution. Specific yoga poses for your foot will increase the strength and flexibility of the muscles surrounding your plantar fascia and other leg muscles. Yoga foot exercises will also increase the range of motion in your toes, heels, and ankles.
Different peripheral nerve training yoga exercises will also improve the functions of foot nerves. With better leg strength, motion, flexibility, and control, your movements will be stable and injury-free. Thus yoga can help ease that plantar fasciitis pain while walking, running and even standing.
Heel Pain-Relieving Yoga Poses for Plantar Fasciitis
Yoga poses for Plantar Fasciitis comprises stretches that are generally beneficial for your feet and lower lack. Benefiting all joints, muscles and ligaments alike. However, certain modifications can be done to each pose to slightly increase the benefits, or reduce injury, for your Plantar Fasciitis.
Practice these yoga poses to relieve heel pain from plantar fasciitis.
1. Mountain Pose – Tadasana
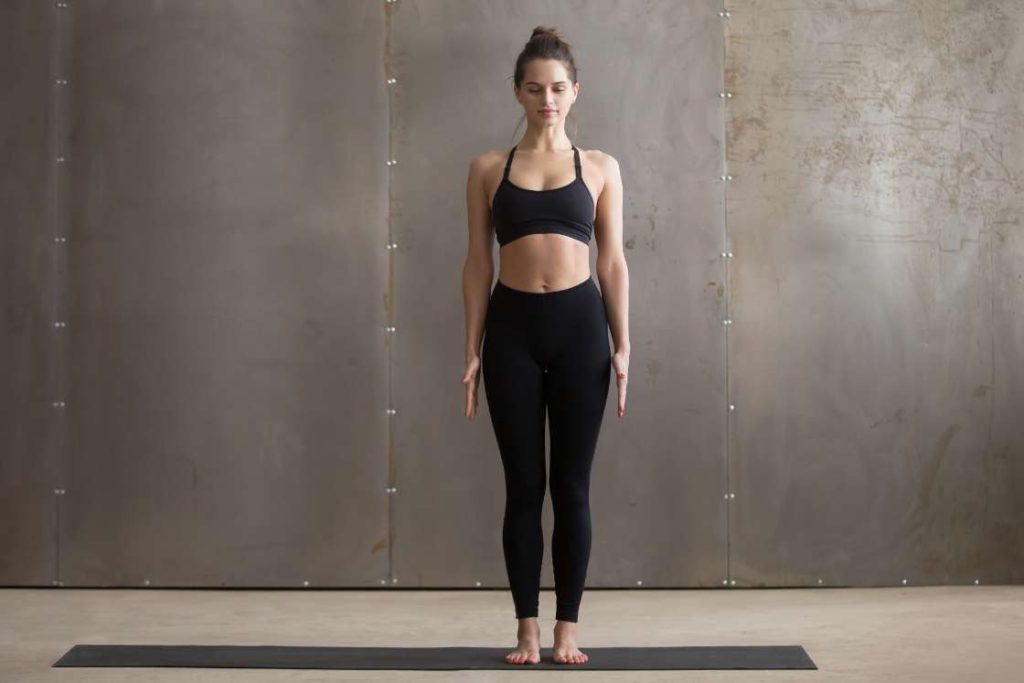
Mountain pose is a basic standing pose, but its simplicity is its specialty. This pose holds every part of your body in its ideal place. It puts a very gentle stretch on every ligament and muscle in your body, encouraging their healing. The mountain pose is also beneficial to your overall nervous and circulatory systems.
- Stand straight, with your spine erect.
- Keep your legs hip length apart.
- Press your shoulders down, puff your chest infront and keep your hands by the sides of your body.
- Open your palm, face them infront and point your fingers downward.
- Keep the curve in your lumbar region prominent, and press your head back, to keep your crown in line with your hip
- Distribute your body weight evenly on both feet.
- Stand steady, and do not wobble.
- Breathe comfortably, and hold your pose for atleast 30 seconds. You can go upto 5 minutes.
Modification – To increase the efficiency of exercise for Plantar Fasciitis, while being in the mountain pose, you can rise up and down on your toes one by one. Do these up and down movement 5 times in one stretch.
2. Hero Pose – Virasana
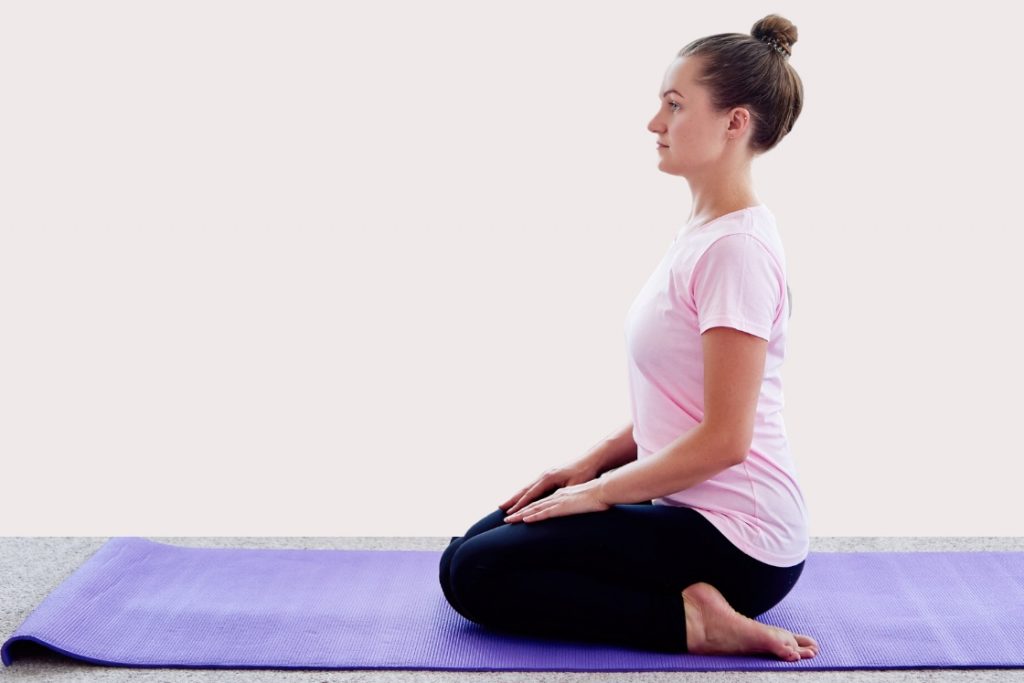
Hero pose is ideally a pose meant for your abdominal health, but it puts significant exercise on your leg joints, muscles, and ligaments. This pose is very effective in improving the flexibility and strength of your ankle and foot.
- Kneel down on the floor.
- Keep your legs hip length apart.
- Keep your upper body straight.
- Bend and fold your knees and sit back between your feet.
- Keep your upper body, like in mountain pose.
- Place your hands on your knees.
- Breathe comfortably and hold the pose for a couple of minutes.
Modification – Sitting directly between your feet, especially if you are obese, will put added tension on an already bruised Plantar Fasciitis. Thus place a yoga block or folded blanket between your feet, to sit on.
3. Garland Pose – Malasana
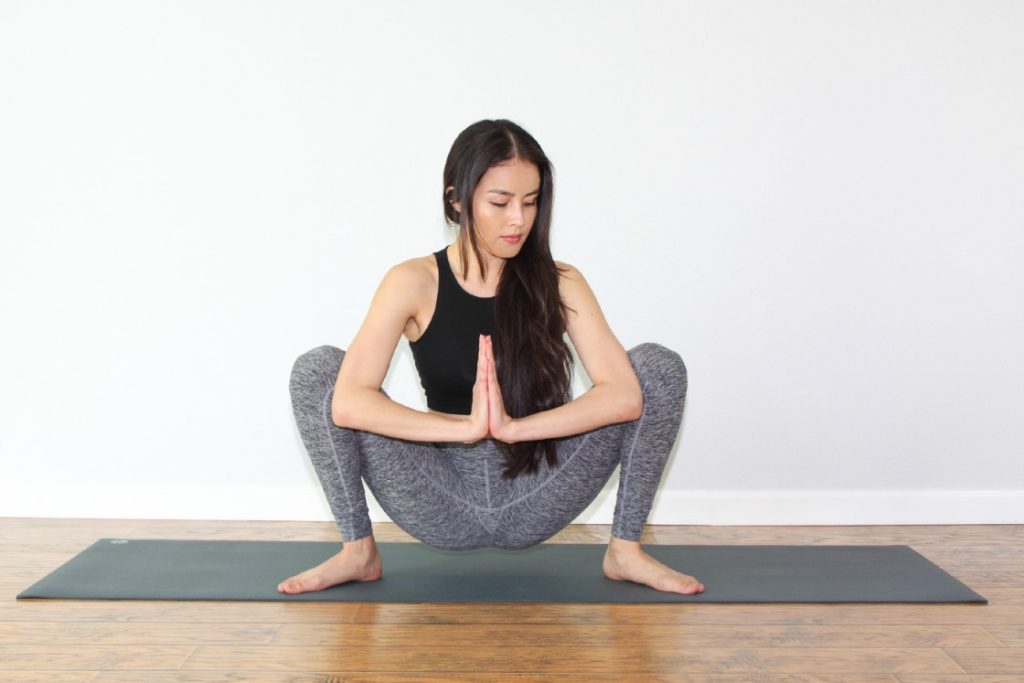
Like hero pose, Garland pose is a pose designed to generate bowel movement benefits. However, the squat posture increases the endurance of your knees, ankles, and feet. You can do a subtle toe lift variation of this pose to increase the foot benefits.
- Stand in a mountain pose.
- Sit down in a squat.
- Do not bend or lean your upper body.
- As you squat all your knees to extend outward.
- Keep going down all the way till you are sitting down completely in a squat.
- Now slightly lean Infront.
- Join your hands infront of your chest in a Namaste.
- You can also rest your hands on your knees.
Modification – If the injury to your Plantar Fasciitis is not severe, then you can slowly try lifting up your squat pose on the ball of your toes. You can support your lift by dropping your hands on the floor.
4. Chair Pose – Utkatasana
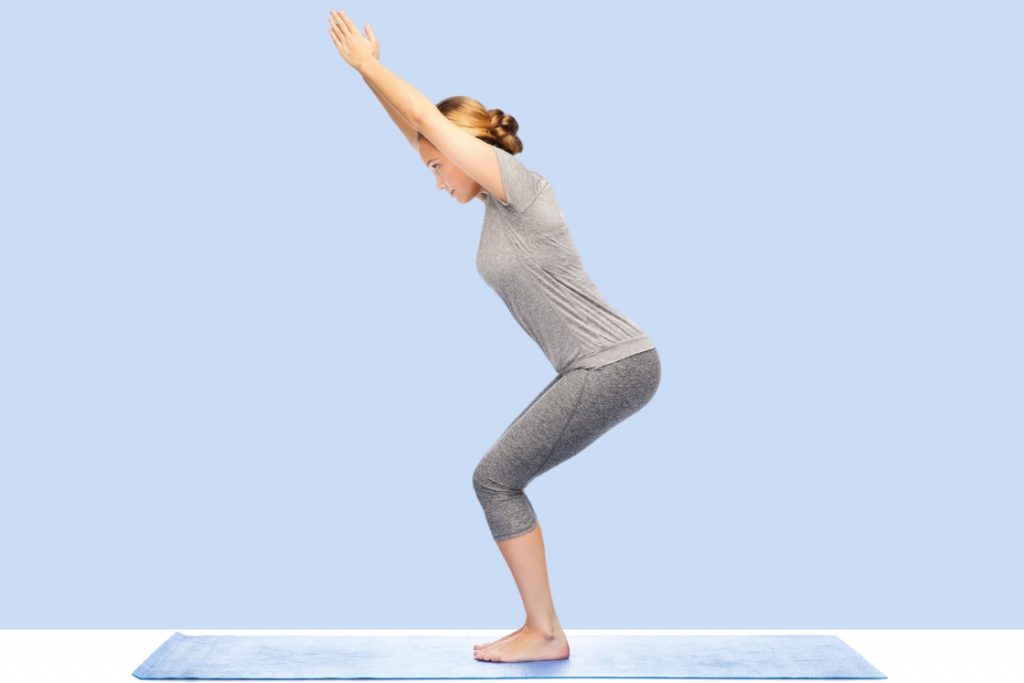
Chair pose is nothing but a squat. The squat will put prolonged and sustained tension on your Plantar Fasciitis ligament and your foot.
Utkatasana will improve the nerve functions in your foot, and increase the capacity of the foot ligaments to withstand tension. It also increases the strength of the supporting leg muscles.
- Stand straight in a mountain pose.
- Join your hands in Namaste infront of your chest.
- Lower your body by coming down in a squat.
- Unlike, previous pose, in the chair pose you will slightly lean infront while squatting down.
- You will also prevent your knees from extending outward.
- Squat down to a point where your thighs are parallel to the ground.
- If possible hold the pose for 10 breaths, if not then 7
Modification – You can try the heel lift variant of the squat. In which you start the squat by placing your toes on the ground but giving your heels a lift of a couple of inches.
5. Warrior 1 Pose
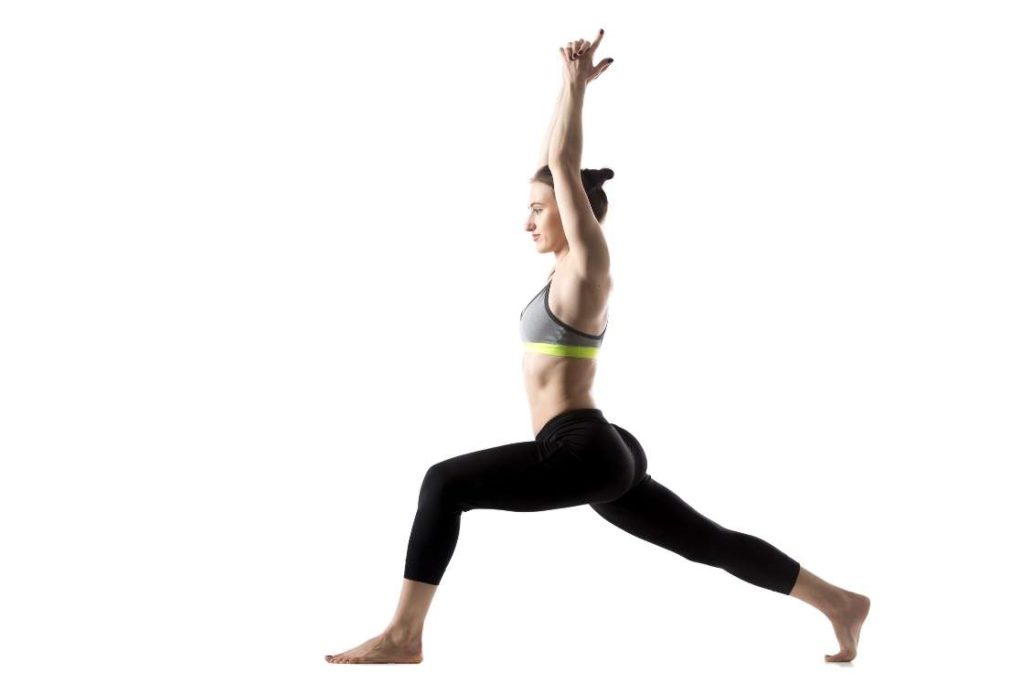
Warrior 1 pose is a strength and flexibility stretch. This pose will increase the range of motion in your foot, and increase the strength at extreme ranges. Being one of the best yoga poses to improve blood circulation in your legs, warrior 1 pose triggers tissue healing to quickly recover plantar fascia ligament.
- Stand in a mountain pose
- Set your legs wide apart, with 3-4 feet distance between them.
- Turn your right foot 90 degrees to your right.
- Lift your left foot on your toes, and revolve your left heel 90 degrees to your left.
- As you revolve your left heel, turn your torso and upper body 90 degrees to the right.
- Place down your left heel on the ground.
- Now lunge forward, shifting your bodyweight towards your right leg.
- A nice stretch should be formed in your left leg.
- Keep your body centered, don’t lean on your right leg.
- Lunge to a point where your right lower leg and right heel is at 90 degrees with the ground.
- Raise your hands overhead, and join them in Namaste.
- Hold the pose for 10 seconds.
- Repeat the pose by changing the leg roles
Modification – Since you already have a bruised Plantar Fasciitis, it is advisable to perform a warrior pose with supports on either one or both sides. So that you can gently feel the pressure and accordingly adjust the tension of the lunge.
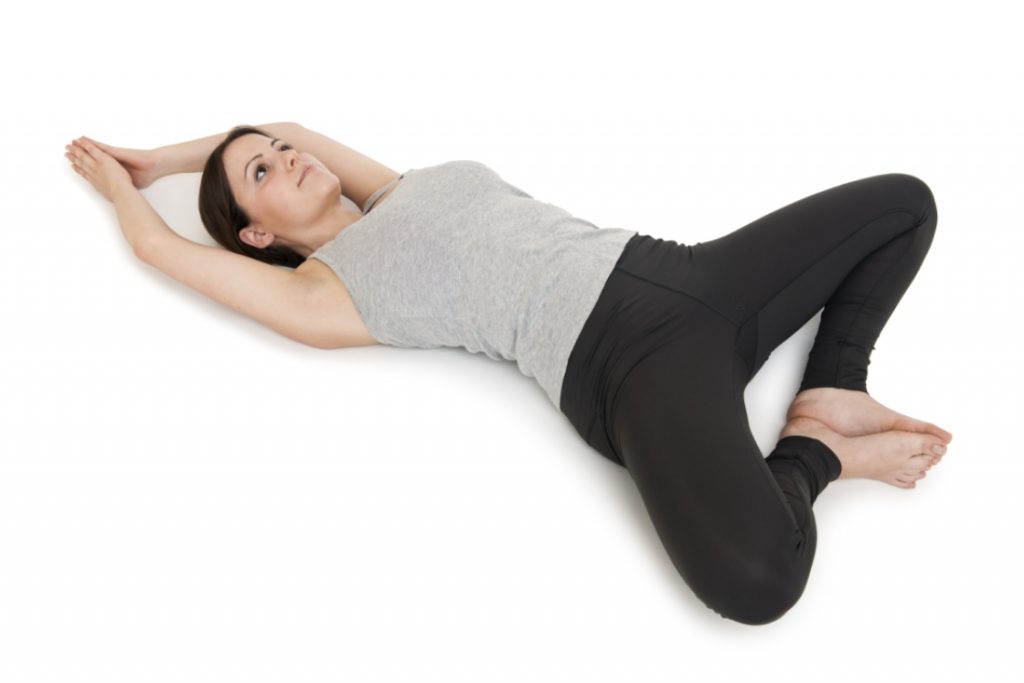
6. Reclining Hero Pose – Supta Virasana
Reclining hero pose is a double-edged sword. It’s a restorative pose for your abdomen, chest, and lower back. However, for your knees, hamstrings, quads, calf muscles, ankles, and feet, it’s an intense stretch. This Pose will increase the stretching ability of your entire leg. Which will further reduce the damage to your Plantar Fasciitis.
- Kneel down on the floor.
- Keep your legs hip-width apart.
- Keep your upper body straight, spine erect.
- Bend your knees, fold back and sit between your feet.
- Now hold the ground and gently recline back.
- Recline back by maintaining the arch in your lumbar region.
- Lie back all the way till your shoulder blades, shoulders and head rests on the ground.
- Keep your hip and lower back off the floor.
- You can keep your hands above your head or by the sides of your body.
- Breathe and rest in this pose for about 10 seconds
Modification – If the pose comes naturally to you, then it’s fine. Otherwise, use a bolster behind you to recline on, and a folded blanket between your feet to focus on.
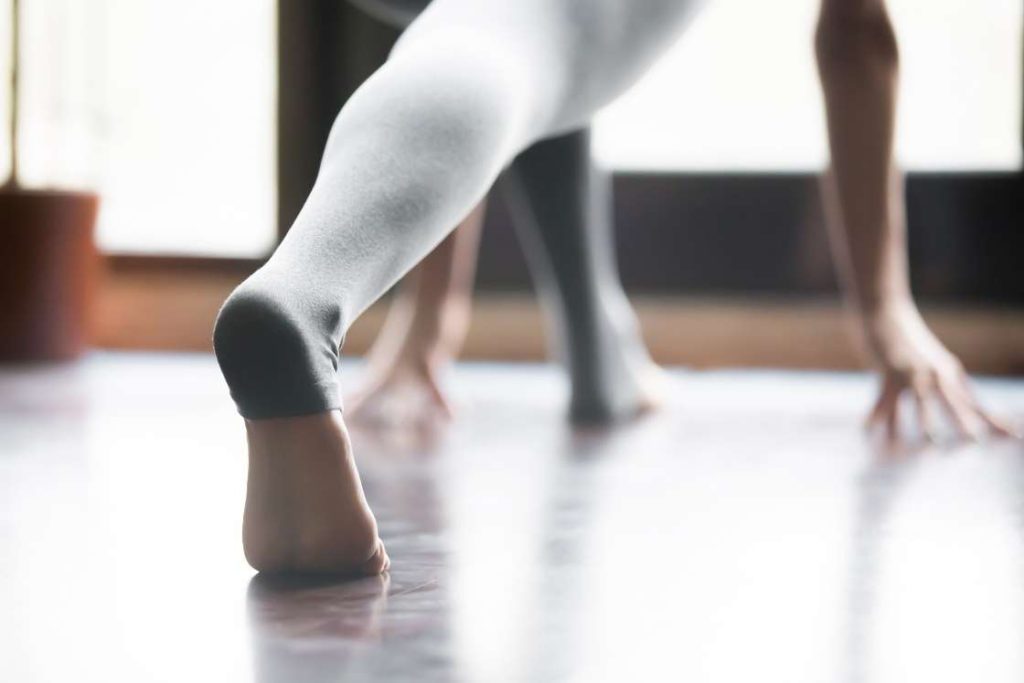
7. Downward Facing Dog
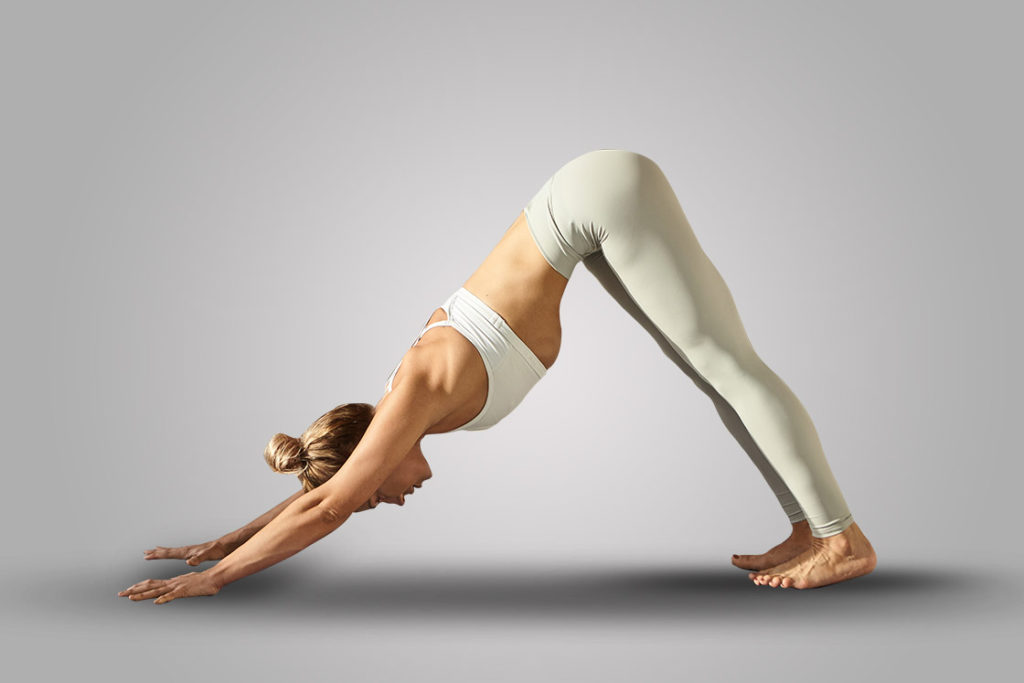
Downward facing dog pose is the most complete exercise for your entire musculoskeletal and nervous system. With this exercise, you can easily expect the flexibility, stability, and strength to increase in your foot and other parts of your lower body.
- Get down on all fours, your knees, and hands.
- Keep your legs hip-width apart.
- Keep your knees exactly below your hips and wrists right below your shoulders.
- Push against the floor and push upward and backward with your buttocks.
- Push back till you can straighten your legs and place the heels on the ground.
- Straighten your hands and stretch your shoulders and upper back.
- Push your chest downward, feel the curve in your lumbar region, and push your butt even further back.
- Don’t hold the pose very long if it hurts, just the stretching is fine.
- However, if your strength permits, hold it for 5 breaths
Modification – To reduce the chances of injury, you can keep a slight bend in your knees. And keep your heels elevated by placing them down on a yoga block.
8. Wide-legged Forward bend
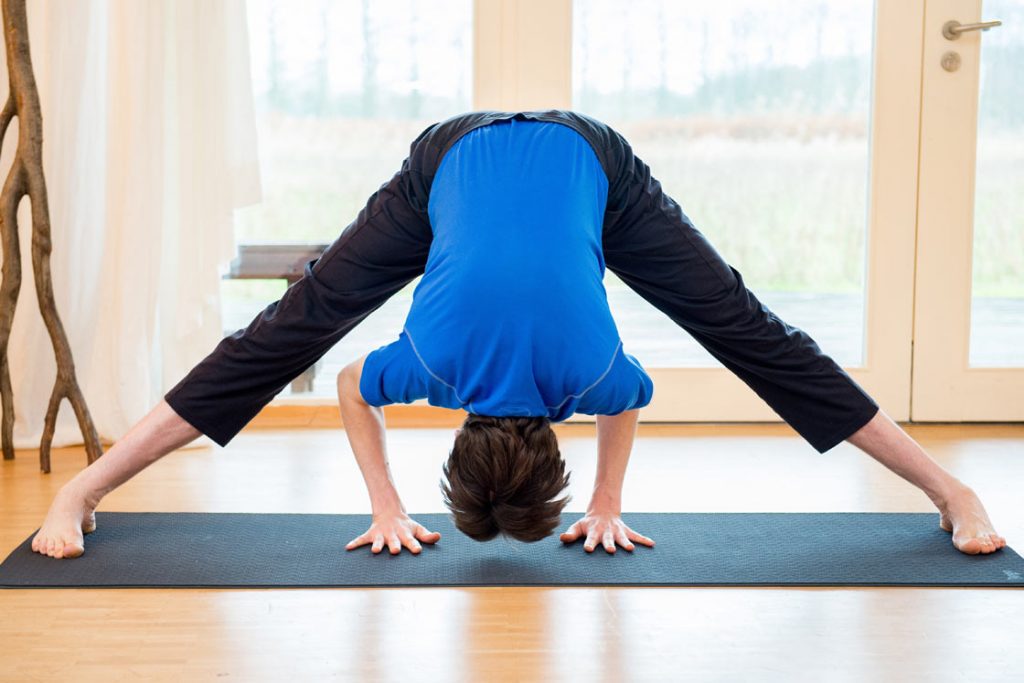
The wide-legged forward bend pulls your foot muscles and ligaments in a two-directional pull; sideways and upwards. This pose will prepare your Plantar Fasciitis for situations that pull your leg ligaments at unusual angles. Wide-legged forward bend is also quite effective in increasing tissue healing and waste detoxing.
- Stand in a mountain pose.
- Set your legs wide apart, by 3-4 feet.
- Now break your body from the groin and bend your body downwards.
- Bend till you can touch the floor, but do not bend your knees.
- If you are unable to bend all the way down, don’t force, especially not by bending the knee.
- Keeping your knee straight is compulsory for the benefit of this pose.
- Hold your pose 5-7 breaths and release.
Modification – On your hold, you can gently massage your calf muscles, this will increase the blood flow to your foot during the pose. You can also try a repetition variation of this pose. Where you hold the pose for just 2-3 seconds but repeat the pose 5-7 times.
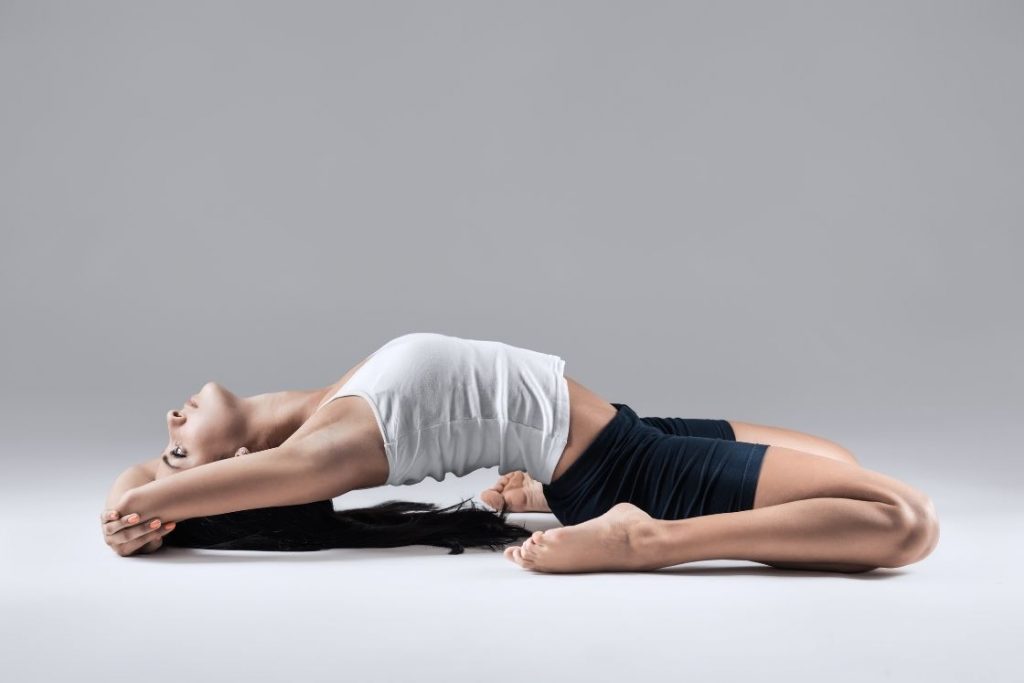
9. Reclining Bound Angle Pose – Supta Baddha Konasana
Reclining Bound angle pose is a restorative pose for your lower body. While most poses will pull, stretch, twist, and compress your Plantar Fasciitis, you will need a couple of poses to rest. After all healing is triggered by the right balance of exercise and rest. Reclining Bound-Angle will reduce the inflammation and stiffness of your heels.
- Sit in a staff pose.
- Bend and fold up your knees.
- Keep your legs joined.
- Now open your knees to their respective sides, and let them fall toward the floor. However, do not let your knees touch the floor.
- Keep your knees about 3 inches off the floor
- Join the soles of your feet together, and clasp your hands around them.
- Lean your body slightly forward, but keep your spine erect and shoulders pressed down.
- Hold this pose for 5-7 breaths and then start reclining back.
- Reclining all the way back, and resting your back on the floor. But keep your legs bound the way they were.
- Release your hands and extend them by the sides of your body and relax.
- Rest in this pose for about 30 seconds.
Modification – As your legs are bound and knees hold themselves off the floor, the tension will pull on your feet and groins. You can reduce the impact of this pull by placing a yoga block under each of your knee.
10. Legs up the wall Pose
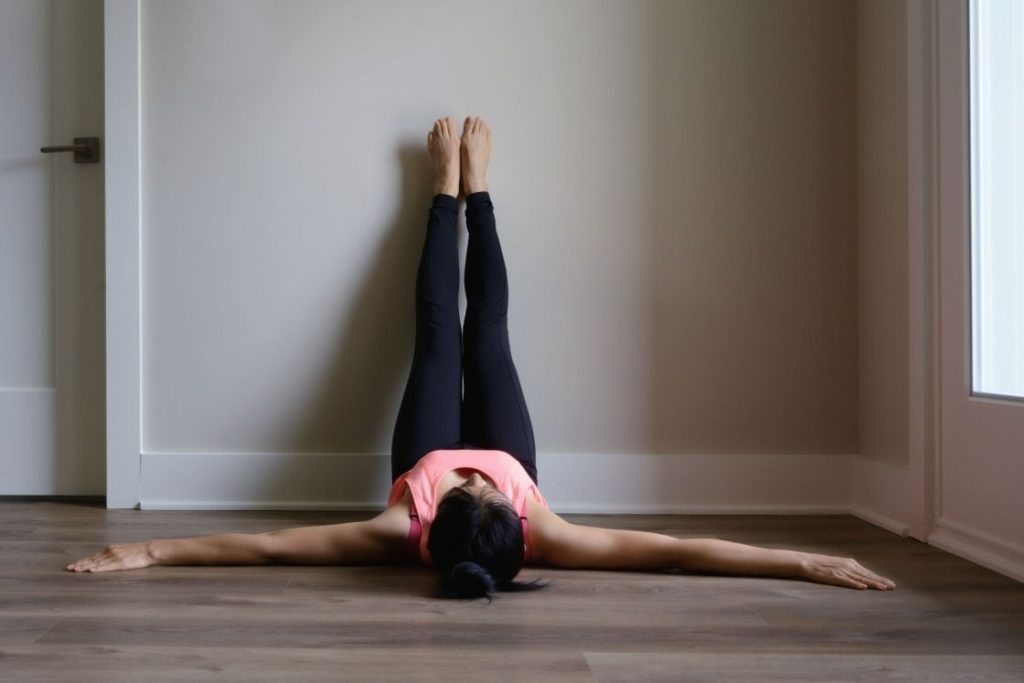
Legs up the wall is the other resting pose apart from the Reclining Bound-Angle pose. Legs up the wall will relax your leg muscles, and reduce inflammation and stiffness. Legs up the wall will also encourage the deoxygenated blood in your veins to flow back, which will boost toxin clearance from your legs.
- Sit against the wall, with your right side to the wall.
- In one clean motion, roll over and lie with your back to the floor, and legs up the wall.
- Extend your arms to the sides of your body.
- Stretch your legs against the wall.
- Adjust your position, to ensure that your sitting bones are exactly over the floor-wall intersection.
- Relax and breathe.
- Walk your legs up and down the wall if that makes you feel good.
- As you walk your legs, you can bring in your hands and push against your hip to lift it up.
- Continue pushing your hip, and walking up the wall, for a partial supported shoulder stand.
- Relax in this pose for 30 seconds
Modification – As you simply rest, focus on your feet. Stretch your toes upward and downward, rock this back and forth stretching for a few times. You can even put a strap around the ball of your toes and pull down your foot, for an extra stretching.
Who is at the risk of Plantar Fasciitis?
Plantar Fasciitis has a tough job to maintain. It acts as a shock absorber for your foot; absorbing the shock of your entire body weight. Thus any lifestyle with increased pressure on the ligament can cause the injury, which is often called Policeman’s heel.
Obesity, jobs that require long standing hours, long-distance runners, many sportsmen and dancers commonly face this issue. Plantar Fasciitis is the most commonly reported orthopedic issue.
Exercises to avoid with bruised Plantar Fasciitis
Exercises in general cause some degree of wear and tear to your body tissues, especially the parts involved. However, this very process kills damaged cells and then with rest triggers, the regeneration of healthy cells in their place. However certain exercises can prove counter-productive in injury healing. As such exercises will cause a great degree of wear and tear. Even sufficient rest will find it overwhelmingly difficult to heal.
In case of bruised Plantar Fasciitis as well, you will come across certain yoga and exercises that will prove counter-productive. You need to stay away from such exercises and yoga poses. You will need to avoid exercises that put extreme pressure on your Plantar Fasciitis, these include running, jogging, Weight-lifting, jump squats, leg presses, and leg intensive power and rocket yoga.
: How to Do, Benefits & More")

: How to Do, Benefits & Variations")

