Yoga is a powerful mind and body practice that can help golfers build strength, balance, and body control. While many associate yoga mainly with flexibility, golf demands much more especially agility, which is the ability to move quickly and smoothly across different planes of motion.
For golfers, yoga improves not just mobility, but also focus, coordination, and muscle recovery. When practised consistently, it helps build a body that can rotate efficiently, stay grounded during swings, and avoid injury over time.
How yoga benefits golfers?
Yoga trains the muscles, joints, and nervous system to support the kind of agility and control that golf demands. With regular practice, your muscle tissues become more responsive to shifts in tension and angle helping you generate a stronger and more consistent golf swing.
It also increases body awareness, which is key to maintaining correct posture and alignment during your swing. According to research, golfers who practise yoga may notice measurable improvements in swing mechanics and control.
In addition, yoga includes spinal stretches and balance-based postures that enhance motor coordination and hand-eye accuracy. Certain yoga sequences also serve as low-impact cardio, helping to build endurance and keep your energy levels steady throughout your game.
Understanding the biomechanics of the golf swing
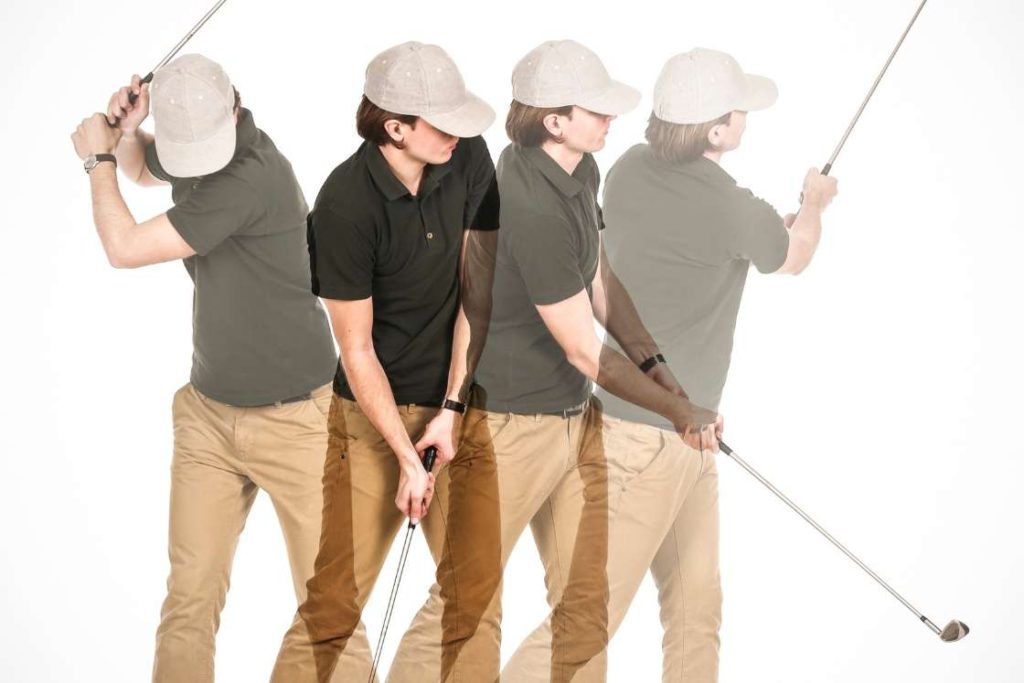
A basic understanding of golf swing biomechanics helps identify which muscle groups and movement patterns to focus on during yoga. By addressing these areas, yoga can help improve swing mechanics and reduce the risk of injury.
The golf swing can be broken down into four key phases: backswing, transition, downswing, and impact. Each phase activates specific muscles and requires precise coordination.
1. Backswing
At the start of your swing, your body is relaxed but primed to move. As you initiate the backswing, weight shifts to the back leg. This movement engages the glutes, hamstrings, and hip stabilisers. These muscles begin building tension, storing potential energy much like a spring.
2. Transition
As you move from backswing into the downswing, the core muscles, especially the obliques, lower back, and front-side hips, take control. This transition phase transfers stored energy into the front side of the body, setting the stage for an explosive downswing.
3. Downswing
In this phase, the focus shifts to the quads, calves, and abdominals, along with active support from the chest and arms. These muscles work together to convert potential energy into kinetic energy, allowing for a strong and controlled release of power.
At the point of contact with the ball, the shoulders, upper back, and arms are fully engaged. After the stroke, these same muscles help absorb recoil shock, stabilising the body as the motion completes.
Understanding these phases allows golfers to target specific muscles through yoga enhancing mobility, core strength, and rotational control essential for a powerful and injury-free swing.
Best yoga poses for golfers
Yoga for golfers focuses on improving mobility, strength, and body control especially in the shoulders, spine, hips, abs, and thighs. To support your golf swing and avoid injury, each area needs to be trained in two ways:
- Strength training
- Flexibility training
Here are the most effective yoga poses for golfers, with instructions and benefits:.
1. Eagle Pose (Garudasana)
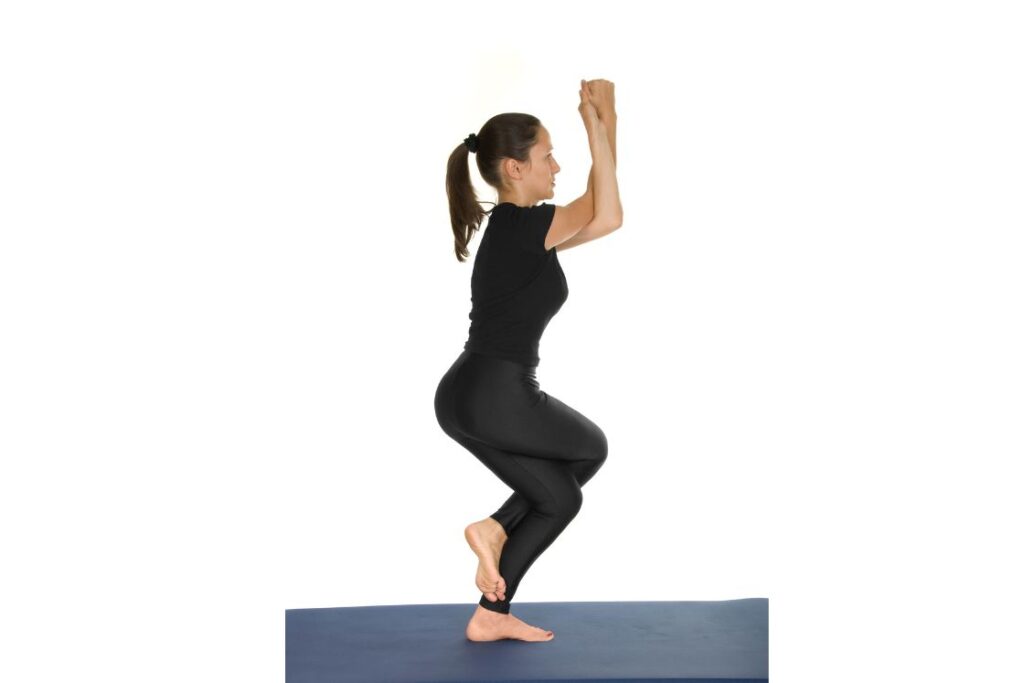
In golf, the maximum kinetic energy is transferred out of your body through your shoulders. Eagle pose (garudasana) stretches your shoulders and upper back for extreme golf flexibility. This pose will also add balance to your muscles. Your thigh muscles will also greatly benefit from this pose.
- Stand in mountain pose and extend your arms Infront, straight.
- Now bend your knees to get into chair pose.
- Take your right leg over your left knee, and hook your right foot behind your left calf muscle.
- Now bend your elbow and point your fingers upward; open palms facing you.
- Cross your elbows by placing your right elbow over your left elbow.
- Now pull back your left palm, and lock your hands by placing your right hand over your left hand.
- Breathe steadily, and hold the pose for 5-10 breaths
The eagle pose can also have a seated variant where the hand posture remains the same, and you are seated on a chair. This will be useful if solely wish to focus on stretching your shoulders and upper back.
2. Crane Pose (Bakasana)
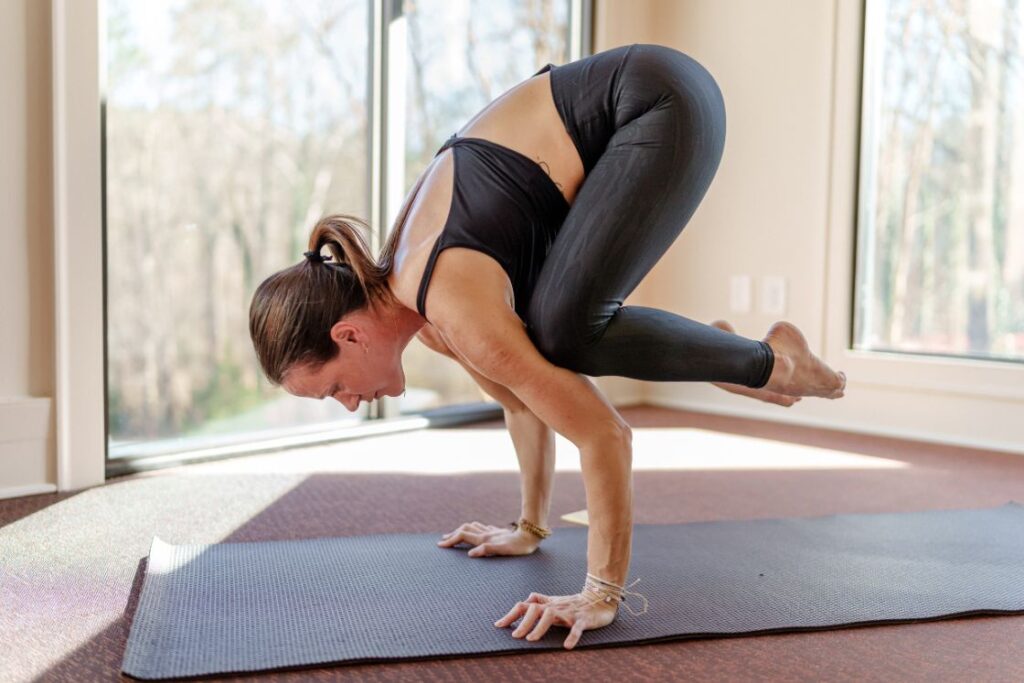
Crane yoga pose is mainly for golfers’ elbow, upper body, and shoulders strengthening. This pose will take some practice, but once you manage the intensity of muscle tension involved, your upper body will get explosive power that helps to take golf’s recoil hit.
- Sit in a squat over a yoga block
- Unhinge your knees and pull up your thighs, putting your buttocks up in the air and upper body downward.
- Place your hands firmly on the floor with open palms.
- Straighten your hands and rise up on your toes.
- Pull up your buttocks further up.
- Look forward, and don’t sink your neck in your shoulders.
- Now lean forward and let your knees rest on your triceps, or little bit higher toward your armpits.
- Lean on with your weight, lift your toes off the yoga block and balance your bodyweight on your hands.
- Hold your pose for 5 breaths.
The crow pose might need a little getting used to. So practice lifting up one toe at a time for few days, and then attempt lifting both toes up. This warm-up is advisable especially if you have a weakness in your hands.
3. Supine spinal twist
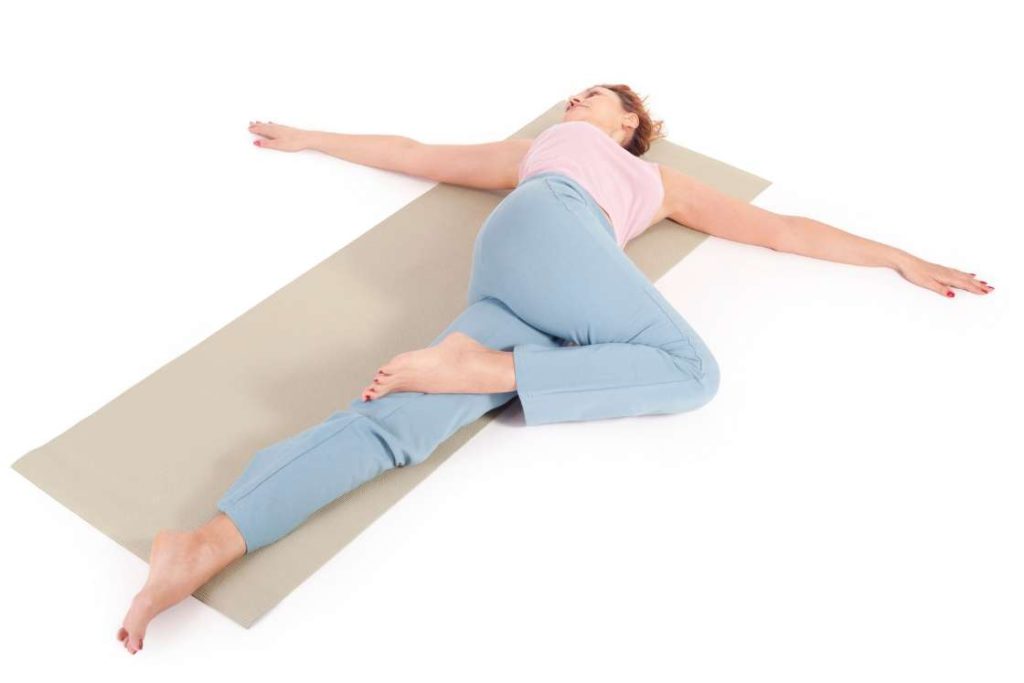
An improper spine twisting training is often the cause of lower back injury of golfers.
Supine spinal twists promote both relaxation and flexibility to the golfer’s spine; especially in the lower lumbar region. This yoga pose will make the spine comfortable even at the extreme end of the spinal twist. It also stimulates the nerve network along the spine.
- Lie supine on the floor
- Extend out, straight, both your hands toward your right and left.
- Fold and bend your right knee.
- Take your right leg over your left leg, and place your right foot next to your left knee. Keep the right heel pressed against the left knee
- With your left hand pull your right knee down to your left towards the floor.
- Gently keep pulling and increasing the twist in your spine, till your right knee touches the floor.
- Keep your right shoulder and hand extended out toward your right.
- Hold your pose for 5 breaths and repeat the twist on the other side.
Don’t force your knee to touch the ground if it naturally doesn’t reach. If your spine resists, it means it’s not flexible enough. It is okay to go halfway initially.
4. Downward dog twist
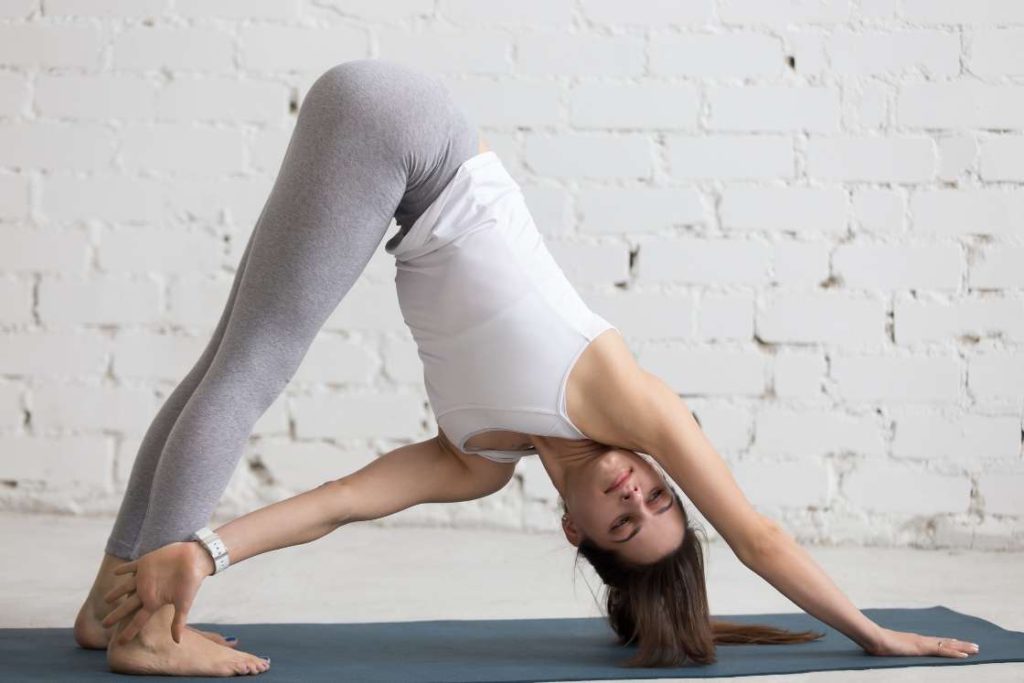
Downward facing dog aims to establish strength in your spine. The normal downward dog in itself makes your overall body muscles agile, but the added spinal twist allows your spine to withstand greater pressured twists.
- Obviously first get to a downward dog position.
- Now, push your chest nicely towards the floor, and ensure your shoulder blades are nicely pressed in.
- Now make the grip in your right hand firm, and proper find the balance in your right shoulder.
- Lift your left hand and hold your right thigh.
- Make sure your hip is not pulling out to the right.
- Gradually bring the twist in your torso, upto to your middle back, by bringing down your left hand from holding the right thigh to right ankle.
- Breathe steadily for 5 breaths, and return to regular downward dog.
- Bend your knees and relax for 10 seconds and stretch back to downward dog and repeat the twist to your left.
Since we are focusing on the spinal twist for this pose, you need not touch the ground with your heels like in a regular downward dog. Also, you can keep a subtle bend in your knee. For this variant of the downward dog, focus more on your upper body form.
5. Bridge Pose (Setu Bandhasana)
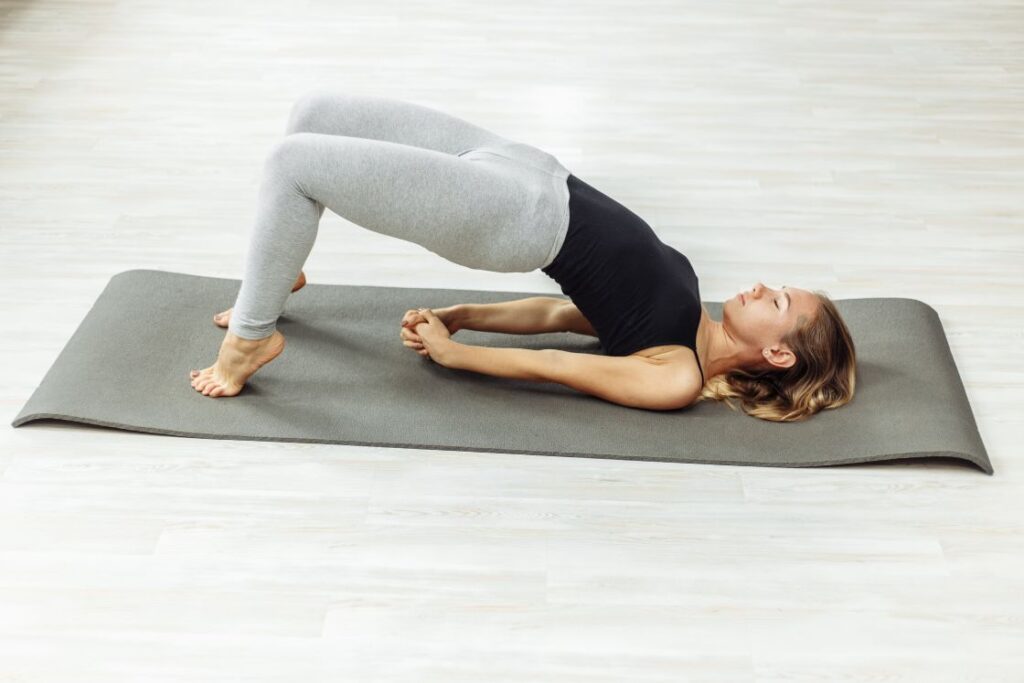
This yoga pose will be your go-to golf flexibility exercise for the hips, abs, and thigh muscles. The bridge pose will also teach you better control over your glutes. The bridge also nicely opens up your cardiovascular spaces for better performance.
- Lie supine on the ground. Keep your hands straight along the sides of your body.
- Bend and fold your knees, and bring your feet closer to your groin.
- Knees pointing upward.
- Now press down with your hands, feet and shoulder blades, and pull up with your hips, abs, thighs and glutes.
- Pull your pelvis and naval region as high as possible.
- Use your hands to support your hips, and push your hips to enhance the stretch.
- You chest should come on to your chin.
- Keep your muscles engaged to hold the pose.
- Breathe steadily for about 7 breaths and release the pose
Do use a yoga block right below your tailbone to support your hold, With this support, you will be able to increase the hold duration, and thus the benefits, without risking an injury.
6. Reverse table top
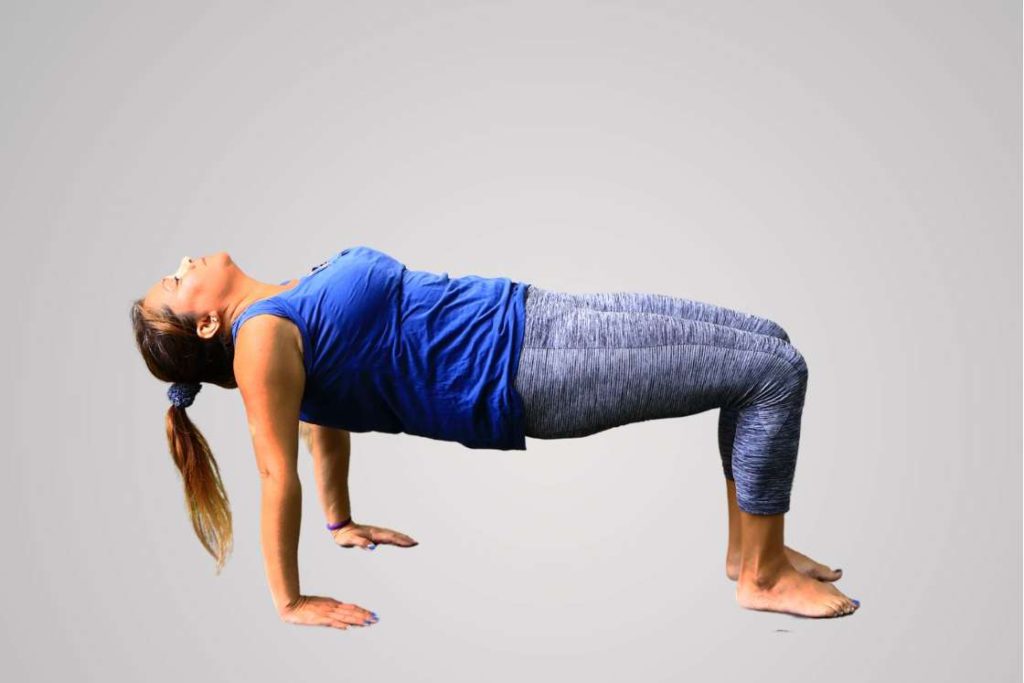
This modified variant of the tabletop pose is hardwired to train your lower body muscles for strength. All of your leg muscles, hip flexors, lower back muscles, and abs will be significantly upgraded to face sudden changes of motion and pressure.
- Sit in a staff pose.
- Place your hands by the sides of your sitting bones.
- Bend your knees and pull your feet closer to your groin.
- Keep your legs hip length apart.
- Maintain about 2-2.5 feet gap between your heel and sitting bones.
- Engage your leg muscles, hips, abs and lower back, and lift your pelvis up in the air, forming a table top formation.
- Your body, from your shoulder to your knees should be in one line parallel to the ground.
- And feet should be right below your knees.
- gently arch your head backward.
- Lift your right leg, and place the right foot on your left knee.
- Take 5 breaths and return to table top, and then put your left foot on your right knee, and hold the pose.
If the tension build-up gets too much, after practicing one leg, leave the entire pose. And start from fresh to repeat the pose on the other leg.
Poses for golfers to heal the body – Finally, irrespective of the injuries you have sustained, it is always advisable to go through a couple of restorative poses. Apart from healing pre-incurred injuries, these poses will deal with micro-injuries to tissues, that result from strength-building exercises. Healing poses will also help with your body awareness and stress management.
7. Tree pose (Vrikshasana)
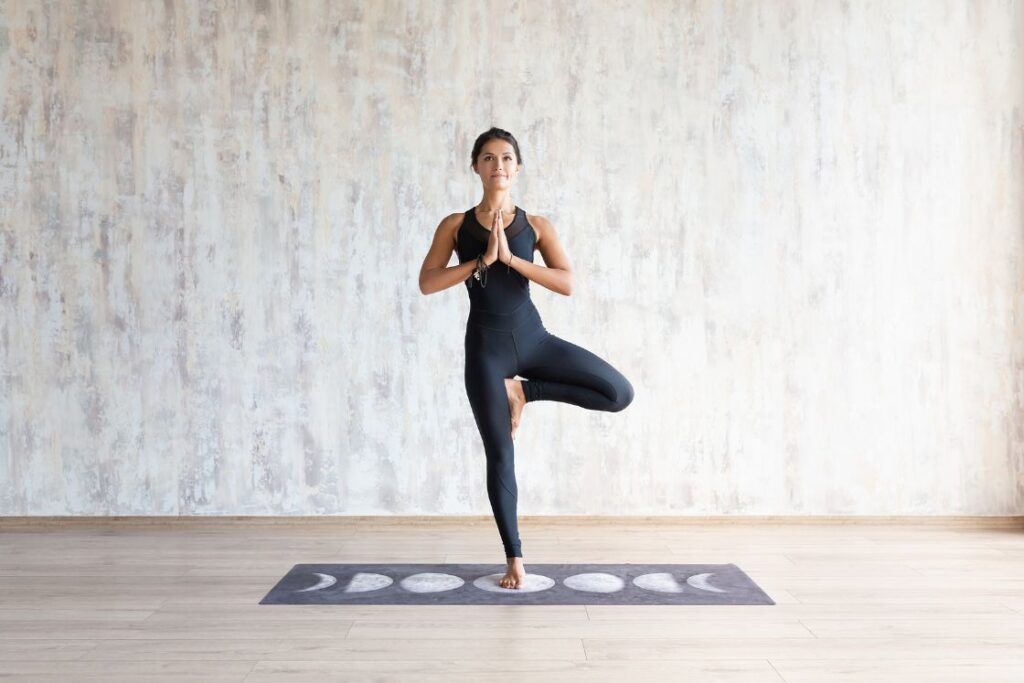
The tree pose brings balance to the overall bone strength and muscular system of golfers. It also heals minor injuries to your spine. The tree pose is best suited to enhance your body posture and awareness. Finally, it will also increase your concentration and blood circulation.
- Stand in a mountain pose.
- Your legs hip length apart, shoulders down, palms open pointing downward, hand by the sides of your body and spine erect.
- Gently shift your weight to your right leg and lift up your left foot of the ground.
- Bring up your left foot towards your right thigh, and rest it against the right thigh.
- Keep your body erect and balanced on your right leg.
- Put your hands over head and join the palms in a Namaste.
- Be conscious of your body to keep the right posture.
- And don’t overexert your muscles to hold the pose, engage just enough to maintain the balance.
- Stay in this pose for 30 seconds. Go upto a couple of minutes if possible.
- Practice balancing on left leg.
Strength will not be an issue with this pose, however, balance will be. Be patient and use a wall or chair initially for beginner’s support.
8. Child pose (Balasana)
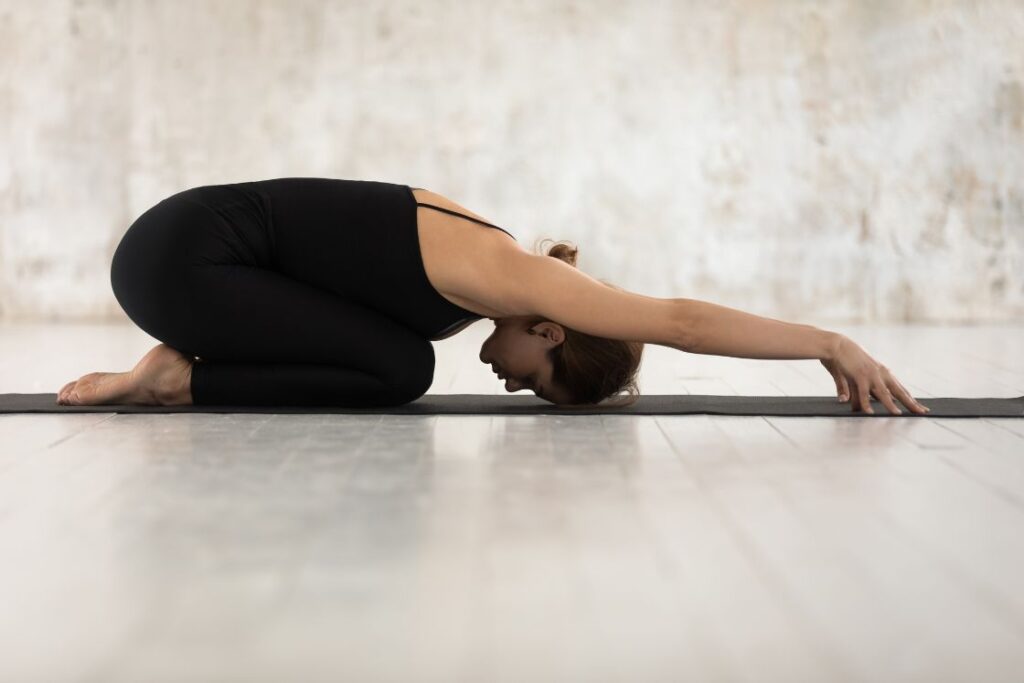
The child pose is a resting pose. It will loosen all muscles in your body, enrich them with nutrition and fresh oxygenated blood. The pose will also rest your abs, shoulders and hip muscles.
- Get down on all fours
- Keep your legs hip length wide and hands shoulder length. Naturally your wrists should be below your shoulders and knees below your hips.
- Now keeping your hands stuck to the ground, move back and sit on your heels.
- Let your upper body and abdomen press down on your thighs as a result.
- Bury your head down.
- Stretch out your hands to increase the stretch in your shoulders and upper back.
- Breathe steadily and hold your pose for 10 breaths.
This is one of the most injury-free poses in yoga, so support is something less likely you will need. You must focus on the breathing of this pose for maximum relaxation. You need to breathe consciously till the lower back of your spine, causing your lumbar region to puff up in a dome shape.
Yoga prevents golf injuries and increases power
The golf swing may appear simple, but generating power from such a subtle motion requires significant muscular effort. This intense demand puts key muscle groups especially in the lower back and core at risk of overuse or injury. In fact, the golf swing is a leading cause of lower back injuries among golfers1.
This is where yoga becomes a powerful supplement for golfers. Yoga not only helps prevent injuries, but it also enhances athletic performance across all levels of sport. Through specific poses, yoga strengthens and stretches the muscles involved in golf, keeping the body agile, aligned, and balanced.
Take Eagle Pose (Garudasana) as an example it builds shoulder and upper back flexibility, relieving tension while improving range of motion. On the other hand, Crane Pose (Bakasana) strengthens the same areas, helping you absorb the force of recoil after a strong swing. This combination of flexibility and power creates the agility every golfer needs.
Bridge Pose (Setu Bandhasana) targets the hips, thighs, and abs, building the stability and core strength essential for swing control and posture. Over time, these poses also reduce joint strain and improve overall movement efficiency.
The spine is especially vulnerable in golf due to the repetitive twisting involved in each swing. Yoga poses like the Supine Spinal Twist and Revolved Chair Pose train the spine to rotate safely and develop strength in the surrounding muscles helping to prevent low back pain and stiffness.
Even if you’re dealing with sore muscles or minor injuries, restorative yoga poses can help. These gentle postures support recovery by improving circulation, releasing tension, and maintaining muscle suppleness without putting strain on the body.
Conclusion
Golf is considered a minimum injury sport, but that’s just theory. In practice there are million ways one could go wrong. And since, it’s a sport afterall, it is only wise to follow it up with supplementing exercise, diet and rest.
After having gone through all details and pose of how yoga interacts with golf, there must be one final question lingering in your head. When to practice yoga for golf?
The answer is quite simple. The flexibility poses are something you can practice as a warm-up to your game. And post-game, you can cool down your body with restorative poses. The strength poses on the other hand are better practiced on days you are not playing. On your rest days, you can practice only your restorative yoga poses.
