Yoga for abs is an option that is increasingly considered by more and more people, as time passes. The reason behind it is quite simple, yoga poses are holistic and harmless. Well, they can cause difficulties if you fail to follow appropriate steps, but that is the case with any exercise.
Abdominal muscles or as we know it, Abs, have a more important functionality than we often realise. Abs are a group of four different types of muscles that build your abdominal region.
Anatomy of Abdominals
The muscles on the sides of the upper stomach, two bands of muscles that run from our breastbone down to our pelvis (these muscles give us the iconic six-pack / eight pack look), muscles on the sides of the lower abdomen and the inner abs, that run below all the muscles from side to side.
As you can understand these muscles build the core strength of our upper body. Apart from different physical movements and protection, these muscles are responsible for things as basic as, breathing and healthy abdominal functioning. So you can only imagine why healthy abs are so highly desired. Abs are not just about looking fit, but being fit, as well.
Well if you are wondering how to make your abs, then do not forget they are just muscles. And like every other muscle they need nutrition, exercise and rest. Now, this brings us to the question; how effective yoga is in building abs.
How yoga can help build abs?
The stretches and twists of yoga poses are just perfect to flesh out your abs. Every yoga and workout you practice will not just work your abs but improve your abdominal functions as well. Which means better nutrition for your ab muscles. Further, you will not be lifting any weight so injuring or scaring your muscles is less of a possibility.
Now there is a misconception related to yoga that building abs with yoga is very physically exhausting, beyond the league of beginner practitioners. Well, this is simply not true.
There are yoga poses at every difficulty level to work on your abs. Did you know simple breathing exercises like pranayama can help you build your abs? But then again there are also certain poses like the cat pose crunches, which will take you quite some time to perfect.
What you need to understand is that you already have your ab muscles, all you are going to do is improve their quality and grow new tissues of the existing muscles. So even the beginner yoga exercises for abs will help you at this task. But if you desire the picture perfect pack of abs, then you will gradually have to move up the routine, from beginner to intermediate and then finally to advanced.
Beginner yoga poses for abs
Tree pose, lying leg raise and planks, together will give you a wonderful yoga ab workout. This routine will make your core strong and balanced. You will find yourself doing daily physical tasks with much ease, and concede very little damage to your tissues. You will also be able to grow new tissues after a considerable period of time. And of course, you will be ready for the intermediate level of yoga for abs.
Practice this beginner yoga routine to start building your abs;
1. Kapalabhati Pranayama
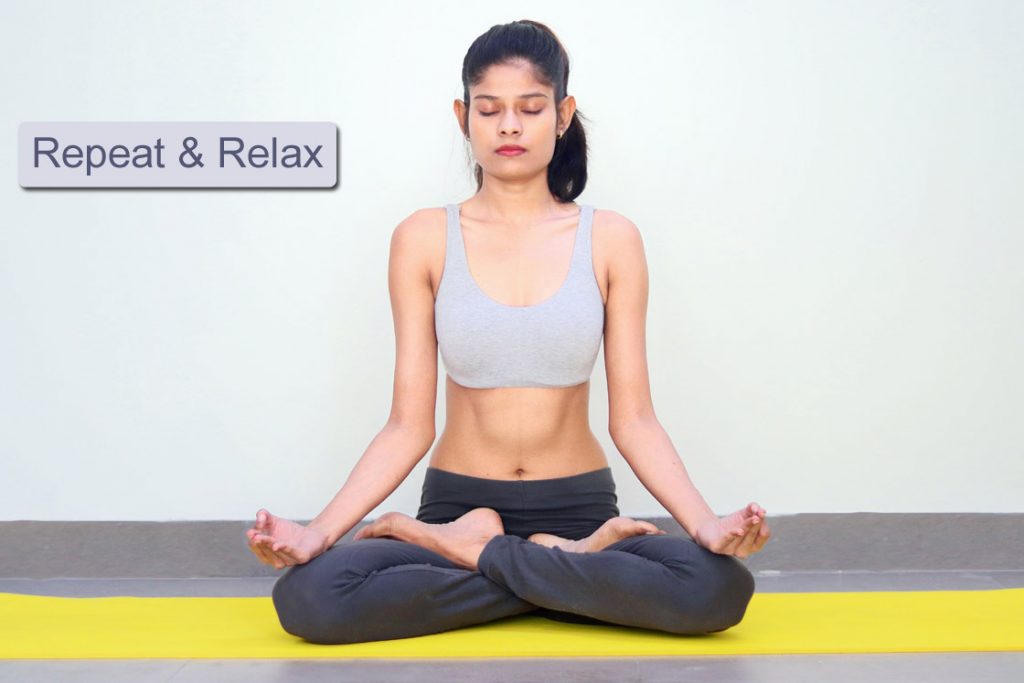
However, not a yoga pose, but Kapalabhati Pranayama is a breathing exercise of yoga that is a great workout for abs building.
It includes swift contraction and relaxation of your abdominal muscles. These contractions in general are a very good yoga exercise for abs. This process will loosen up the tissues and make them flexible for the core building exercises to follow.
Needless to say, the breathing pattern of this Pranayama will also enrich your body with oxygen, and rush fresh blood to your body muscles.
- Sit in a comfortable cross-legged position. Opt for a chair if you have a knee or other similar leg injury that restricts a cross-legged posture. If not, prefer a cross-legged position.
- Keep your upper body and head straight. Nicely open up your shoulder blades.
- Now place your right hand on your abdomen and take a deep breath in. Keep your left hand on your left knee.
- Now make quick successive exhaling breath spurts. Make as many as you can comfortably, but gradually increase the number to 20.
- Make these spurts specifically by swift contraction and relaxation of the abdomen muscles. With your right hand on your belly, you will be able to feel the movements of your muscles.
The muscles movements and exhalation spurts are the focus of this Pranayama. You need not worry about the inhalation, that will happen naturally every time you relax your abs.
2. Tree pose
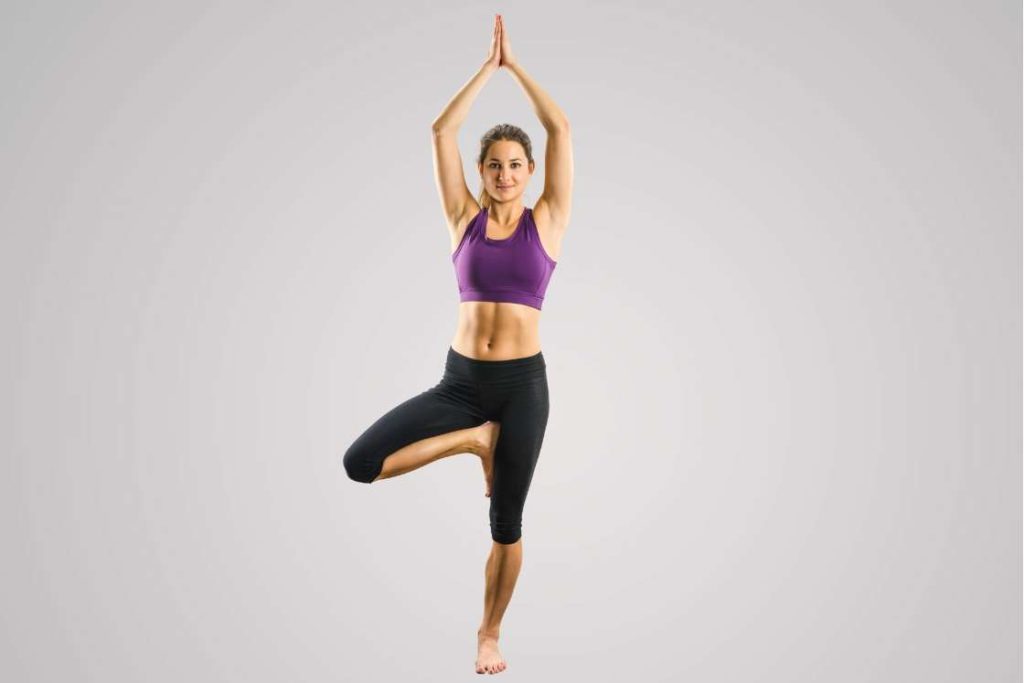
After Kapalabhati, you move on to the tree pose to balance your abs.
Tree pose might seem like a yoga pose for your legs, but it is not. It integrally requires you to balance your abs and hold your entire weight with your abs. You will of course balance your entire weight on one leg, but this balancing will be done by your abs. As a matter of fact, tree pose is a good demonstration of how activities that apparently doesn’t seem to involve your abdomen, in reality, need the core strength of your abs.
- Stand straight in a mountain pose.
- Now gradually shift your weight on your right leg.
- As you have shifted your weight, you will hold your weight with your abs, on your right leg.
- Now slowly bend your left knee and pull up your left leg.
- Support this the lift of your left leg with your left hand to remain stable.
- Rest your left foot against the inner muscles of your right thigh.
- Raise both your hands above your head and join your open palms together in a Namaste mudra.
- Stay in this pose for 30 seconds and then repeat the pose by balancing in your left leg.
This pose has a unique meditative nature to it. Continue practising this pose even when you have reached advanced levels, and you will find yourself exploring the cognitive depths of this pose.
3. Plank pose
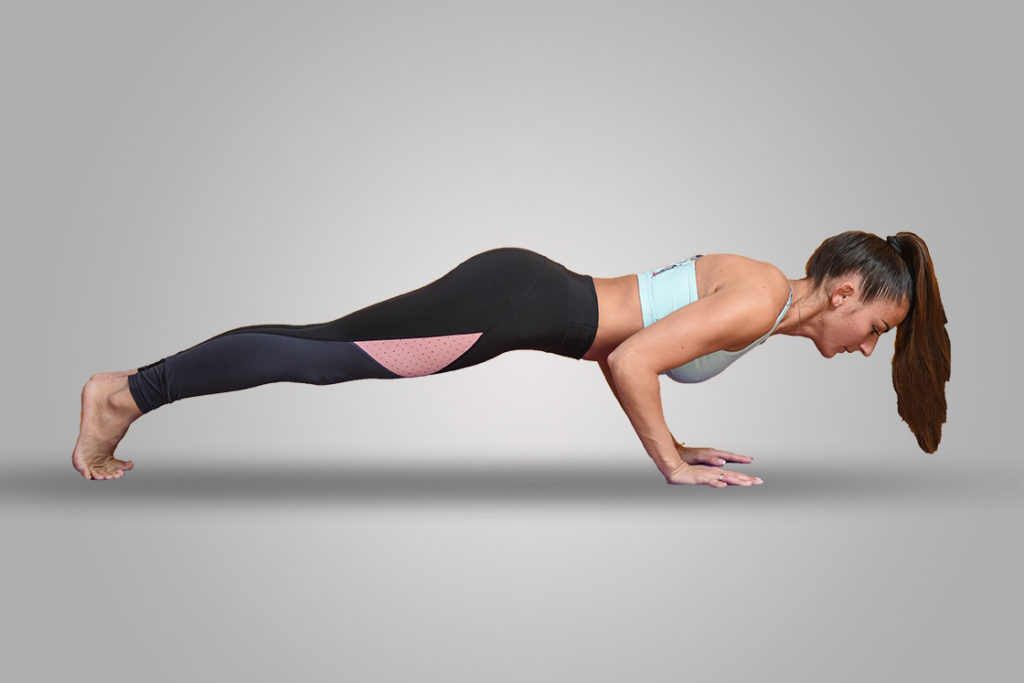
After the previous two yoga exercises for abs, your muscles will be both flexible and balanced; a condition ripe for practising strength and stamina building exercises.
Plank pose is a beginner level exercise that can be used for almost all the upper body muscles, including your biceps and arms. Plank is often a preparatory strength-building pose for intermediate poses like push-ups, dips and sun salutations.
- Lie on yoga mat in prone position.
- Keep your legs very close to each other but not touching. Rest your toes against the floor and heels toward the ceiling.
- Place your hand, with palm touching the ground, by the sides of your chest.
- Now push against the ground and lift up your body by your entire arm’s length. Rotate your arms and bicep muscles Infront and inward as you push up
- Do not use just your hands to push up your body, but your entire upper body strength.
- Now hold this position, by using your shoulders, abs and chest muscles to hold your weight. Your hands should just act as a support to keep you off the ground.
- On the contrary, if you wish to develop your arms and bicep muscles, let your hands take more of the tension.
- Hold the pose for atleast a minute. And try 3 repetitions.
As you gradually start to gain comfort with this pose, try different variations of the plank. Instead of going up your entire arms length, go halfway up and rest on your elbows, not the elbow joint, but your entire elbow. This pose is often called the dolphin plank. You can also keep switching between regular plank pose and dolphin pose on a single repetition.
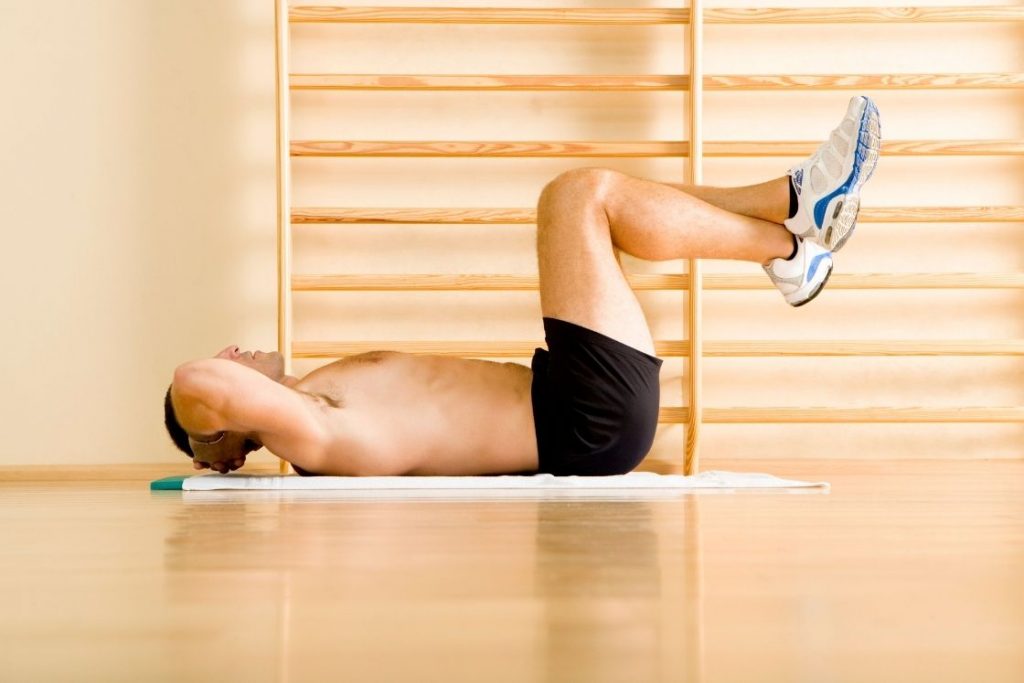
4. Lying leg raise
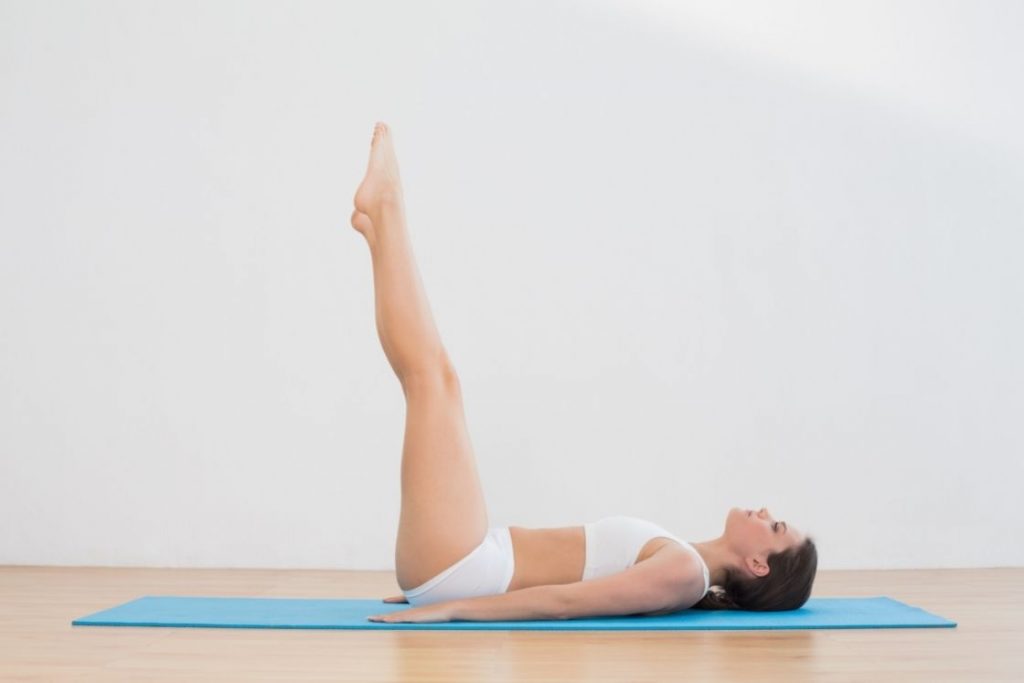
The final exercise to wrap up your beginner yoga exercises for abs will be the lying leg raise. By now you will have taken care of the flexibility, balance and strength of your abs. The final area that remains to be addressed is the toning of your abs. And that is what lying leg raise will do.
- Lie supine on the ground.
- Keep your upper body straight, and hands by your side.
- Join both your legs from thighs to feet.
- And now the exercise is as simple as just lifting both your legs, joined, by 45-60 degrees off the ground.
- Now hold the pose, as you feel tension building up around your abs and hamstrings region.
- Hold your pose for a comfortable duration, 15 seconds atleast, and then release.
- Try 3 repetitions of this pose.
This pose will mostly require the strength of your hamstrings and abdomen. If you have weak hamstrings you must not try to put extra abdomen pressure in pulling up the leg, it might injure your ab muscles. Rather support your hamstrings with your hand, but not to a degree that it reduces the due work of your abs. Also, remember this pose will have a tendency to pull up your upper body in order to counter the weight of your legs, so it will be helpful if you have an assist to hold down your upper body.
Intermediate yoga poses for abs
Once you can comfortably cruise through your beginner yoga for abs routine, it is time for you to move on to the intermediate poses.
Even as you move on to the intermediate poses, you need to continue with Kapalabhati and tree pose. The flexibility and balance they provide are foot to be valuable at all levels. Additionally, these two yoga practices within themselves have many layers of awareness, that make them worthy even at advanced levels.
This means, when you have reached intermediate level, you will have increased your muscle awareness. And when you practice Kapalabhati and tree pose with increased muscle awareness you will Achieve better flexibility and balance for your abs. Which further will act as a base for the core abs yoga workout. You are going to practice seated forward bend, side plank, revolved chair pose, boat pose.
1. Seated forward bend
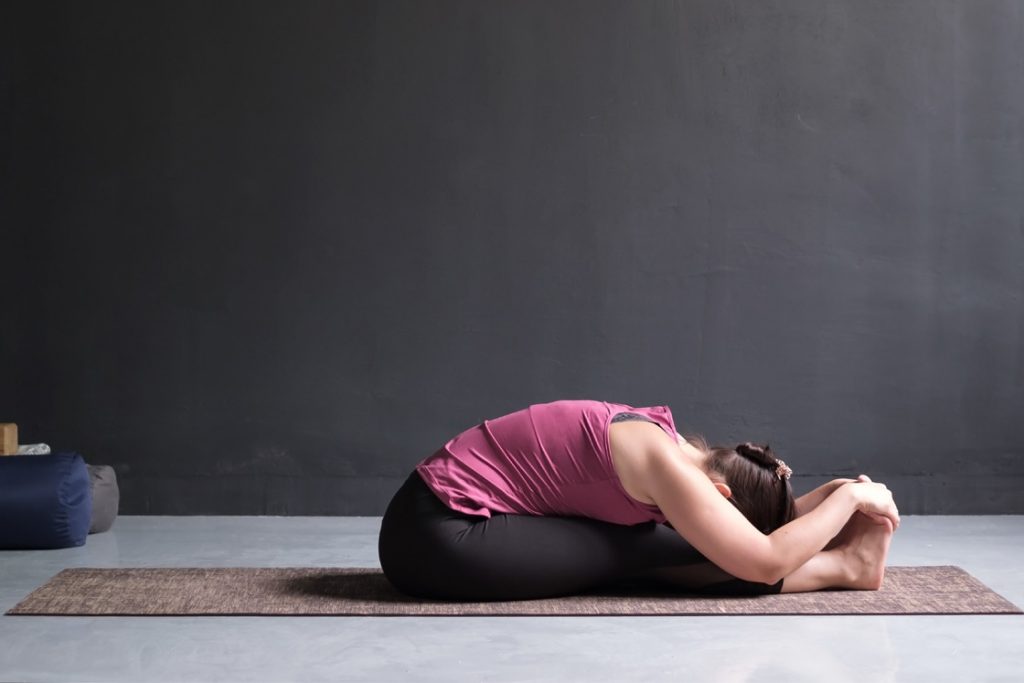
The seated forward bend is the pose you are going to start your core routine with. This pose works on your front abs and inner abs. Your inner abs are essential to your core strength and very few poses go as deep into your inner abs, as the forward bend does.
This yoga pose for abs will also help you tone your abs by chiselling out the extra bit of fat. It is also brilliant at digestive functions as well.
- At first you sit in a staff pose, with your legs stretched Infront and joined. Keep you heels pressed down against the floor and your toes pointing upwards.
- Keep you upper body firmly erect and look straight.
- Now gradually bend your upper body, in an attempt to bring your forehead closer to your knee. Ideally you should try to touch your knee, however, that comes with practice. Flexibility should never be forced, rather gradually developed.
- As you bend after a point you will have to slightly arch your spine downwards, but still, do not bend the spine.
- Your knees will also tend to bend, but you will have to resist it as well
- Hold your pose for 5 breaths and do 10 repetitions of this pose.
Note: The challenge of the seated bend is mostly on your spine and knees. You can reach out with your hands and hold the calf muscles, use it as a support to keep your knees straight as well as pull your body closer to your knees.
2. Side Plank
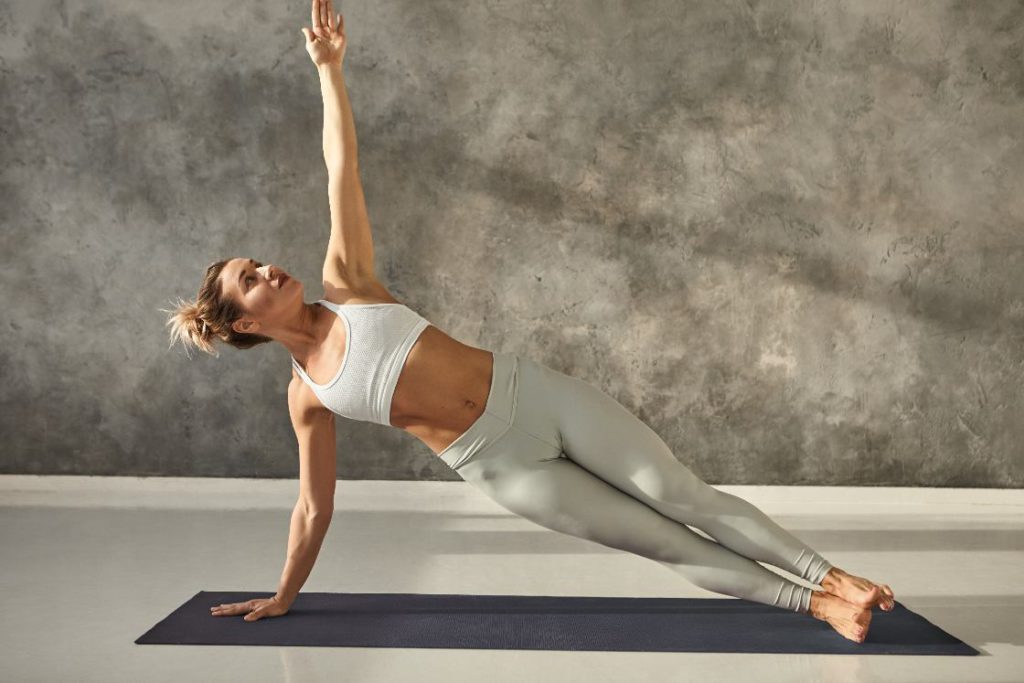
The side plank is going to specifically work on your ab muscles at the sides of your lower and upper abdomen. It develops a lot of arms and core strength, which you will need to perform other advanced yoga poses with stability. This pose will build other ab muscles as well. The posture of this pose is very critical. Especially, because a wrongly postured side plank will not only deprive you of the benefits but cause injuries as well.
- Kneel down on your knees, bend your upper body from your hip to the right side.
- Drop your upper body on the right side and touch the ground with your hand.
- Straighten your hand and carry your weight.
- Make sure that your wrist is directly below your shoulders.
- Now extend your legs straight to your left side, and pull up your hip, to form a slope from your head to toe.
- Keep your toe, knees, hip, chest, shoulders and head in one straight sloping line.
- Stack up your left leg on top of your right leg and hold the position for 15 seconds. You need to gradually increase this time. Go upto a minute.
- Repeat the same with your left hand.
If you find yourself comfortably performing this step, try putting your left hand upwards in the same line ( but opposite direction ) as your right hand. Along with your left hand, you can lift up your left leg as well, and if you do so, bring your left foot to the height of your right shoulder.
3. Revolved chair pose
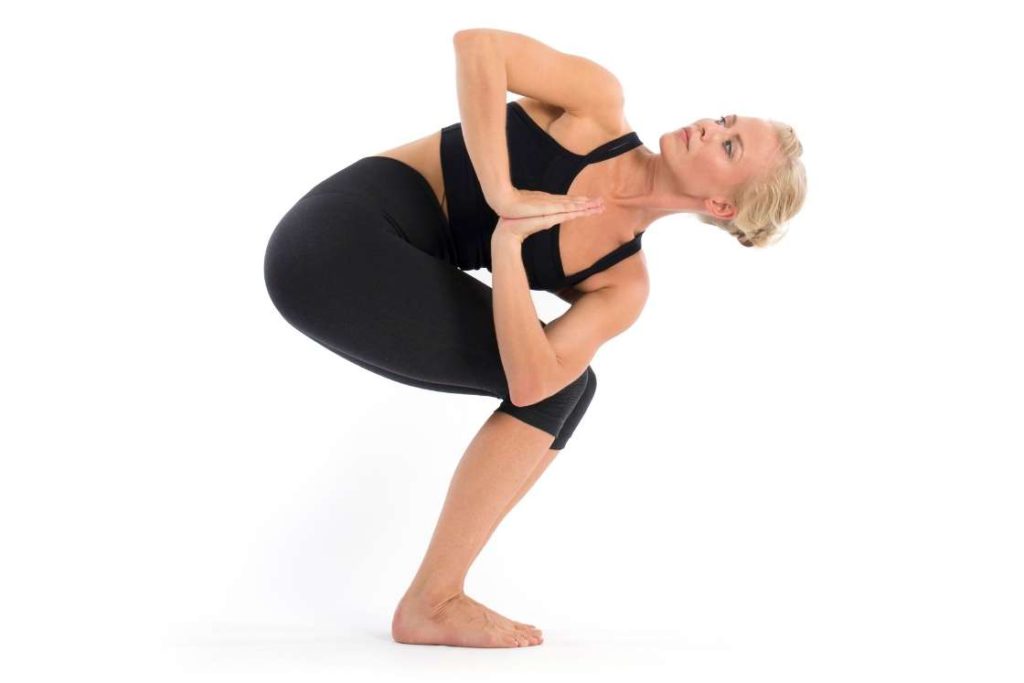
Revolved chair pose is just a normal chair pose with a side twist.
The normal chair pose just focuses on the core strength of your abs, but the twist teaches your abs to withstand a greater degree of stretch and tension.
The revolved chair pose will exercise all four ab muscles. Remember that once you have started practicing the intermediate poses you will have to pay extra attention to the techniques in which you get into your posture. Otherwise, you will expose yourself to risks of injury.
- First stand in mountain pose
- Then break your hip and knee and lean forward. Do not bend your spine and keep your legs and feet very close to each other ( almost touching, but enough distance to maintain balance.)
- Now from your knee joint bring your thighs and body downward, upto a point where your thighs are almost parallel to the ground. Hold this position.
- Now rest your torso on your thighs and let your upper body fall on your legs. Reach down the floor with your hands for support.
- Now bring your left hand over your knees to your right side.
- Make a twist in your abs, and revolve your torso to turn your upper body to the right.
- Join your palms in a Namaste mudra.
- Hold this pose for 5 normal breaths and release the pose.
- Repeat the pose on your left side and then do. 3 such rounds.
Do not try this pose by sitting in half chair pose. It is integral you go all the way down till you can rest your torso on your thighs. Your body needs to be in right position for the twist. If there is tension build up in your torso, twisting it will injure the tissue. Thus resting the torso before twisting is important.
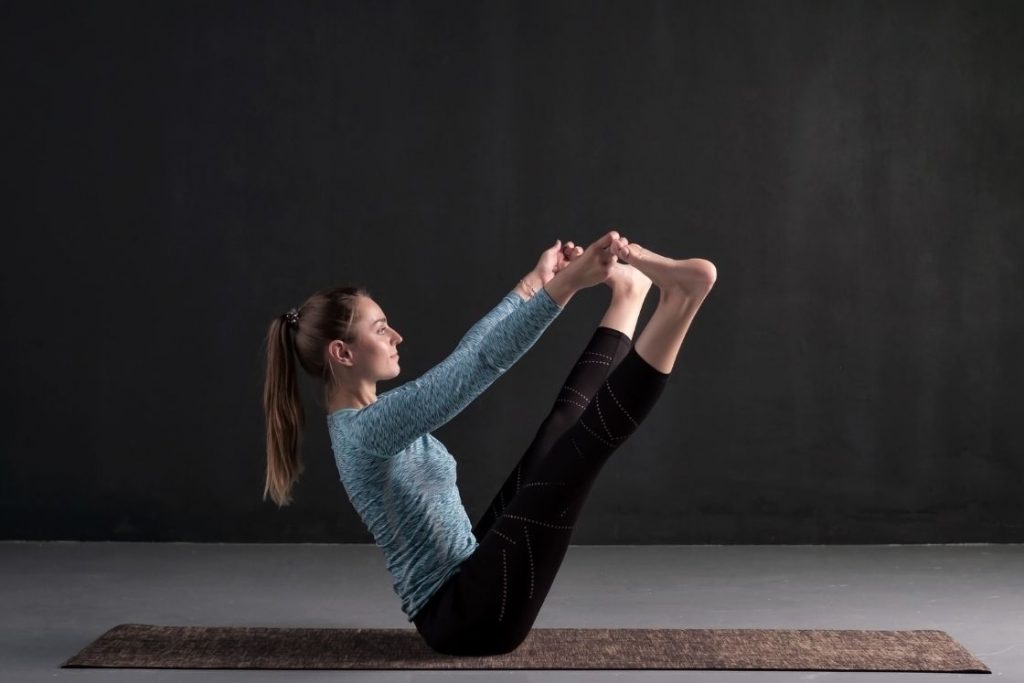
4. Boat pose
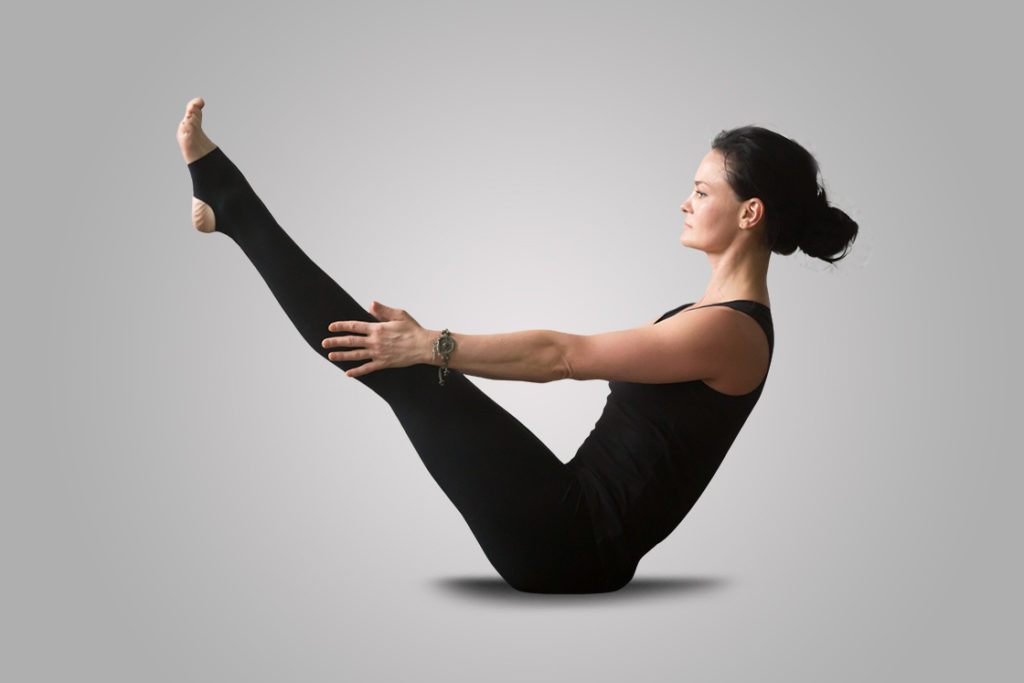
Finally, you will have the boat pose.
The boat pose will do to your body, what lying leg raise would do to your body in the beginner routine, but with a bit more difficulty. The leg raise focuses more on the lower abs, but the boat pose puts tension on both the ends of your abdomen. The boat pose requires hamstring strength, but significantly less when compared to leg raise. In boat pose the maximum tension stays within the abdomen region.
- Sit in a staff pose on the ground, bend your knees and draw them close to your body, with your feet placed against the ground.
- Keep about two feet distance between your heels and sitting bones.
- Join your feet and knees together.
- Place each hand under the thigh for hamstring and back support.
- Now recline your upper body backwards, hold your upper with your abs and gradually let it recline back.
- Recline to a point, after which you will feel like falling back. This should be the point just before pressing down on your tailbone.
- Hold your upper body in this position and lift your legs from your knee. Keep you shin bones parallel to the ground.
- Hold your position for 5 breaths and release. Repeat this position 3 times.
When on the hold, you can slightly press on the sides of your upper thighs, inward. This press will prevent your thighs from pulling on your groin crease. A prolonged pull on your groin crease can injure your groin.
Advanced yoga poses for abs
Having finished the intermediate poses your ab muscles should gain the required strength and durability to attempt the advanced yoga poses.
The advanced yoga poses will involve a few yoga exercises, that will function as different variations of crunches. These yoga exercises for abs will scalp out the last bit of remaining fat covering your abs and put them through the ultimate test of strength.
Apart from the customary Kapalabhati Pranayama (by now you should easily be able to do 20 successive exhaling breath spurts) and tree pose ( by now you should be able to balance for around 3 minutes on each leg), you will practice cat pose crunches, crow crunch hold, butterfly crunches and camel pose.
1. Cat crunch
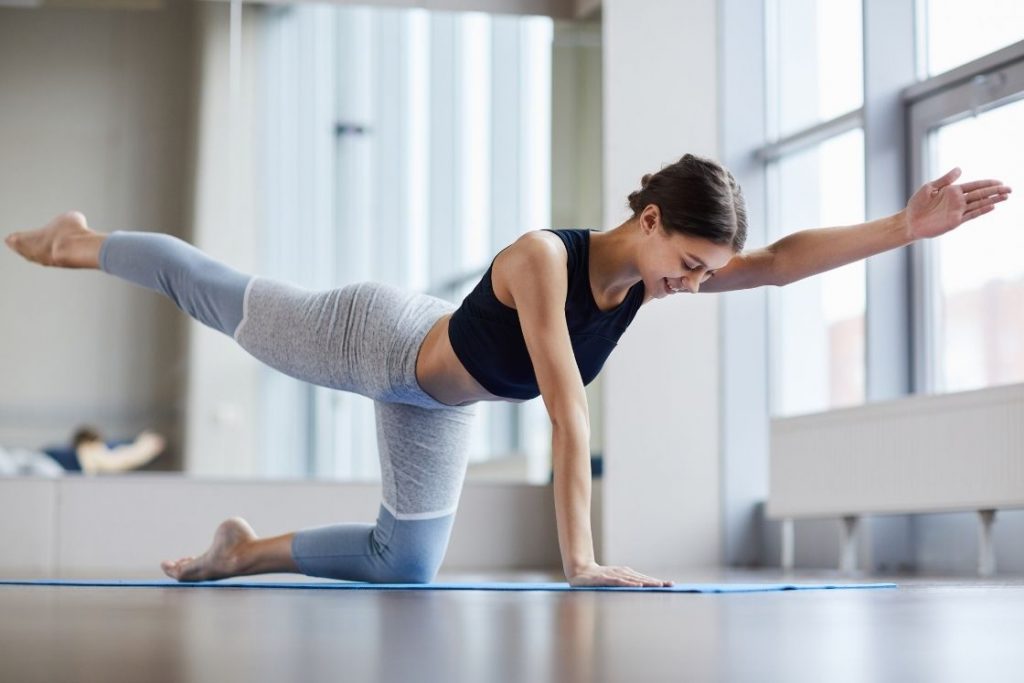
The cat pose in itself is wonderful for your spine, as it helps enhance the blood flow between the vertebrae of your spine. It also enhances your mind-body coordination and brain stability.
The cat crunches brings all these benefits along with the abs crunching crunches. The crunches of the cat pose will not only develop your abs but also enhance hormonal activities in your abdomen.
- For starters get on all fours, with your palm and knees against the floor.
- Keep your wrists and knees in the same line, as well as, maintain equal distance between your wrists and knees.
- Ensure your wrists are right below your shoulders and knees exactly underneath your hips.
- Now in normal cat pose you would need to inhale and suck in your abdomen against your spine, such that your back arches up in a dome shape. And then release your abdomen with an exhale.
- In cat crow crunches you start stretching your right hand and left leg outward, as an extension of your body, parallel to the ground.
- Then like in cat pose you need to inhale and suck in your abdomen, but with the retraction of your abdomen you need to draw your right elbow and left knee closer to each other and touch.
- And then with exhale release your abdomen and stretch out your arms and legs.
- Make 10-15 of these crunches and switch your legs and arms.
You can try cat crunches in two separate steps. First, try the regular cat pose, and then separately try stretching out your right hand and left leg, whilst balancing on your left wrist and right knee. Once you have successfully pulled these two poses separately, you will be able to attempt the cat pose crunches.
2. Crow crunch hold
Most types of crunches focus on using the abs to pull to extremes of your body closer. But their task mostly ends at pulling your upper and lower body together. The crow crunch hold is a unique crunch that takes it a step further. The crow crunch includes a unique upward push that needs your abs to perform even in the maximum pulled and compressed state.
- Lie on your back in a preparatory posture for crunches. Your knees bend and hands clasped together behind your head, with your elbows by the sides of your head.
- Now use your abs to lift up your legs and upper body off the ground.
- Lift and draw your knees to bring it over your upper abdomen, and lift your shoulders off the ground and touch your knees with your elbows.
- Once your knees and elbows are in contact, give an upward push to form your body in an U-shape and lift up your tailbone.
- Hold tailbone lifted crunch for 5 breaths and make 5-10 repetitions
As preparatory exercises, you may want to try normal crunches and rolling on your spine. These two exercises should comfortably set you up for crow crunch hold.
3. Butterfly crunch
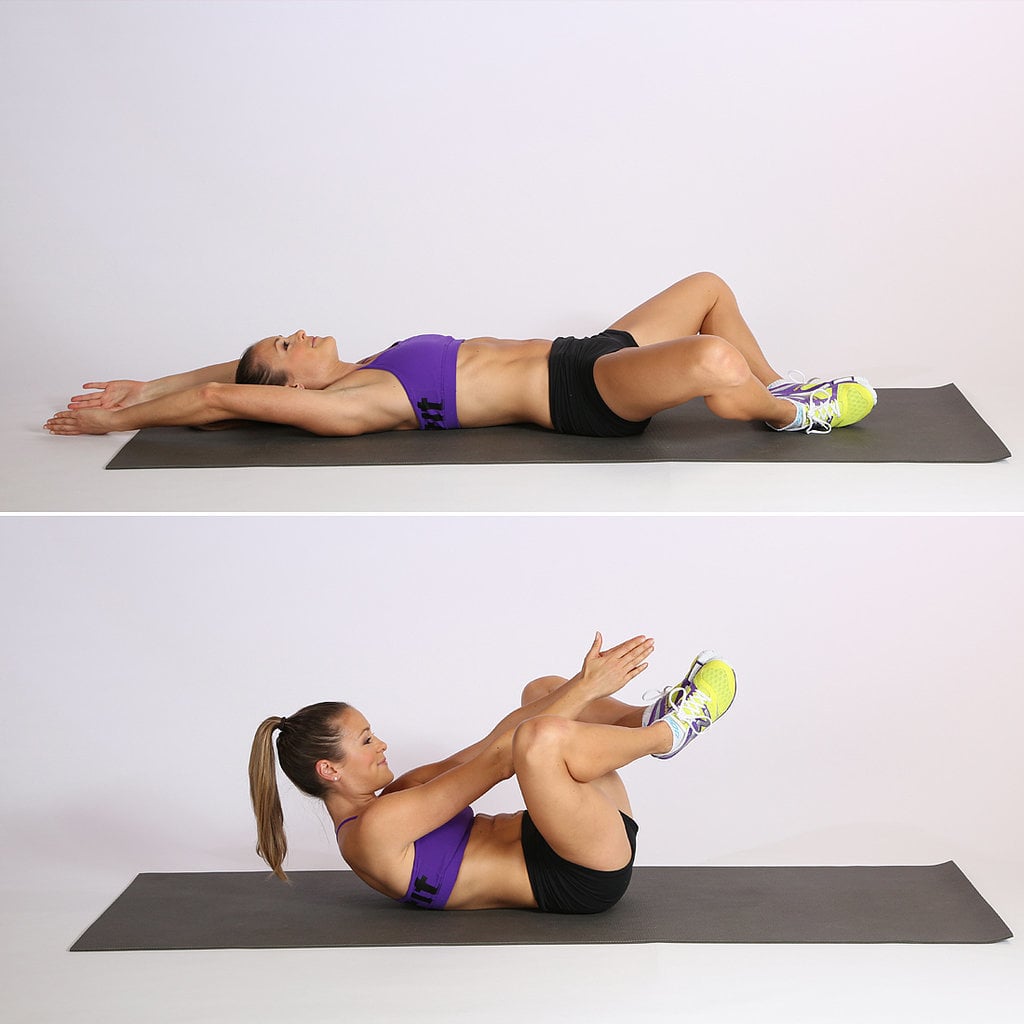
Butterfly crunches work specifically on the band of muscles that bring out your six backs. As compared to other poses on the list, butterfly crunches are pretty easy. However, it’s not the difficulty level that puts butterfly crunches on the advanced list but its effects.
Butterfly crunches do the final bit of toning for your front abs, working as finishing touches. Whereas as a beginner you will need to focus a lot on building core strength; butterfly crunches are no good to a beginner.
- Lie on your back on the floor, bend your knees like a butterfly and touch your soles against each other.
- Draw your feet halfway toward your groin.
- The opening up of the groin will pull down the abs downward firmly, for a better workout.
- Now contract your belly and pull up your upper body slightly into a crunch.
- You just need to lift your shoulders up and then recline back but not all the way down. Do not rest your shoulders entirely rest, hold the pressure in your abs, and return for the next crunch.
- Do 3 sets of 10 repetitions.
Keep in mind that the opening up of your groin puts you at the risk of groin and hamstring injury. As you press the crunches consciously pull your body with your abdomen, and do not put strain on your groin and thighs.
4. Camel pose
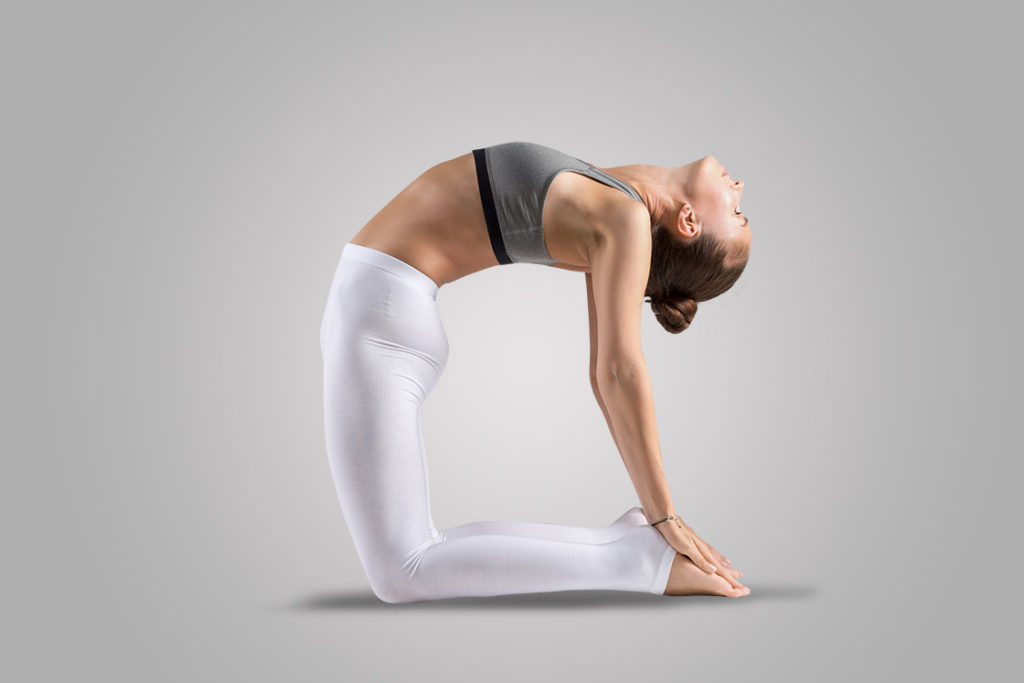
Camel pose yoga for abs is just the right thing to do finish your routine with. It will stretch your entire abdomen to ensure you don’t suffer from any stiffness of muscles from previous exercises. It will stretch your spine and cardiovascular muscles as well. Ending with camel pose will also normalize hormonal activities in your body and put your mind and body in a state of relaxation.
- Start the pose by sitting in Vajrasana; sitting with folded knees on your heels.
- Then rise up on your knees.
- Keep your body straight.
- Now place your hands on the back of your hips and gently help your body to arch backwards.
- Inhale, and then as you exhale, arch backward to a point that allows you to drop your hands backwards and hold your heels.
- Open up your chest muscles and push your back into your cardiovascular region to assist your arch.
Our backs are stiff and our spine is more used to arching forward. Hence, before stretching for the pose, massage your hips and gently take a few deep breaths while gently doing warmup arches backward.
You must remember the poses mentioned in this list are in precise order. Do not attempt to jump onto an intermediate or advanced pose before practising the beginner poses, even if your body permits. Every pose prepares you for something Further. Additionally, even in each category, it is advisable to follow the order of the yoga poses for abs.
: How to Do, Variations & Benefits")
: Steps, Benefits, Precautions")
: How to Do, Benefits & Precautions")


Much helpful thank you for sharing