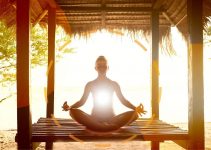
Meditation is more than just closing your eyes it begins with how you sit. The position you choose directly shapes your comfort, focus, and ability to stay present. While some practitioners can remain cross-legged on the floor for hours, others find a simple chair more supportive. The key is not one fixed way, but choosing a posture that allows steadiness without strain.
Among the many approaches to meditation, seated postures remain the most common and effective. The way you align your body influences your breath, energy flow, and mental clarity.
In this guide, we explore how to sit properly for meditation and introduce yoga-based sitting poses that support stillness and ease.
Why is posture so important in meditation?
Your posture sets the foundation for meditation. Whether your goal is inner peace, mental clarity, or spiritual awakening, the way you position your body directly influences the depth of your practice. A steady, comfortable seat helps the mind settle; without it, distraction and restlessness easily take over.
In yoga, meditative asanas are recommended because they balance ease and stability. If a posture is too relaxed, drowsiness can creep in. If it is too rigid, the mind struggles to focus. Sitting upright signals awareness you are present, not preparing for sleep.
Correct posture also reduces stiffness and lethargy, allowing the body and mind to work in harmony. A tall, neutral spine is especially important: avoid slouching forward or leaning back. This alignment supports smooth breathing, improves energy flow, and helps the awakening of Kundalini along the spine.
In short, the position you choose is not just physical it directly shapes your breathing, awareness, and inner experience during meditation.
Seven-point meditation posture
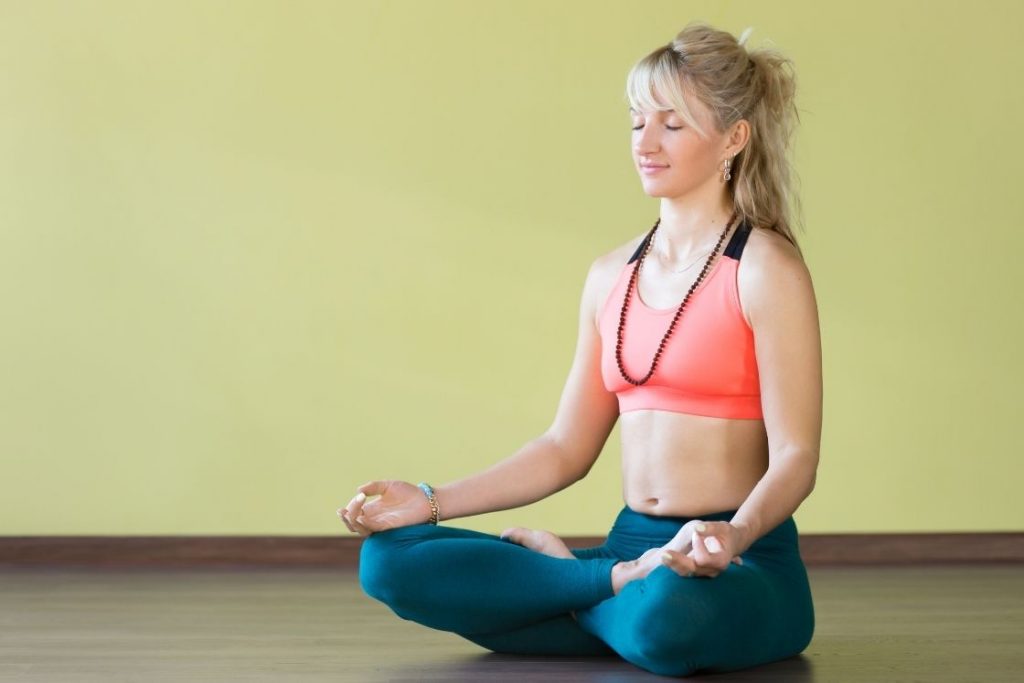
For centuries, seasoned practitioners have relied on the seven-point meditation posture as a foundation for stillness and clarity. This method is rooted in the sitting posture of Vairochana, one of the principal Buddhas in Tibetan Buddhism, revered as a meditational deity.
These seven points are not rigid rules but guiding principles. They outline the ideal alignment for meditation, yet can be adapted to suit each person’s body and comfort. The aim is simple: to create a posture that supports both calmness and alertness, making it easier for the mind to remain steady.
When preparing to meditate, keep these seven points in mind to refine your sitting position and deepen your practice.
1. Cross-legged sitting
Cross-legged postures are among the most traditional and widely practised positions in yoga and meditation. Sitting this way naturally lifts the spine and grounds the hips, creating a stable foundation for stillness. This balance of elevation and firmness makes it easier to remain seated for longer periods without excessive strain.
Some of the most common cross-legged meditation poses include:
- Padmasana (Full Lotus) – a classic posture offering strong stability and symmetry.
- Ardha Padmasana (Half Lotus) – a gentler variation with one leg folded on top.
- Siddhasana – a steady, grounding posture favoured by yogis for inner focus.
- Sukhasana (Easy Pose) – a simple, accessible option for beginners.
If cross-legged sitting feels difficult, you can explore kneeling positions such as Virasana (sitting between the heels) or Vajrasana (sitting on the heels). Using a cushion or bolster under the hips or knees can also ease discomfort and support proper alignment.
Ultimately, the right posture is the one that balances comfort with alertness. Adjust the pose to suit your flexibility and physical capacity, so that the body remains at ease while the mind stays attentive.
2. Hands in the lap or on the knees
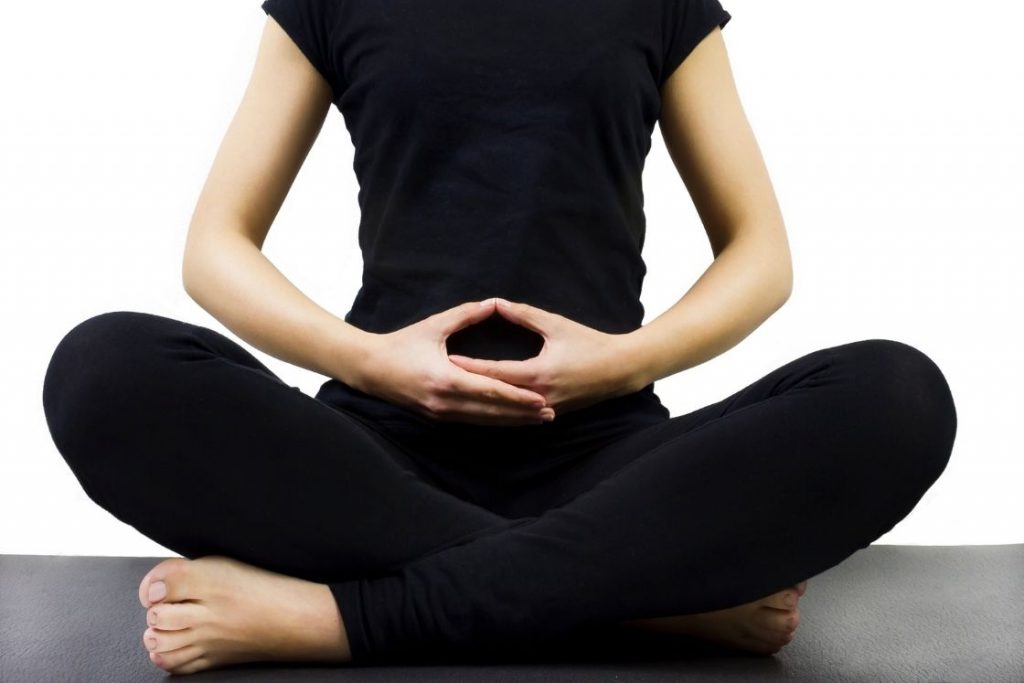
Hand placement plays a subtle yet powerful role in meditation. In a balanced posture, the hands may rest about 2–3 inches below the navel with palms facing upward, or they can be placed gently on the knees or thighs, palms down, to encourage relaxation.
In yoga, specific hand mudras are used to deepen meditation. The most common is Dhyan Mudra, where both hands rest in the lap, the right hand above the left, and the tips of the thumbs lightly touching to form a triangle. This mudra creates a stable axis for the body and helps maintain an upright spine.
- Palms facing upward (Dhyan Mudra): Enhances stillness, supports concentration, and symbolises the union of wisdom (left hand) and compassion (right hand).
- Palms resting downward on the knees: Encourages grounding, stability, and the free circulation of energy throughout the body.
By choosing the right hand position, you not only support physical alignment but also direct subtle energy in a way that nurtures mindfulness and awareness.
3. Straight back
The most significant postural aim of a meditation position is to keep the spine naturally erect. Your spine should be as straight as an arrow or a pile of coins stacked on top of each other.
Being naturally erect means having a poised, alert posture that is neither constrictive nor slumped. This posture increases alertness during meditation practice and allows energy to flow freely through the body’s subtle energy channels (aka Nadis).
It may be challenging at first, but it will become innate over time, and you will be able to sit easily in meditation for evermore extended periods of time.
The placement of your legs can strongly impact how effortless it is to sustain a straight back; mostly, the higher the cushion under your buttocks and the relatively low your knees, the easier it is to retain a straight back.
4. Spread shoulders
Arms and shoulders should be relaxed. Your arms must not be placed against your body, but should be held a few inches apart to enable air circulation, which will allow you to stay awake.
Shoulders ought to be slightly back and not dropped forward. Relax the muscles in your shoulder and back. This forms a strong back all the while opening the front body. As stated earlier, this promotes an alert, attentive mind as opposed to one that is distracted or gloomy.
5. Straight head
Instead of being pointed forward, the chin should be tucked down slightly toward the neck. You don’t need to go so far that you’re staring down at your lap, but you also don’t want your head tilted so high that it tires you out.
If you hold your head excessively high, you could experience distraction and restlessness, and if you hold it too low, you might feel heaviness or sleepiness.
Your neck must be lowered to the point where your vision is easily drawn to the floor in front of you. This facilitates your neck to remain comfortable, it should never be strained.
6. Relaxed mouth
Your jaw should be relaxed, and your teeth should be mildly apart rather than clenched. Your mouth must also be loosened, with your lips delicately together.
The tip of your tongue should rest behind your upper teeth on the palate. This restricts the flow of saliva hence the need to swallow, as these are obstacles as your concentration improves and you sit in meditation for longer periods of time.
7. Fixed gaze
Without any fixed object of concentrate, one’s gaze should be focused slightly downward, along the bridge of the nose. Eye motions to the left or right should be avoided; but, depending on one’s mental level of activity, the gaze may be elevated or dropped.
Shift the gaze down if the mind is extremely active; if the mind is dull or sleepy, raise the gaze to offset that state.
With their eyes closed, novice meditators typically find it easier to concentrate. This is perfectly OK. It is advisable, however, that you keep your eyes partially open to allow some light in and focus your attention slightly downward. Shut your eyes could lead to sluggishness, drowsiness, all of which are unhelpful to meditation.
If you find it difficult to concentrate with your eyes open, close them. Before you start to meditate, you must make the choice about what you will do, or you will shift back and forth between closing or opening your eyes for the entire meditation duration.
Seated yoga poses for meditation
Among the many ways to meditate, seated yoga postures are the most common and time-tested. No matter which pose you choose, the basic principles remain the same: keep the spine upright but relaxed, balance the head and neck over the spine, and let the hands rest gently on the thighs or in the lap.
Comfort is key. If you feel pain or stiffness while sitting, your body will resist, and the mind will struggle to stay calm. Modifying your position is not only acceptable but encouraged. You may sit on a cushion, lean lightly against a wall, or place a small bolster or rolled towel at the lower back to support healthy spinal alignment.
Below, we’ll explore some of the most preferred seated yoga poses for meditation—each designed to balance ease and alertness, so you can sit longer with greater stillness.
1. Full lotus pose
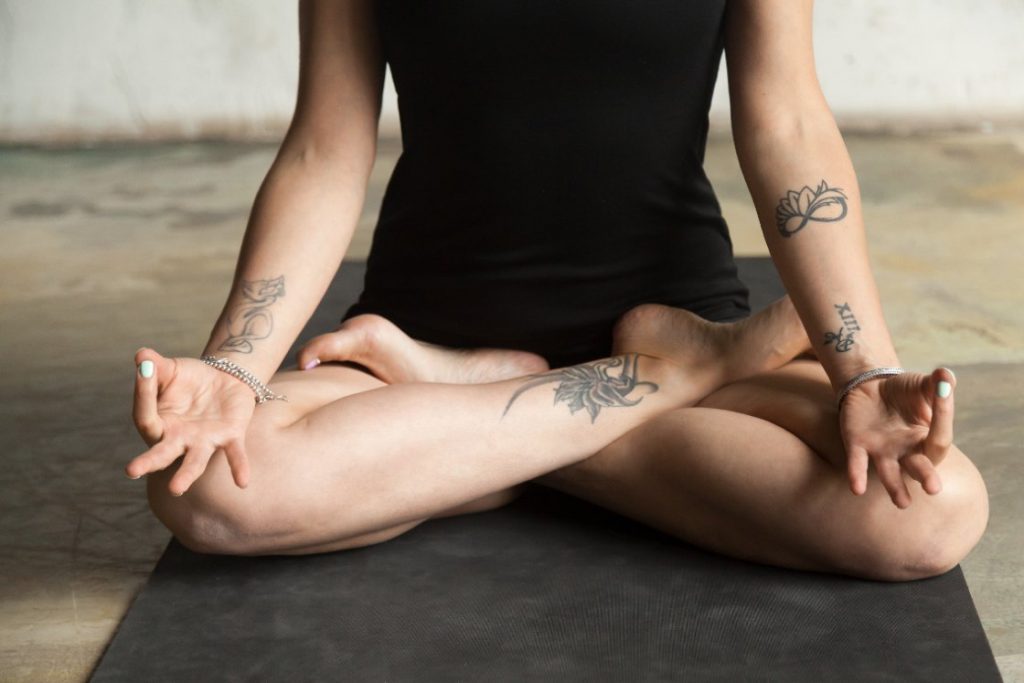
Also known as Padmasana, it entails sitting on the ground or a flat surface while crossing the legs and resting the top of each foot on the opposing thigh. It is one of the ideal and recognized meditative positions.
This meditation posture is incredibly steady and uniform, which is good when understanding the connectivity of mind and body, but it demands a lot of lower body flexibility. This is why this pose is often difficult to practice by beginners.
This is primarily due to the fact that we are no longer accustomed to squatting and sitting on the floor. As a result, our hips are restricted in their motion. If you have serious knee or hip problems, or if it feels like pressure on your body, don’t try full lotus.
- Sit comfortably on the ground with your hips open.
- Cross your legs such that your left foot is on top of your right ankle and your right foot is on top of your left ankle.
- Pull the feet and place them on the opposite upper thigh, the left foot in the right upper thigh and vice versa.
- Put the soles of your feet to face up.
- Relax the shoulders and knees toward the floor to lengthen the spine.
- Your palms can face up when you put your hands on your knees.
- Raise your chest and stretch your spine by sitting upright.
- Sitting on a folded blanket raises the pelvis above the knees, which helps to align the hips and prevent the spine from rounding.
2. Half lotus pose
The half lotus or Ardha Padmasana is the next best option, as it is identical to the lotus but just one foot rests on the opposite thigh. Your legs are crossed, and one foot is resting on the thigh of the person on the other side. The other foot can be tucked under the top leg and nestled beneath the knee or thigh.
This is an intermediate-level pose. If you don’t have a lot of hip flexibility, to begin with, you’ll have to work your way up to it. If you have a chronic or recent knee or hip injury, or inflammatory problems in those joints, this posture is not for you. Your knees may be strained as a result.
- Sit comfortably on the ground with your hips open.
- Cross your legs such that your left foot is on top of your right ankle and your right foot is on top of your left ankle.
- Pull the right foot and place it on the opposite left upper thigh.
- Maintain a cross-legged position with your left knee bent and your left shin resting comfortably on the floor.
- Put the soles of your right foot to face up.
- Relax the shoulders and knees toward the floor to lengthen the spine.
- To maintain your spine straight, move your shoulders away from your ears. Your palms can be turned up or down as you rest your hands on your thighs.
- Sitting on a folded blanket raises the pelvis above the knees, which helps to align the hips and prevent the spine from rounding.
- You can also place a yoga block or cushion under the knee.
3. Quarter lotus
Each foot rests below the opposite knee in this posture. It’s the traditional cross-legged stance. The quarter lotus position is a modified version of the lotus pose that enables yogis with tight hips and ankles to maintain the sitting meditation pose.
The pose is appropriate for practitioners of all levels and is typically performed by beginners who find the full lotus position too challenging to sustain for lengthy periods of time.
In this position, a meditation cushion can help elevate the hips and rotate the pelvis forward enough to keep the lower back from rounding. To achieve this tilt, sit towards the front cushion.
No matter how you sit, you don’t want your knees to be higher than your hips.
- Sit comfortably on the ground with your legs stretched in front of you.
- Pull both legs toward you and place the feet under the opposite knee, i.e right foot under the left knee and vice versa.
- Make sure your calves are resting comfortably on the ground
- Relax the shoulders and knees toward the floor to lengthen the spine.
- To maintain your spine straight, move your shoulders away from your ears.
- Your palms can be turned up or down as you rest your hands on your thighs.
4. Burmese or Easy Pose
The Burmese position is more relaxing than the Lotus position. It is performed while sitting with both feet down on the ground in front of the pelvis, not crossed. It’s especially good for people who can’t sit cross-legged yet want to practise on the floor or on a mat.
This is the Sukhasana or the easy pose which is also the starting point for many yoga asanas. The word “easy” in this context implies “without difficulty,” not certainly the polar opposite of “difficult.”
Tilt your pelvis forward if you find your spine is rounding. It is simpler to tilt with the pelvis forward if the hips are raised above the knees by placing a prop below the sitting bones. As a result, you’ll be able to stay in this peaceful meditation stance for as long as you choose.
- Sit comfortably on the ground with your legs stretched in front of you.
- Pull both legs toward you and place the legs in front of each other – with your left leg pulled in and your right leg just ahead of it.
- Relax the shoulders and knees toward the floor to lengthen the spine.
- To maintain your spine straight, move your shoulders away from your ears.
- Keep your elbows pointing inwards toward your torso.
- Place your hands in your lap, one on top of the other, palms up, or keep the hands palms down on your knees.
5. Seiza
Kneel and arrange a cushion, blanket, or a yoga block between your legs instead of sitting with your legs crossed. This position is simply a propped-up variation of Virasana (Hero Pose) or Vajrasana (Thunderbolt Pose).
Seiza’s kneeling position relieves pressure on the lower body’s joints and allows the back to naturally straighten. For a beginner, some cushioning under the knees and feet will be extremely beneficial.
Because the cushion provides support, many students find this more comforting than kneeling directly on the floor. It also helps with meditation as you automatically get a straight spine.
- Kneel on the ground.
- If necessary, put a folded blanket or pillow between your calves and thighs.
- Your feet should be slightly wider than your hips, and the tops of your feet should be flat on the floor.
- Your big toes should be angled slightly inwards toward each other, and the top of each foot should be evenly pressed on the floor.
- Sit down between your feet with your torso tilted slightly forward.
- Raise your buttocks on a block or a thick book put between your feet if you are unable to bring them down properly on the floor.
- You can also cushion your ankles with a blanket or towel if you’re having issues with them.
- Place one hand on top of the other on your lap, palms up, or on your thighs, palms down.
Alternative positions for meditation
If you do not prefer sitting meditation, you can always try out other positions that will give you the same calming effect. All you need to make sure that your spine is straight with your head aligned, your hands resting comfortably on your lap, thighs, or knees and your muscles are completely relaxed.
The most important thing in meditation is to find a comfortable position that allows you to feel quiet and relaxed.
Meditation on a chair
Sitting on a chair may be a more suitable option than sitting on the floor in a cross-legged or kneeling position. Meditating in a chair gives all of the perks of sitting (cross-legged) meditation. If it’s feasible, set aside a chair solely for meditation. This acts as a cue to the environment. It’s a technique for the mind to become accustomed to the fact that this is how I meditate.
Chair meditation is a great choice for anyone who has knee injuries or other physical challenges that make sitting on the floor painful. Place both feet firmly on the ground if you prefer to sit in a chair. If the feet do not reach the ground, place a prop under them to provide them support.
But ensure you’re sitting away from the chair’s back and your feet are firmly planted on the floor, lined with your hips and knees. Position your head over your spine and sit on the edge of the chair. Insert a cushion behind your back or sit on one if your spine requires more stability.
Meditation while standing
Standing meditation is just like standing in the Tadasana or Mountain Pose. Your feet have to be placed firmly on the ground, arms hanging beside you in a relaxed manner and head aligned comfortably with the spine. You also have to maintain a straight spine in this method as well.
For people who can’t sit for lengthy periods of time, this is a good option. It’s especially beneficial if you find yourself falling asleep during your meditations or if sitting brings you pain. You can do all of the sitting meditation practices while standing. If you’re standing, make sure your knees aren’t locked.
You can try some variations with the placement of your legs and feet. Stand with your legs shoulder-width apart or join your feet at the heels so that they are closer and the toes are pointing away from each other.
Also, you can place both your hands on the belly, one hand on the heart, and one on the belly, or in the prayer position.
Meditation while lying
Any prolonged meditation session may cause moderate ache, but if sitting in a chair brings you pain, lying down meditation is an alternative. If you lie down, you may benefit from being able to loosen up and relieve tension. Your body will be fully supported in this manner.
To meditate in this manner, lie down on your back in the corpse pose (savasana) with your arms at your sides and palms up, like in yoga. Then begin your meditation by keeping your body calm yet awake and aware.
You can make the meditation more comfortable, you can place a folded blanket under your head to support your neck and head. Lying on a bolster, placed lengthwise under your spine, will help support the spine. Using props is extremely beneficial if you are extremely tired or suffer from severe body aches.
However, you need to be cautious that this position often induces sleep. To keep it at bay, try a few of these modifications:
- Bend your knees to place your feet on the ground so as to keep your mind alert.
- Keep the legs hip-width apart. When you start falling asleep, your legs will automatically fall on the sides, which will wake you up.
- Place your hands on your belly. Join the tips of the thumbs and interlock all the other fingers. When you start to fall asleep, your thumbs will pull apart, alerting you to wake up.
- Instead of placing your arms flat on the ground, raise one forearm so that it is perpendicular to the floor. As soon as you fall asleep, the arm will fall and wake you up.
Meditation while walking
Walking meditation may seem unconventional, but it is a powerful way to blend mindfulness with movement. Instead of rushing, you walk with deliberate awareness eyes open, pace relaxed, and attention anchored in the present environment.
This practice, often called a meditation stroll, is especially helpful for those with busy schedules. It can be done anywhere whether in a garden, along a quiet street, or even indoors and at any pace that feels natural.
Walking meditation is closely linked to mindfulness practice, where the goal is to stay fully present with the act of walking itself. You observe the rhythm of your steps, the movement of your breath, and the sensations in your body, without getting caught up in wandering thoughts.
Conclusion
The best meditation posture is the one that supports both comfort and awareness. Explore different positions and choose what feels natural for your body rather than forcing yourself into an idealised image of a meditator. Physical ease is not separate from mental stillness both work together.
Begin in a position that feels steady and comfortable, then refine your alignment gradually as your practice deepens. With the right posture, meditation becomes less about struggle and more about finding balance between body, breath, and mind.
