Iyengar Yoga has been named after famous Indian yoga guru BKS Iyengar. This style of yoga primarily focused on the alignment of the body while doing the poses with the help of props.
The best part of Iyengar yoga poses is the use of props. Iyengar has encouraged the use of props to achieve the needed alignment. The support of a prop will also give you confidence and enhance your body awareness. Both beginners and advanced practitioners can make use of a prop at any point in their practice.
The props that are usually used in an Iyengar yoga class comprises blocks, straps, bolsters, ropes, sandbags, poles, etc.
Iyengar yoga can also be easily performed in the comfort of your home. If you are worried about spending money on buying props especially for practice, you can substitute them for everyday items available in your homes. Books, belts, pillows, towels, blankets, chairs, tables, rice bags, etc can be used as alternatives.
And since a wall is an integral part of every room, you can also use its support in any asana.
Below, we have mentioned 8 Iyengar yoga poses that you can easily practice at home with the use of props.
1. Mountain Pose
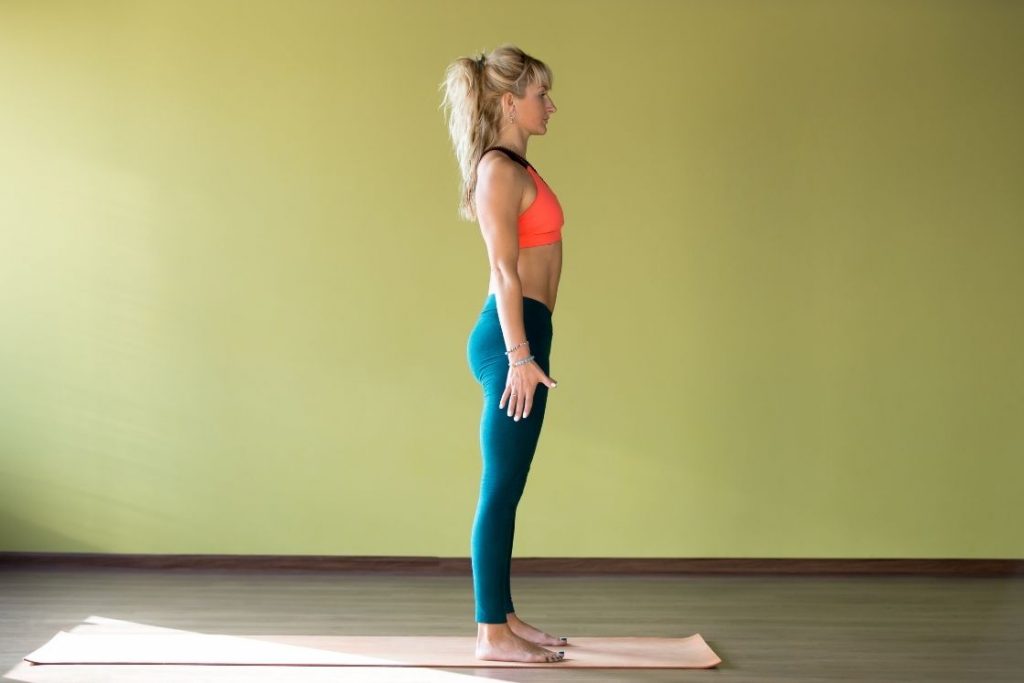
It is one of the foundational poses that is taught to all yoga practitioners as something as simple as standing straight can be messed up. The mountain pose is also used as a base pose for most standing or balancing poses.
By keeping your entire leg engaged in this simple standing stance, you can improve your stability. Because you must maintain your feet firmly on the ground, your arches of the foot also receive undivided attention. Mountain pose provides relief from flat feet, strengthens the thighs, knees, and ankles, aligns the hips and pelvis, firms the buttocks, and corrects posture, among other things.
How to do it with props
- Stand straight on a yoga mat with your feet parallel to each other. Your feet can be slightly apart so that your ankles do not touch each other.
- You can place a yoga block, on its flattest surface, between the thighs. This will engage and strengthen the inner thigh muscles.
- Draw in your navel and keep the back straight to maintain the natural curve of the spine.
- Let your arms naturally hang beside you. Keep your head straight and gaze straight ahead at an immovable point.
Stay in this pose for 5-10 breaths.
2. Triangle Pose
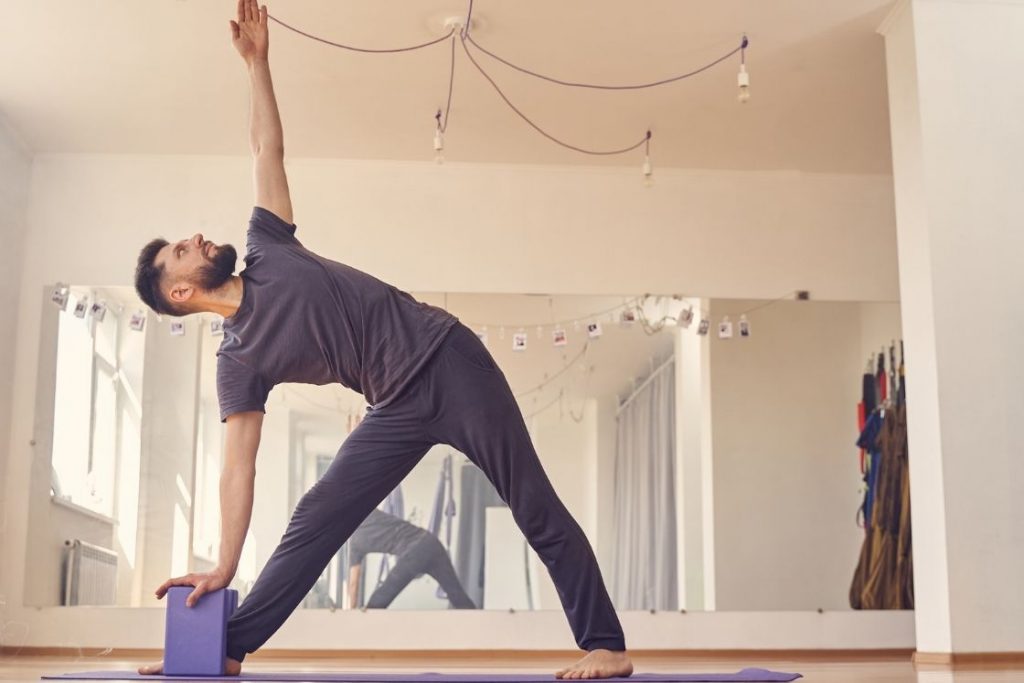
The triangle pose is a stability-improving pose. It engages and stimulates your core and assists in alignment. It is one of the poses that open your hips and chest simultaneously. The pose improves the flexibility of the hips, stretched the quads, strengthens the shoulders, and lengthens the spine.
In Iyengar yoga, the triangle pose can be performed with a yoga block. It assists you in stretching the lower hand to the ground. Using block also gives better massage to abdominal organs which aids in improving the digestive system.
How to do it with props
- Facing the longer side of the mat, stand straight with your feet 3-4 feet apart.
- Turn your left foot diagonally and your right foot pointed towards the shorter end of the mat. The heels of your feet should be aligned.
- Spread your arms to the side with your palms facing down. They should be parallel to the mat with your shoulders away from your ears.
- From your hips, bend towards your right foot, bringing your right arm down with you and your left arm moving upwards.
- Bend till your fingers touch your right foot. You have an option to bring your arm completely the mat, to your ankle, or to your shin. You can also use a yoga block at its highest side to rest your right hand.
- Keep your arms in a straight line with your left-hand fingers pointed towards the ceiling and shoulders aligned.
- Turn your head upwards to gaze at your left fingers.
Hold this pose for 5 breaths and repeat with the other leg.
3. Downward Facing Dog
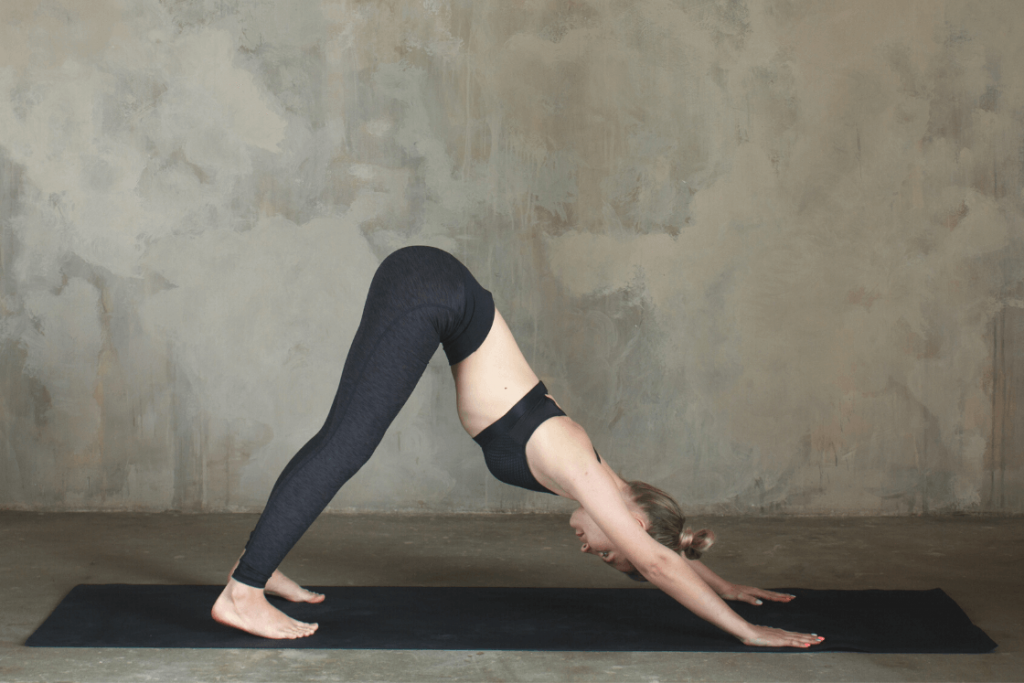
The downward dog is amongst the favorite yoga poses for many practitioners. It works on stretching and strengthening all the major areas of your lower body such as glutes, hamstrings, quads, calves, knees, and feet.
It also lengthens and aligns your spine which helps in correcting your posture. Moreover, your shoulders, arms, and wrists also get a good workout.
How to do it with props
- Start by coming to a tabletop position with your arms parallel to each other and shoulder-width apart. Keep your legs hip-width apart as well. Spread your finger to distribute the weight evenly on your hands.
- Place a folded blanket/towel under the heels to give them extra support. You can also use a yoga block or a stack of books to keep your hands if you have trouble reaching the floor.
- Another option is to tie a strap or belt above the elbows to keep your arms aligned.
- Curl your toes and put slight weight on your hands to lift your hips upwards. Avoid locking your shoulders and elbows, but keep them straight.
- Stretch your tailbone towards the ceiling to lift the hips and keep your back straight.
- Let your head and neck hang freely.
Hold this pose for at least 3 breaths.
4. Standing Forward Bend
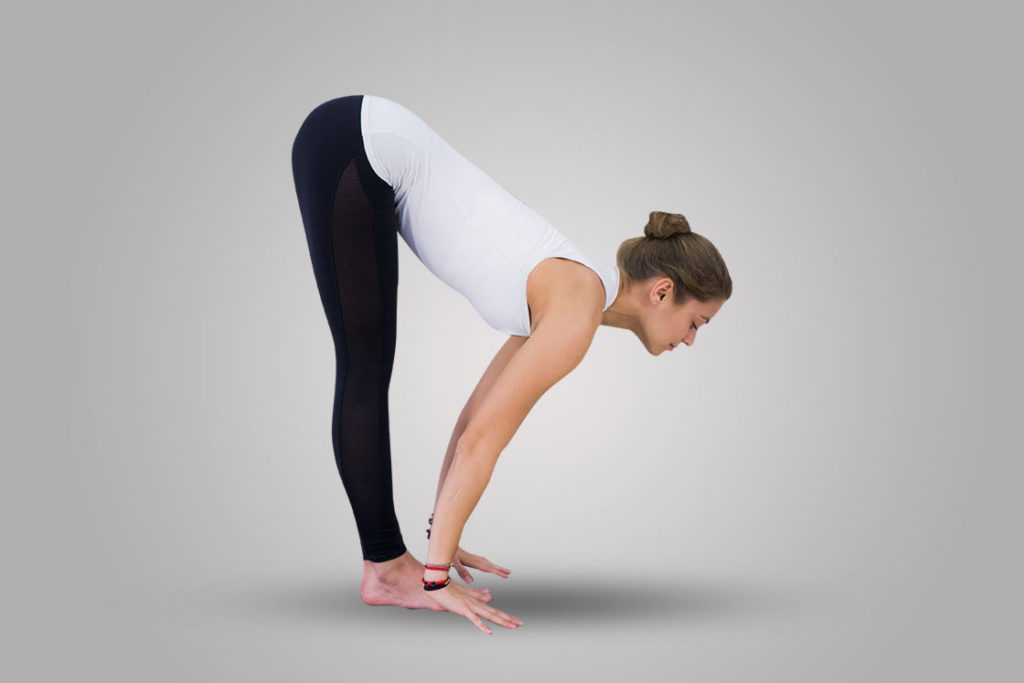
The forward bend of this pose will stimulate the muscles and joints of the hip area and strengthen your leg muscles to support your upper body. This pose will aid in strengthening your lower back, stretching the hamstrings, and improving digestion. The inversion is great for calming the mind and reducing stress and anxiety.
Standing forward bend in Iyengar yoga can be performed with a chair and block to support the downward stretching hands. It reduces the tension on the back and neck muscles.
How to do it with props
- Stand in Tadasana (Mountain Pose) with your legs slightly apart and firmly placed on the mat.
- From your hips, start to bend forward, while keeping a straight spine. If you are a beginner, you can keep a slight bend in the knee and slowly work towards straightening your legs completely.
- As you bend, slide your arms down from the back of the thighs, to the calves till they reach the ankles, the top of your feet, or completely to the ground.
- If you are unable to bring your hands to that extent, you can rest them on a yoga block or a stack of books. The prop can be placed on the outside of your feet.
- You can also use the back of a chair to rest your hands however this will be a half bend. This is especially useful for people who have tight hamstrings, stiff hips, or back muscles.
- Let your head hang in a relaxed manner.
Stay in this pose for at least 3-5 breaths.
5. Sitting Forward Bend
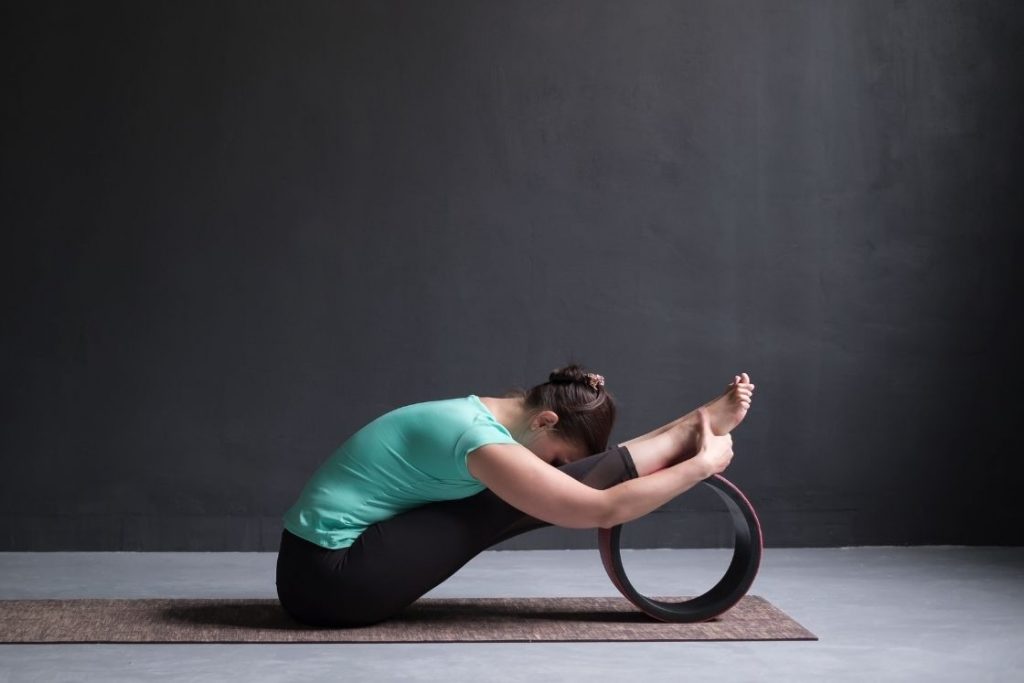
While the standing pose strengthens the leg muscles, the seated version gives emphasis to the back. It aids in the lengthening and strengthening of the spine, stretches the lower back, and shoulders. The pressure on the abdominal muscles due to the forward fold improves the functioning of the digestive system, liver, and kidneys.
The slight inversion also helps in calming the mind and relieving the practitioner from stress, tension, anxiety, etc.
How to do it with props
- Sit in a staff pose with a straight spine.
- You have multiple options for using a prop in seated forward bend. You can:
- Place a folded blanket or towels under the knees and buttocks.
- Use a bolster to place it lengthwise on your thighs.
- Place blocks on its flattest surface under your feet.
- Stretch your hands overhead and on an exhale, start bending forward from the hips.
- Keep your head aligned with the spine. Do not tilt it back or bend forward
- Keep bending when you feel you can no longer go further. It is not necessary that you entire have to bend till your head touches your leg and you are able to hold your toes.
You can also use a strap or belt to increase and decrease the level of the bend in this pose. Just loop a strap on the balls of your feet and hold the ends with both your hands. The strap will give you resistance and support holding your back straight and bridging the gap between your hands and feet.
Stay in this pose for a minimum of 3 minutes.
6. Supported Bridge Pose

This pose allows you to stretch your hip flexors while also expanding your chest. It aids in the improvement of blood circulation, the reduction of stress and tension, as well as the reduction of blood pressure. The Bridge Pose is a parasympathetic nervous system (PNS) activating pose.
By using props, you can reduce the strain in your legs, hips, glutes, and lower back.
How to do it with props
- Lie on your back and spread your legs hip-width apart. Bend your knees so that the lower legs are perpendicular to the floor and feet are firmly placed on the mat.
- Keep your arms beside your torso palms facing down. This will also help in balancing the torso and supporting the lift.
- Engaging your hamstrings and core muscles, lift your hips off the floor. Place a prop of your choice such as a stack of folded blankets, bolster, stack of books, block under your sacrum. The prop should be supporting your lower back and tailbone.
- You can also place a rolled blanket under your head in case of stiff muscles or discomfort.
- If you feel that your legs are sliding sideways or are unable to keep them in position, you can bind them lightly with a strap on the thighs.
Hold this position for 5 breaths.
7. Child’s Pose
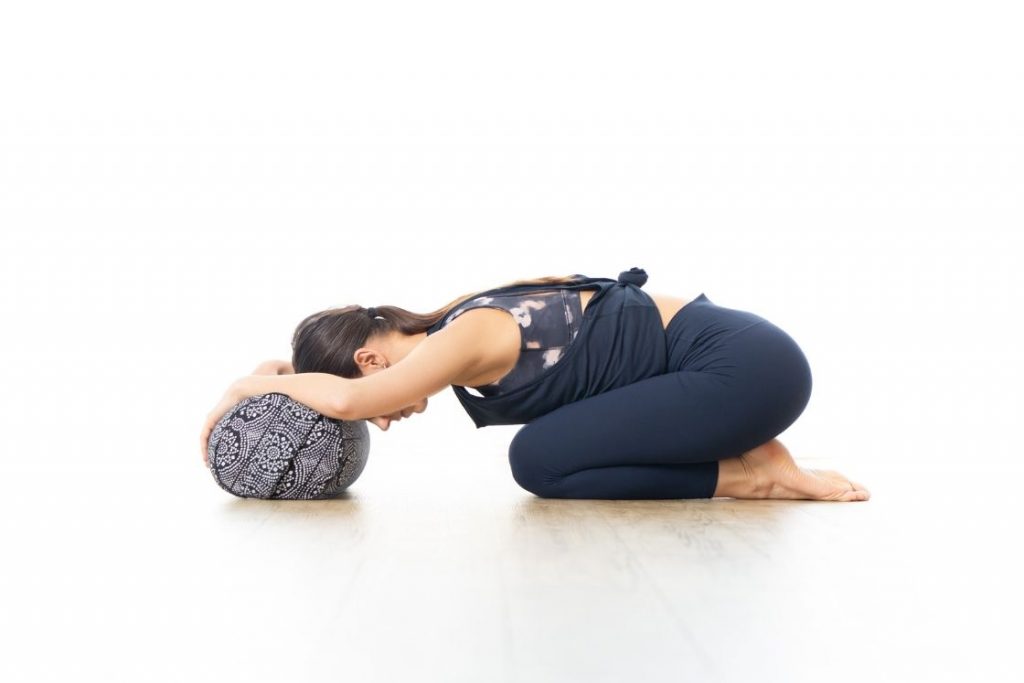
This pose is frequently advised for beginners because it gives the body a period of relaxation. This pose is also commonly utilized as a transition pose. It gives the hamstrings, hips, thighs, and ankles a pleasant stretch. When you use supports, you can help relieve back and head pain.
Because the head is elevated above the heart, blood circulation to the head is improved. This aids in the relaxation of the brain and the reduction of tension.
How to do it with props
- Sit on your knees with your toes tucked. Your big toes should be touching each other and buttocks should be placed on the heels.
- You can use a rolled towel or folded blanket to keep under the back of the thighs for more support.
- Place your arms in front of you with your hands touching the mat.
- Create a slight gap between the knees and bend forward from your hips. Simultaneously, slide your arms forward as you come to a full forward bend. If possible, place your forehead on the bolster or rest it on a yoga block.
- You can use a bolster or a stack of blankets between your inner thighs if you have stiff back muscles.
Hold this pose for 3-5 breaths.
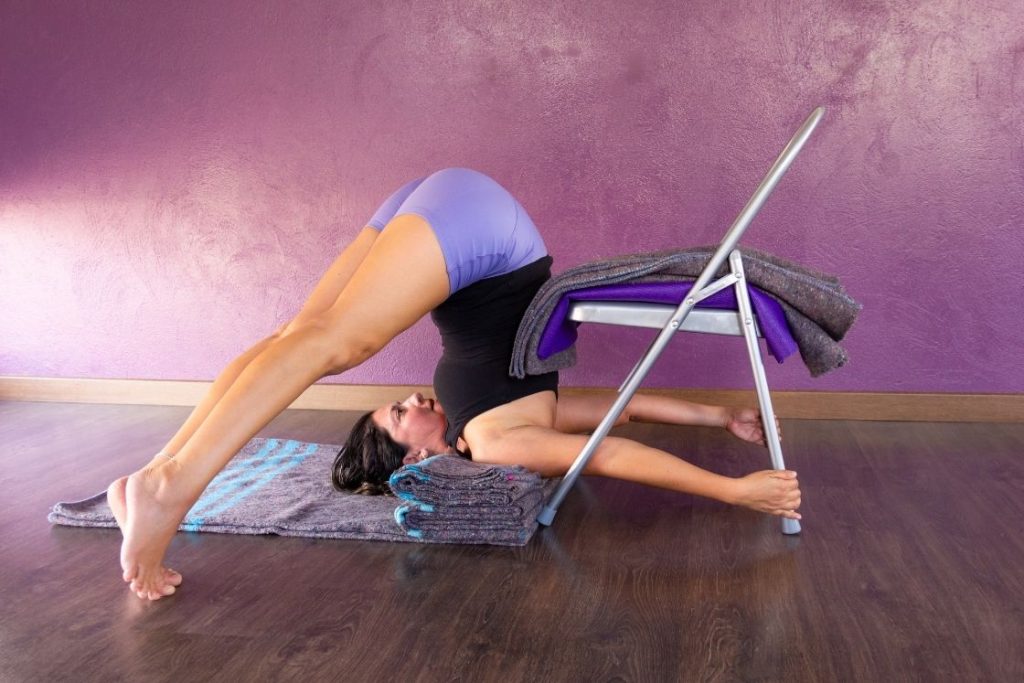
8. Legs-Up-the-Wall Pose
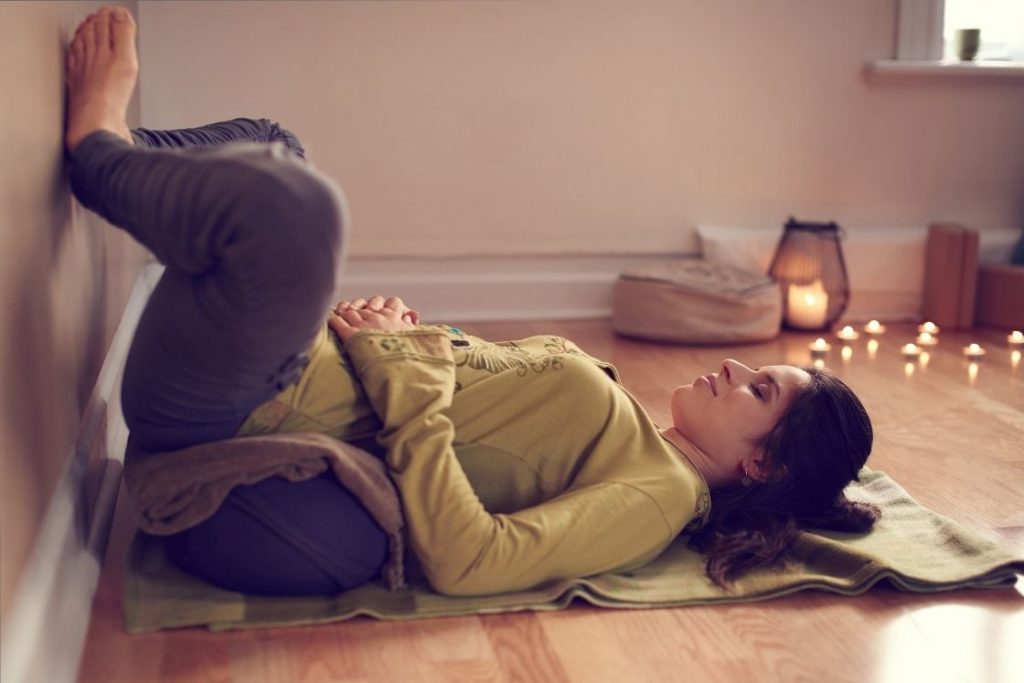
Also known as Viparita Karani, this pose is best for anyone who uses their legs frequently. This position is very effective for people who have swelling in their legs or who have to sit for lengthy periods of time.
Your energy flow and blood circulation are reversed when your legs are higher than your heart. It also ensures that your entire body is reenergized as a result of the flow. This is a good pose to do if you’re seeking relief for your feet and legs.
How to do it with props
- Place the shorter end of the yoga mat close to the wall. Keep a wide surfaced bolster, pillow, or folded blanket to support your hips.
- On the opposite end of the mat, place a folded blanket or pillow for your head and neck.
- Lie on the right side of the props in a fetal position. Rollback on the props and straighten your legs upwards to rest on the wall. You will have to scoot to adjust your position as per your comfort.
- Alternatively, you can also use a chair to place your legs instead of the wall. here the lower legs will be placed on the seat of the chair.
- For your arms, you can either stretch them above your head, to the side with your fingers spread, place them straight beside your torso or on top of your belly.
Hold this position for 7-15 minutes.
Conclusion
You do not have to be worried about not being able to perform a pose because your hamstrings are tight or you are recovering from an illness. You will always have the option of using props till the time you feel that you have achieved the required perfection.
And since the props can be easily substituted, you will not have to worry about missing out on any of your asanas due to the unavailability of props!


